

Hosting machine
If a user has the free computation available for renting, the user can sign up as a host on the platform. Owners (of machines) will receive earnings in tokens as payment for every time a rent
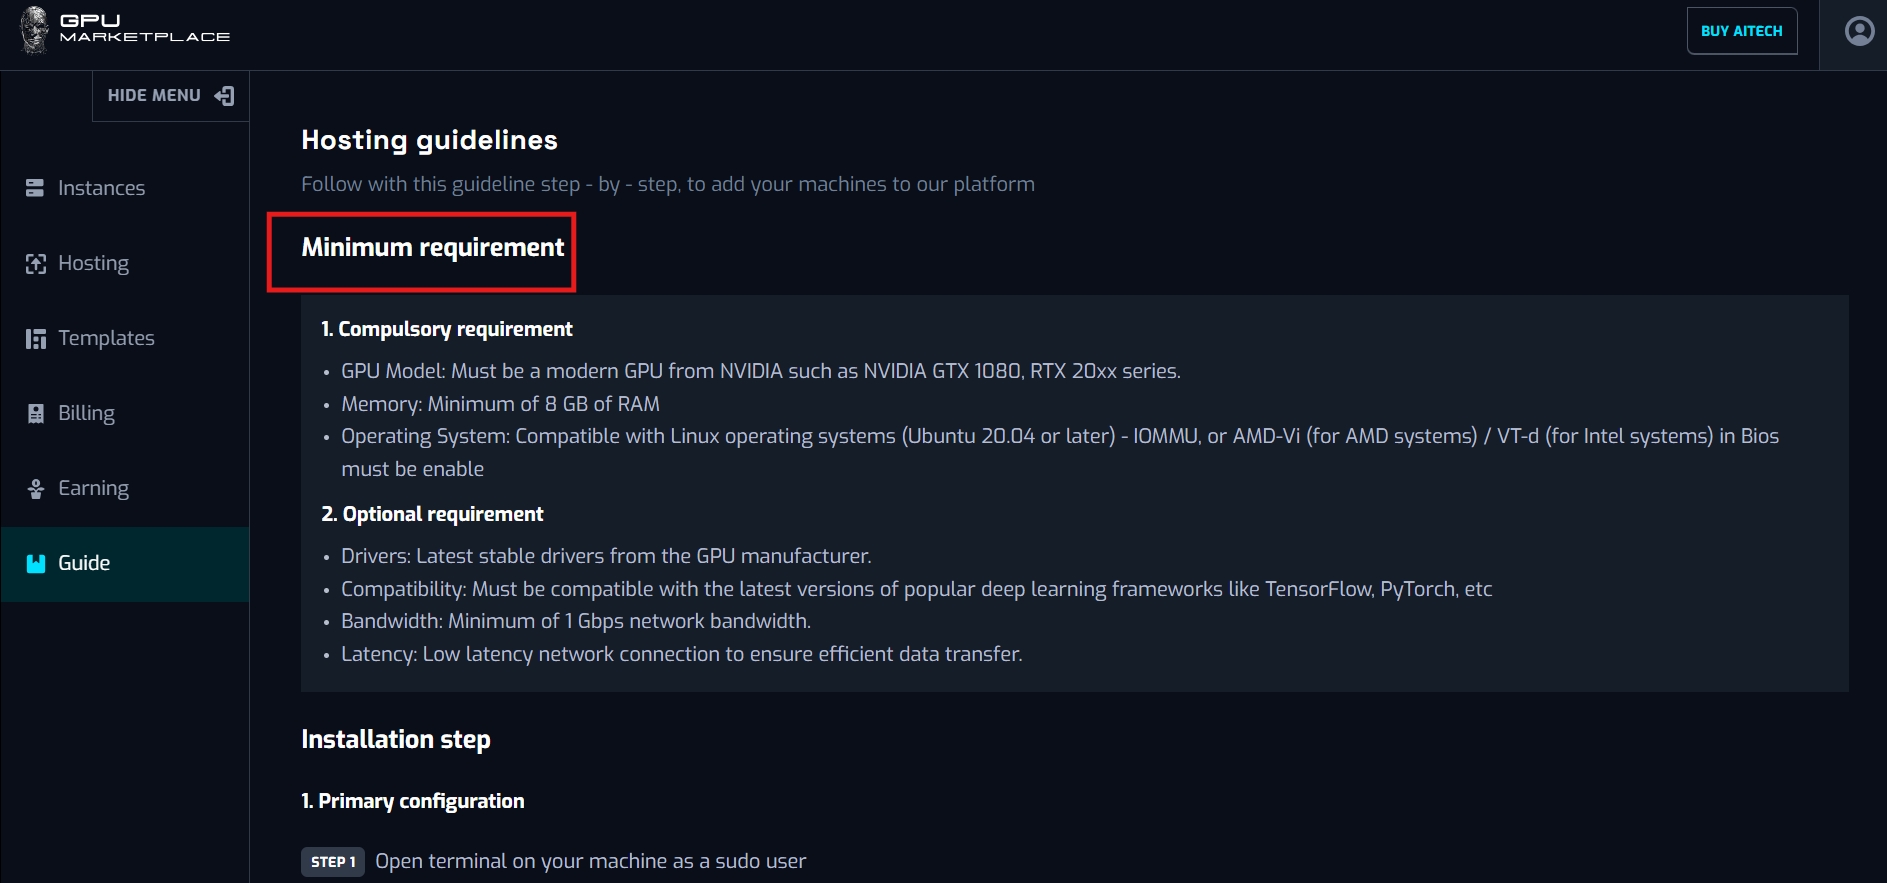
To set up the machine as a host, the user will need to visit the hosting guidelines.
Step 1: Navigate to “Guide” in the sidebar
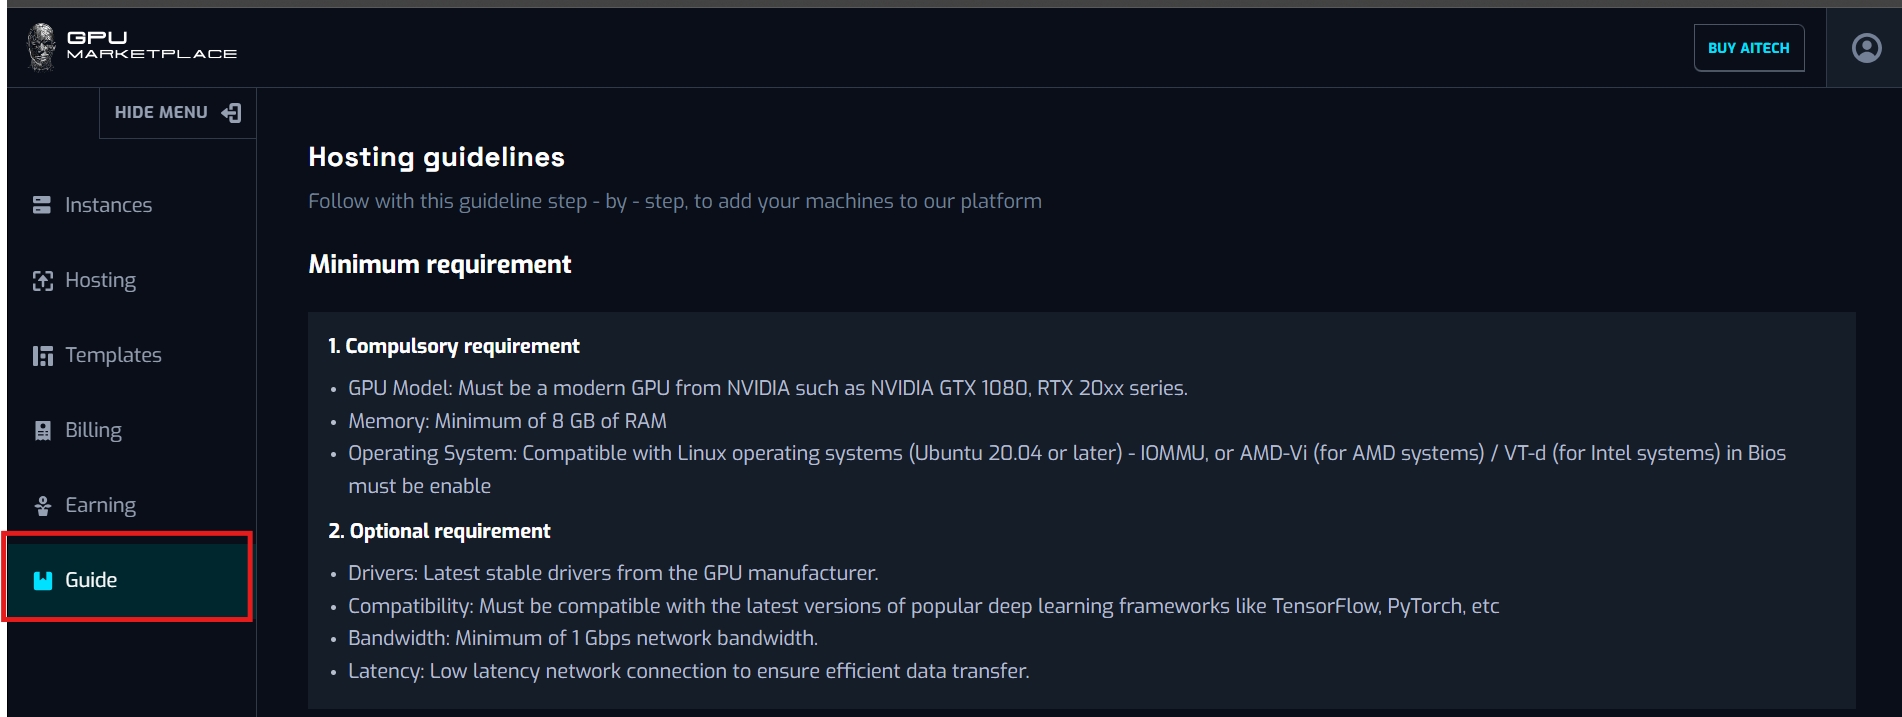
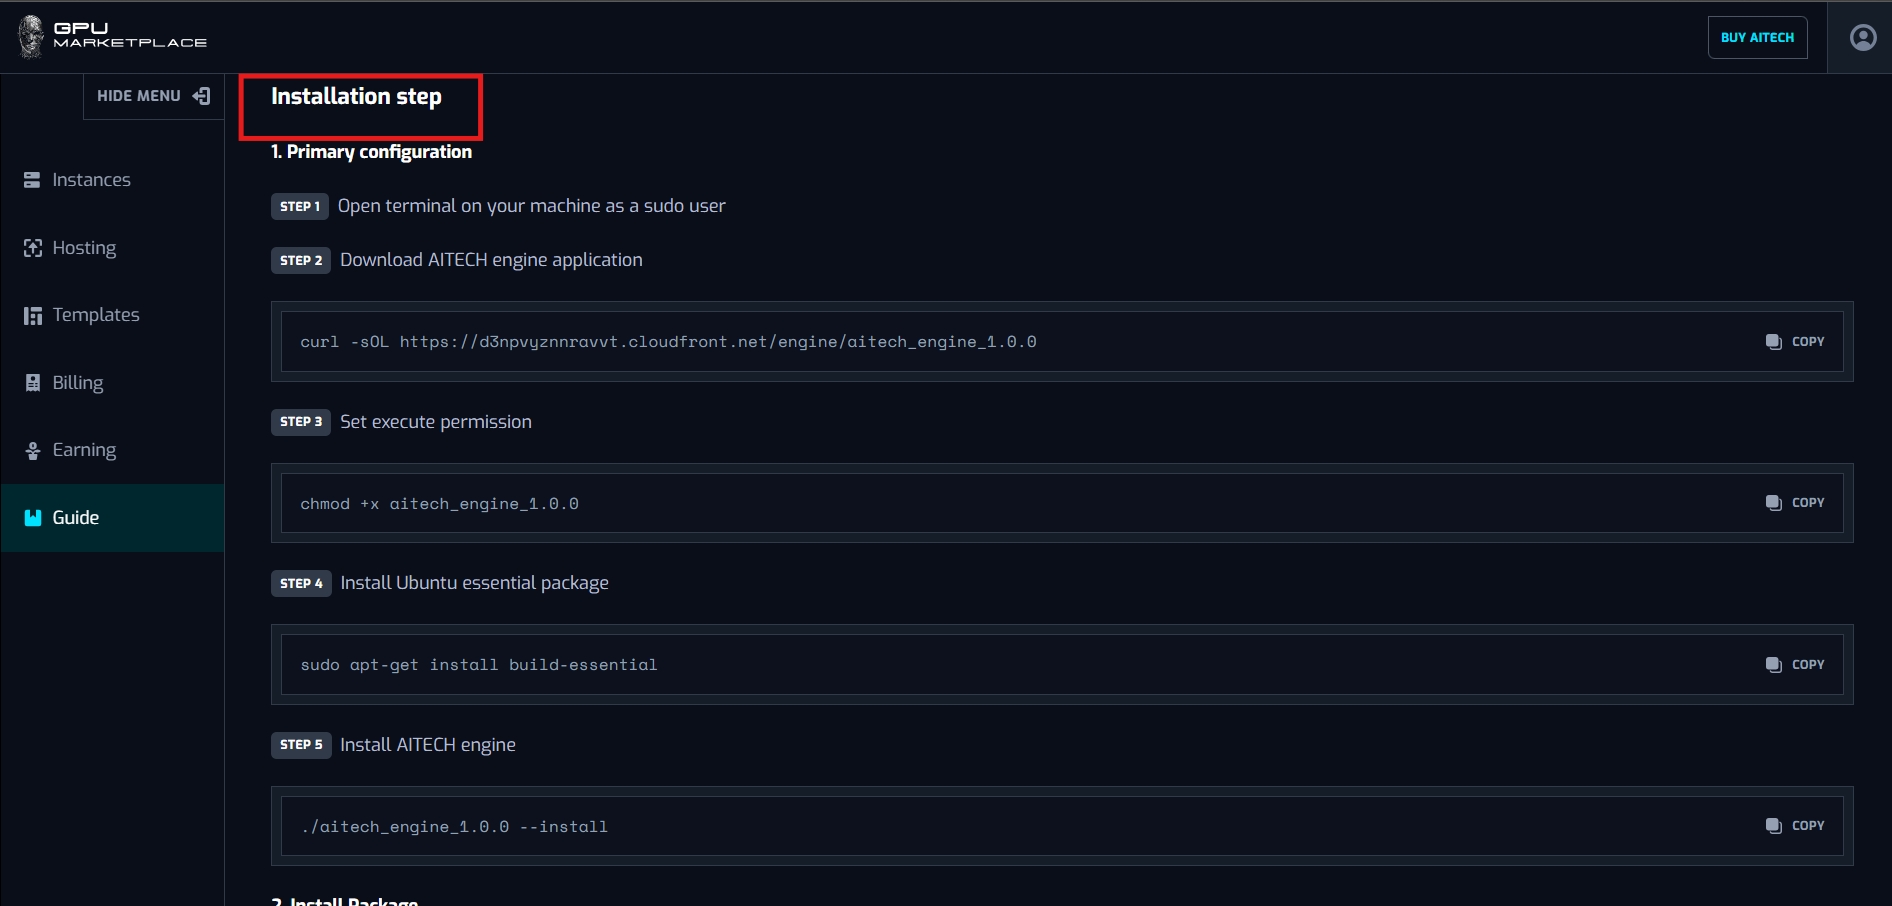
Step 2: There are 2 sections in this function. Users can check the minimum requirement in the first section. If their machines pass the minimum requirement, users navigate to the “Installation guide”. Here user can find all the commands that need to be run on their machine, for the machine to be listed on our system,
Machine management
Overview: After the user has set up their machines on the system, the owner will need to be able to manage them. Machine will have 4 different statuses, and 4 methods accordingly. This section will cover different cases for managing machines.
Status including:
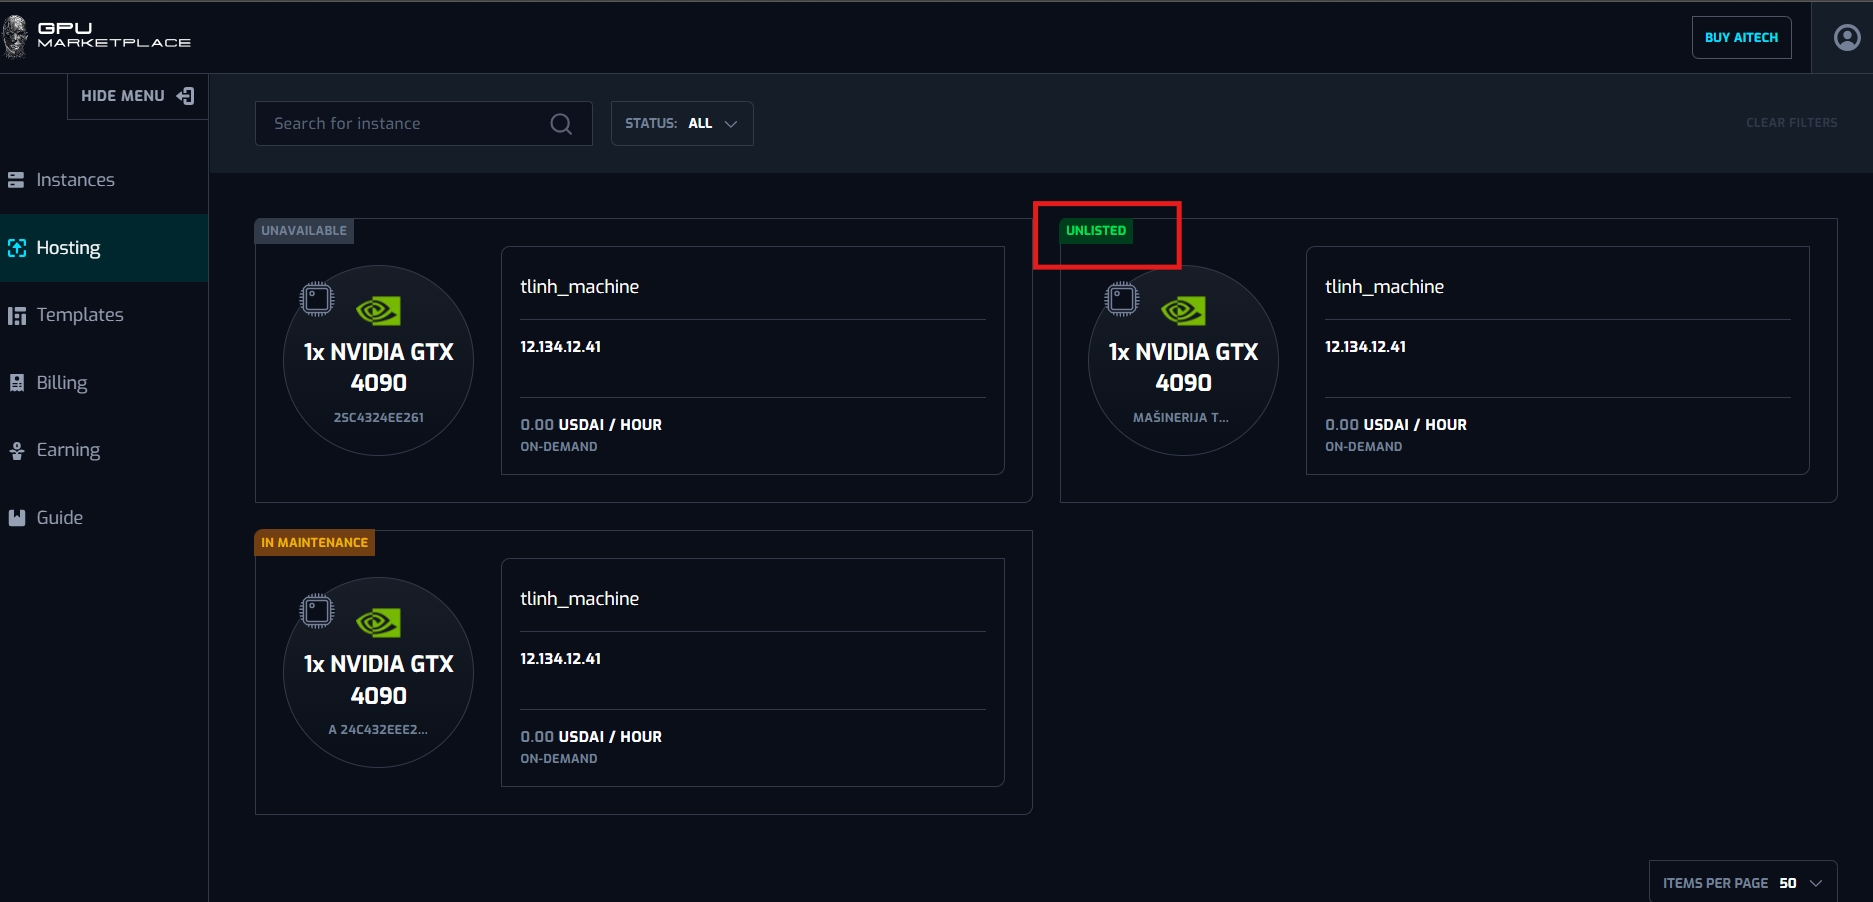
Unlisted: The machine is available on the system, but not available for renting. After user lists the machine, the status change to “Listed”
Listed: The machine is available on the system. Different renters can rent the machine on the marketplace. If a renter rents the machine, status change to “Sold”
Sold: The machine is available on the system, and a renter has occupied the machine. This machine is currently running and can not be intercepted by other users. After Sold, machine will change status to “Listed”, and ready to be rent again
In maintenance: This machine is currently maintained by the owner. This machine can not be rented at this time. After maintenance finished, the machine changed status to “Unlisted”. User can set up new information (Price, expiration date) for the machine,
Method including:
List: Set up necessary information for machine listing
Unlist: Change machine status from “Listed” to “Unlisted”. Machines no longer available on the market
Set maintain schedule: set up a maintain schedule when needed
Remove: Remove the machine completely from the system
Case 1: User wants to list machine
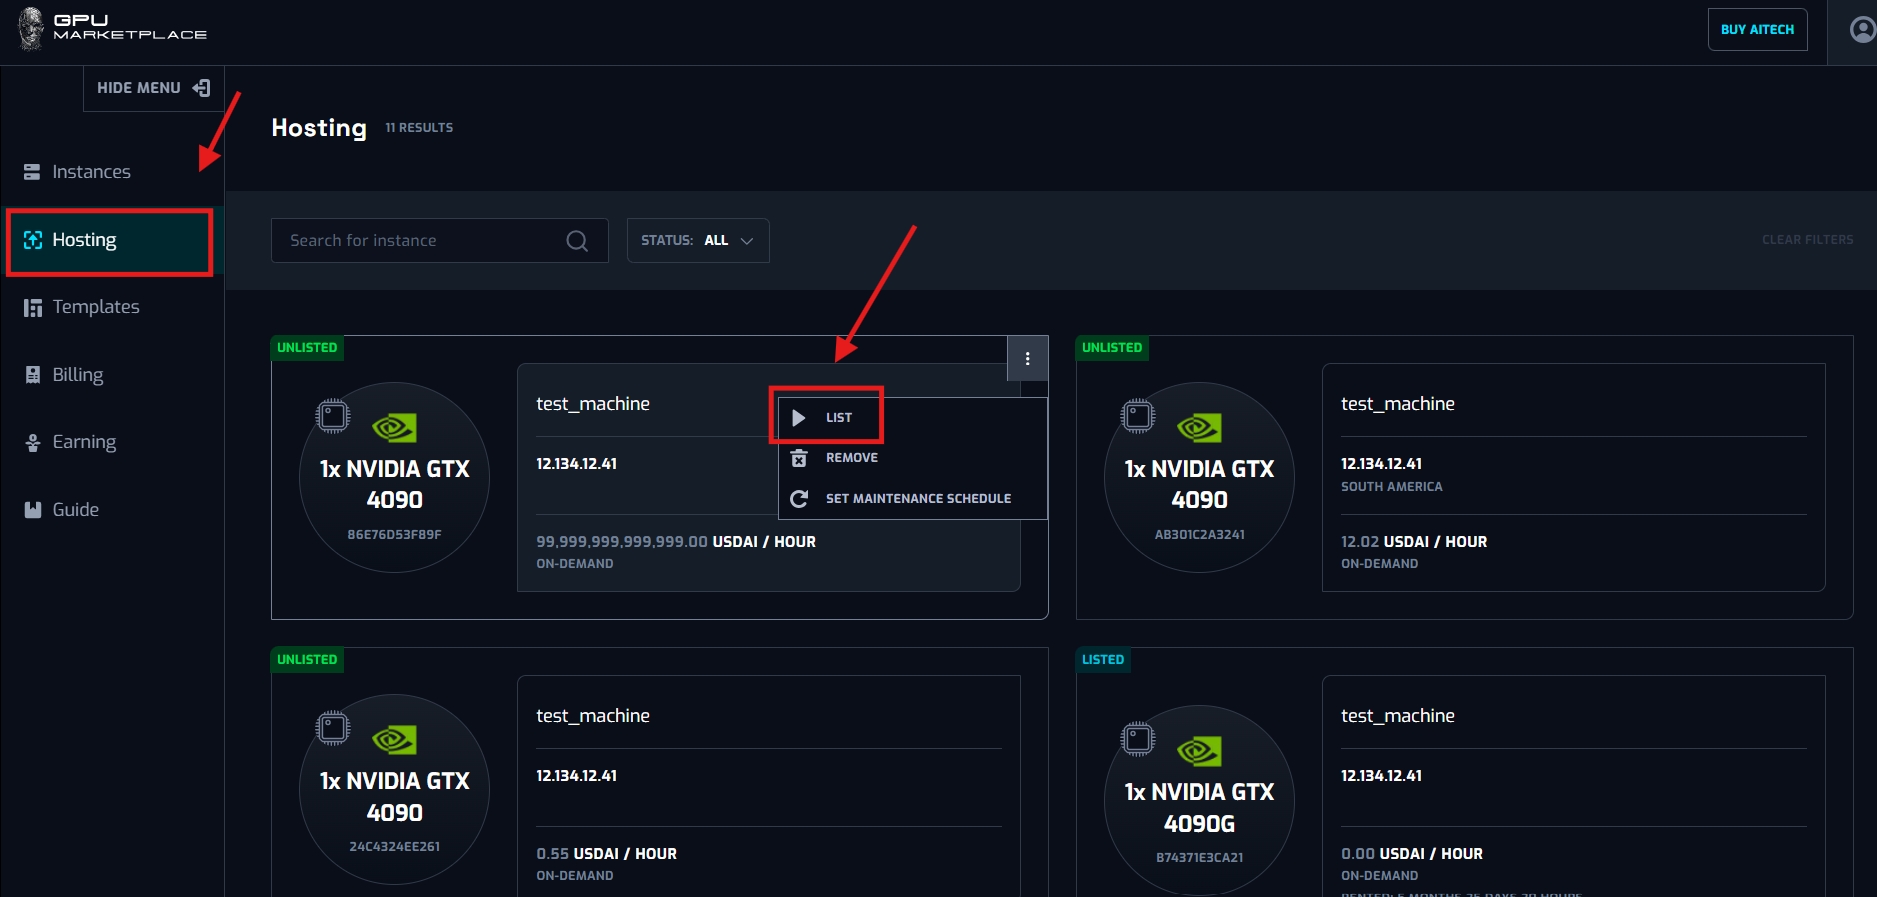
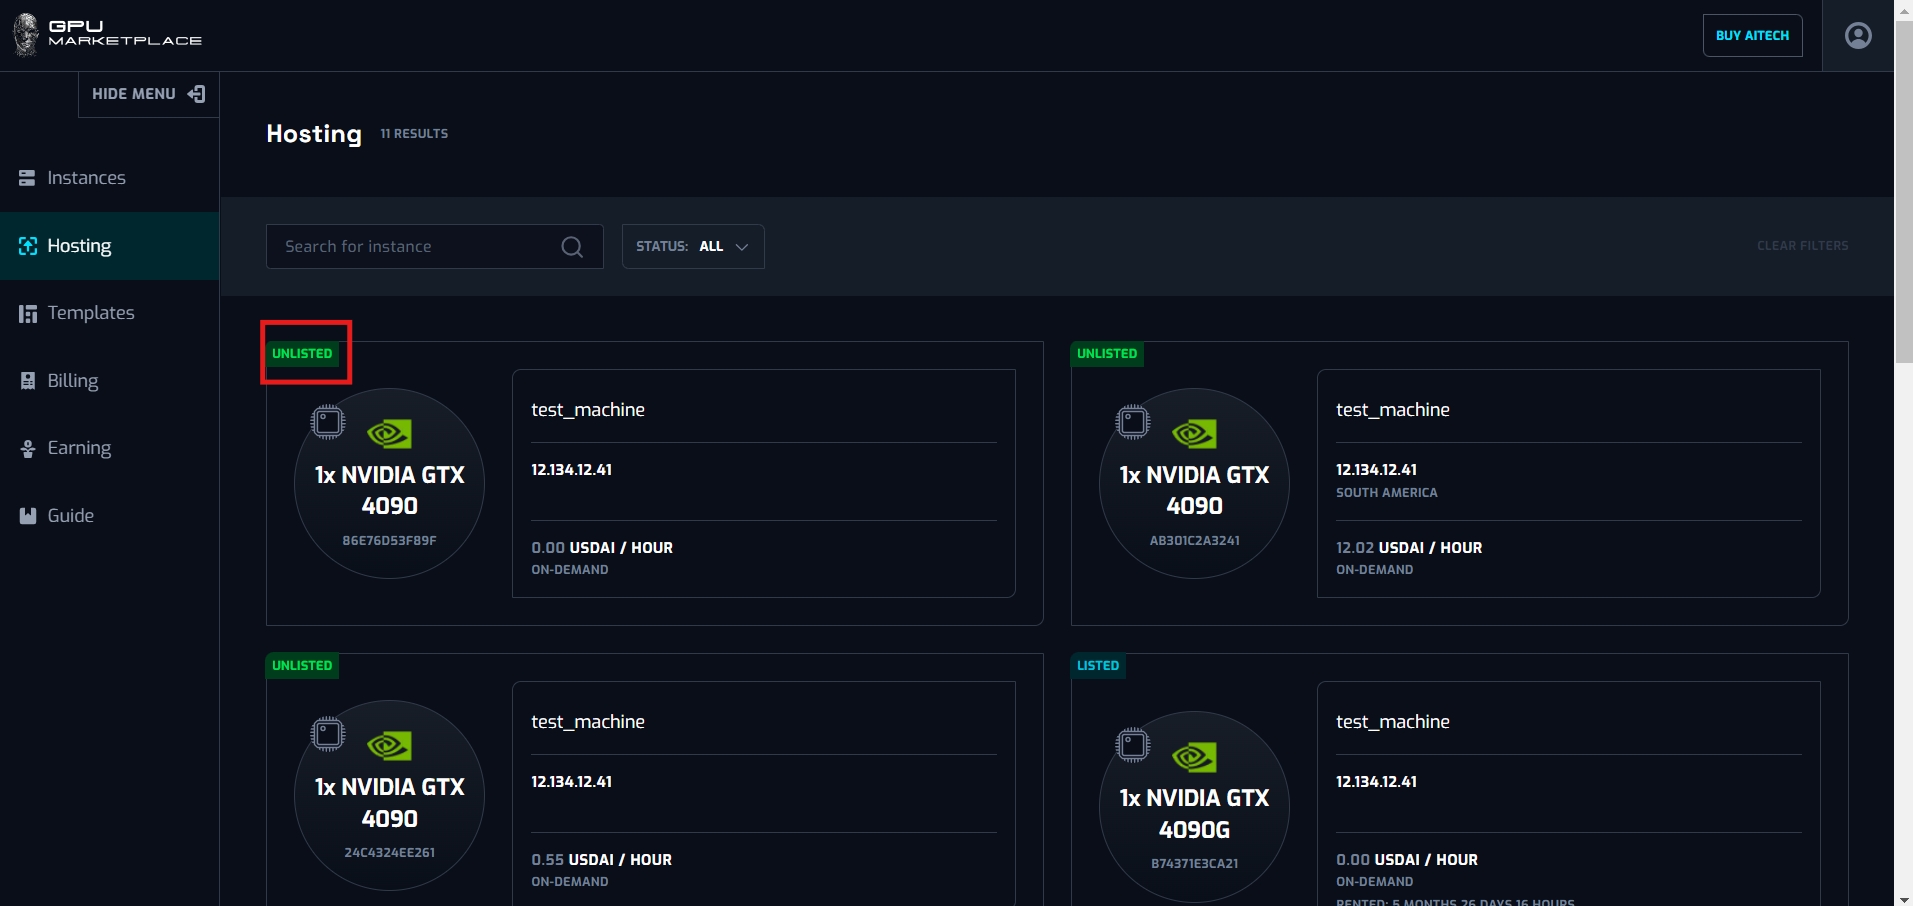
Step 1: User navigates to “Hosting” on the sidebar
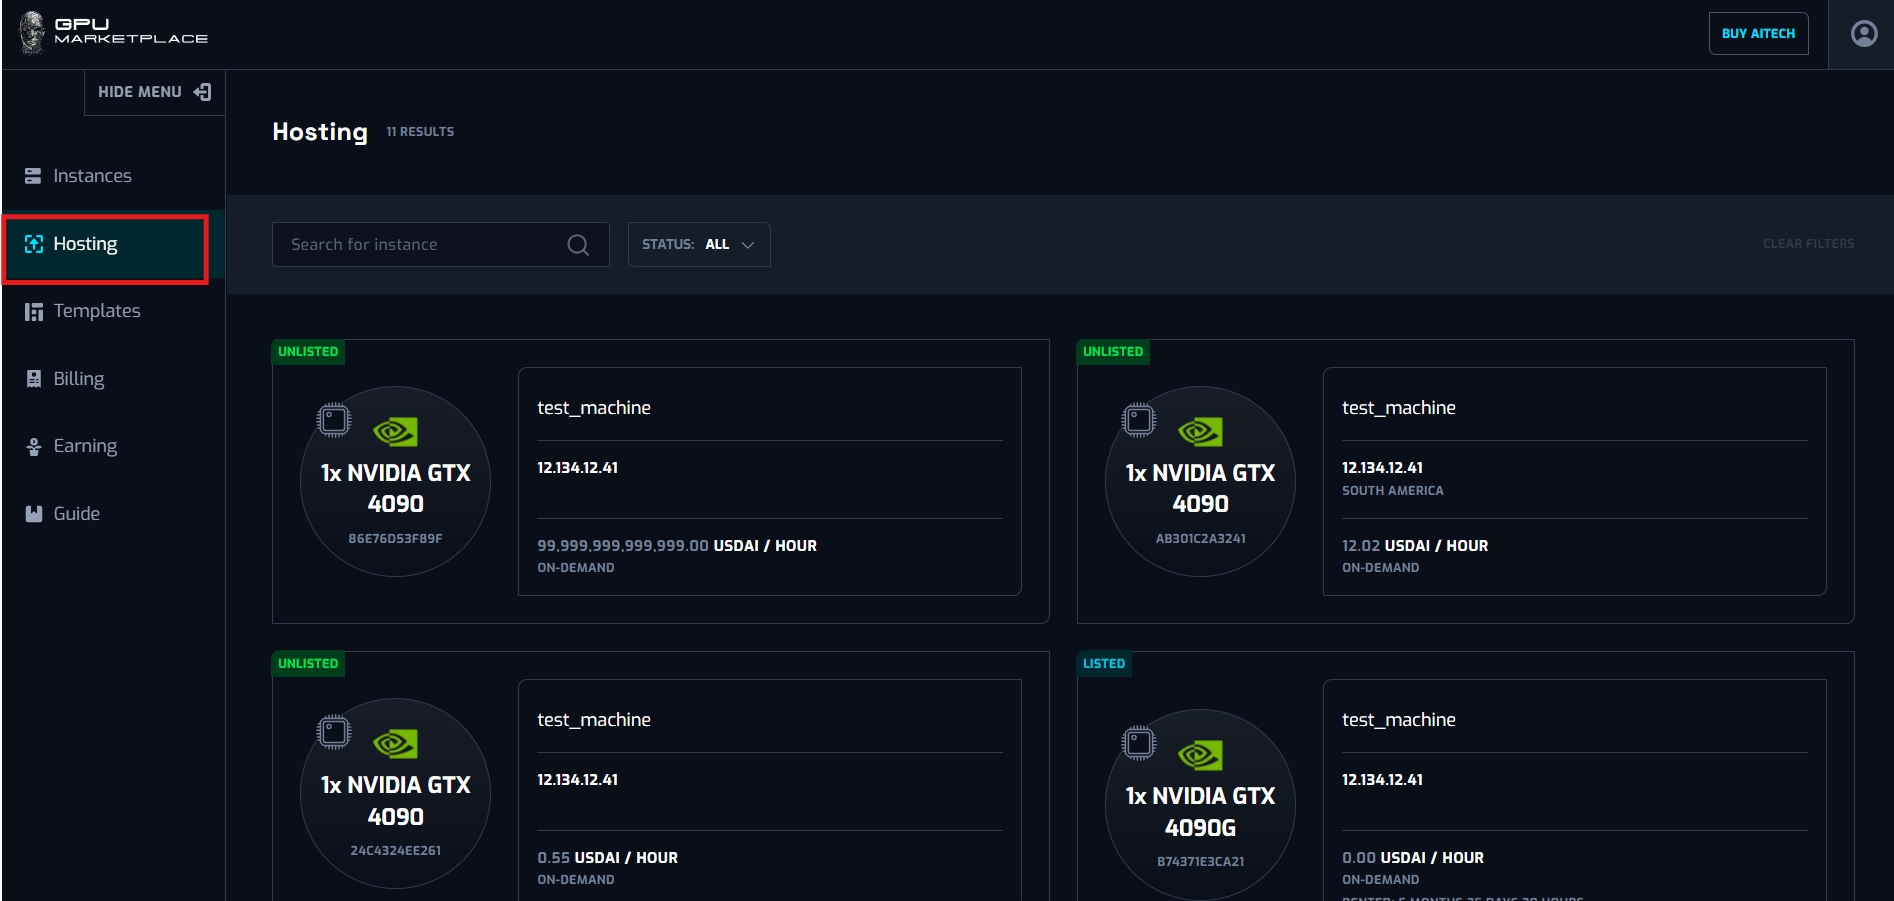
Step 2: Select a machine with status “Unlisted”, click “List”.
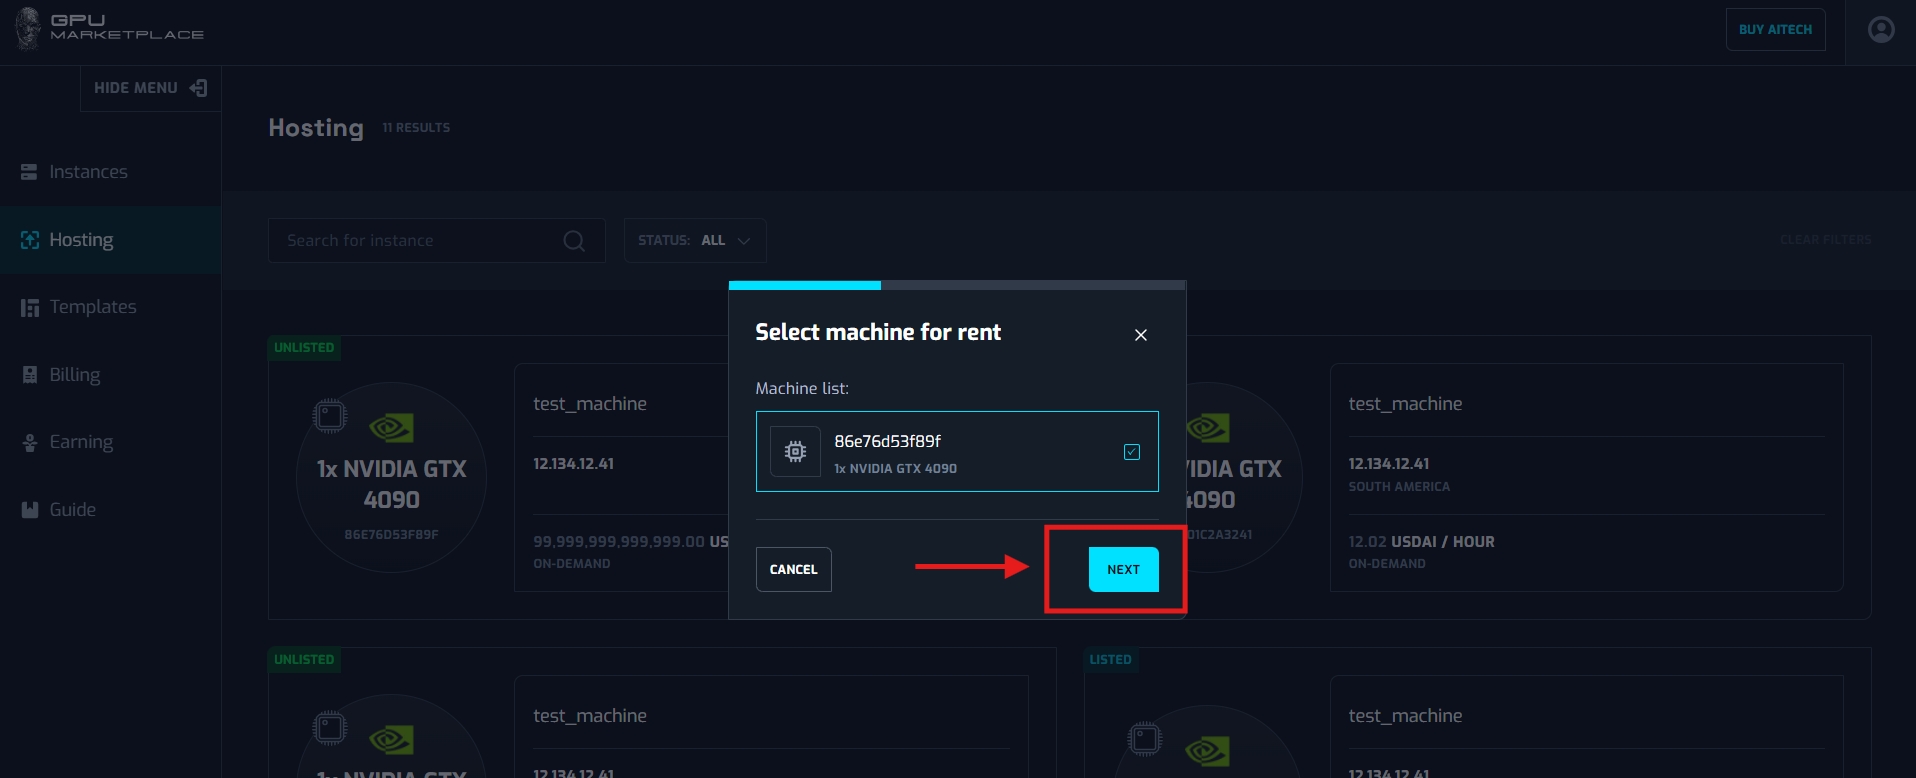
Step 3: A pop-up will appear. User clicks “Next” for confirmation.
Step 4: User sets up renting price (compulsory) and expiration date (Optional)
The renting price will be renting price in USDAI per hour. This price depends on the owner, there is no limit for setting the price of the machine.
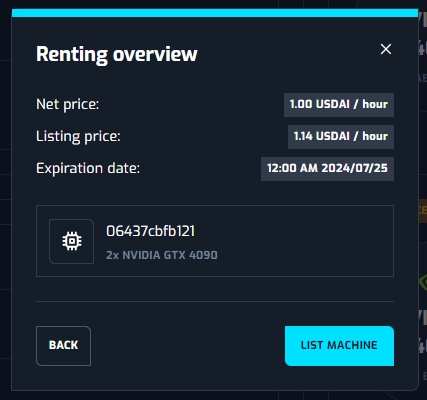
There will be 2 renting price
Net price: = the actual price (actual earning price)
Listing price = net price + system fee (price shown for the renter)
System fee will be calculated = net price * (1 - stacking rate - burn rate) (this will be fixed by system settings)
The expiration date will be the last date the machine is available on the system. After the expiration date, the machine will be removed. If no expiration date is available, the machine will stay permanently on the system/
User sets up the information, clicks Next.

Step 5: System yields a confirmation pop up. If the user selects “List machine”, machine status will be changed to listed, with the price and expiration date as defined.
Case 2: User want to unlist the machine:
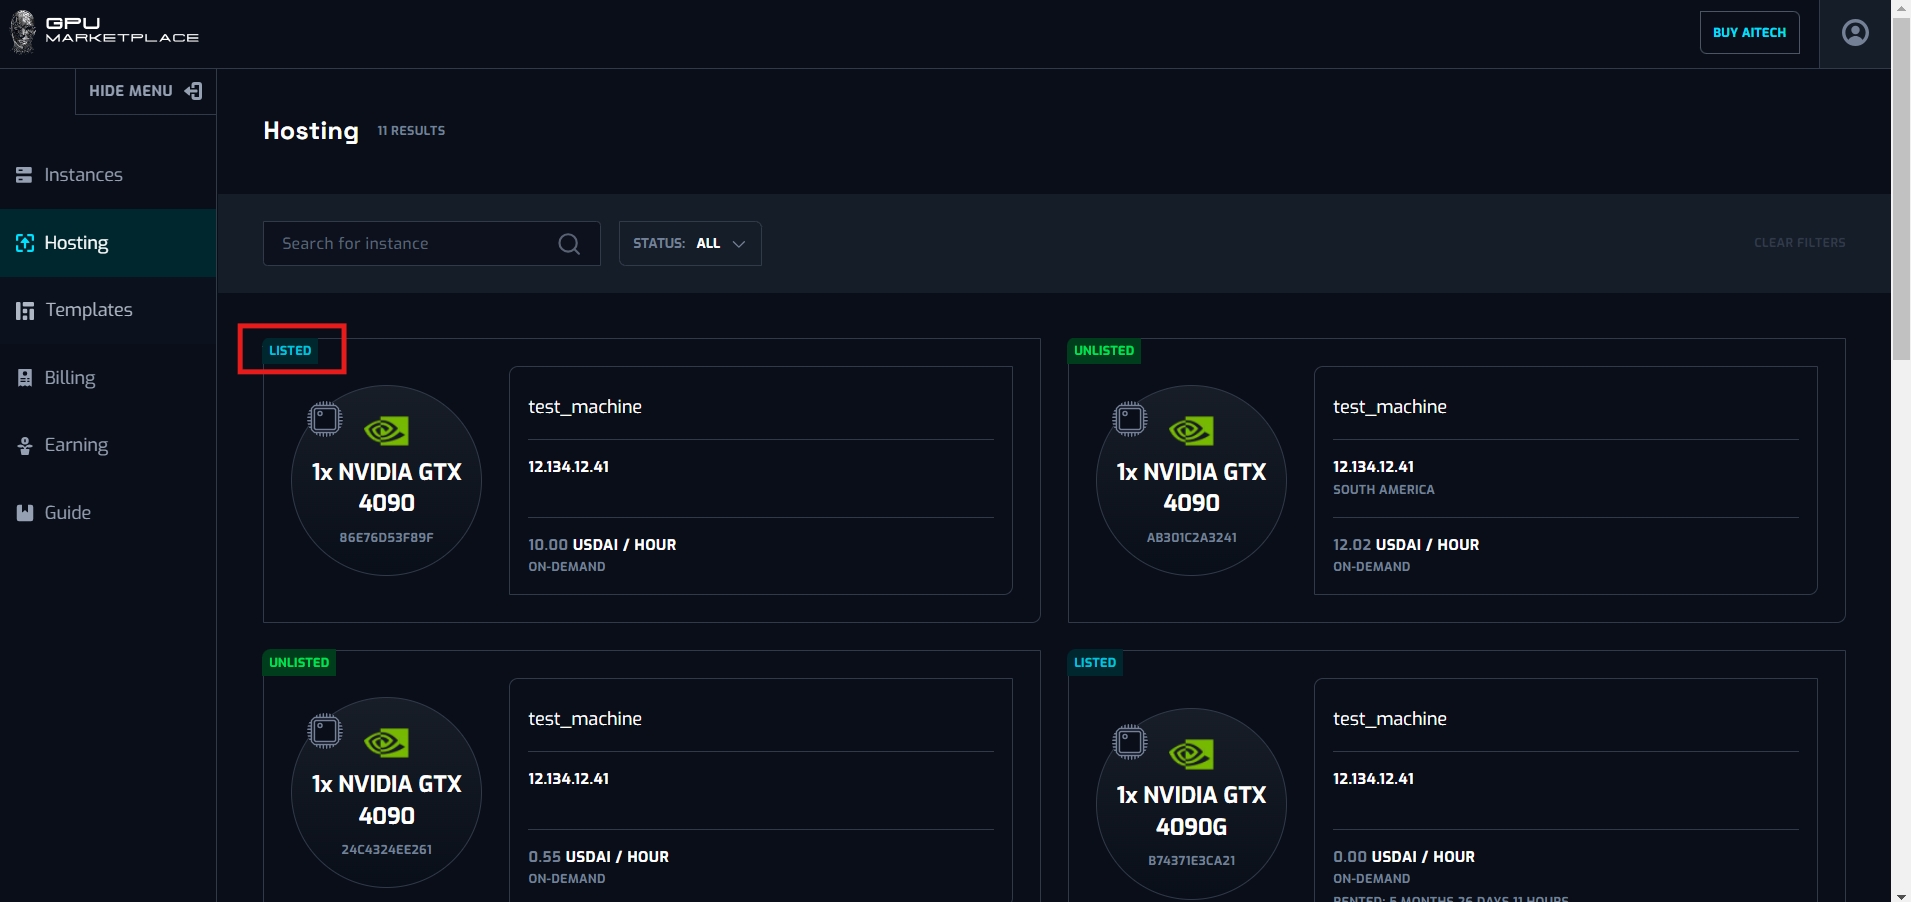
Step 1: Users navigate to “Hosting” on the side bar
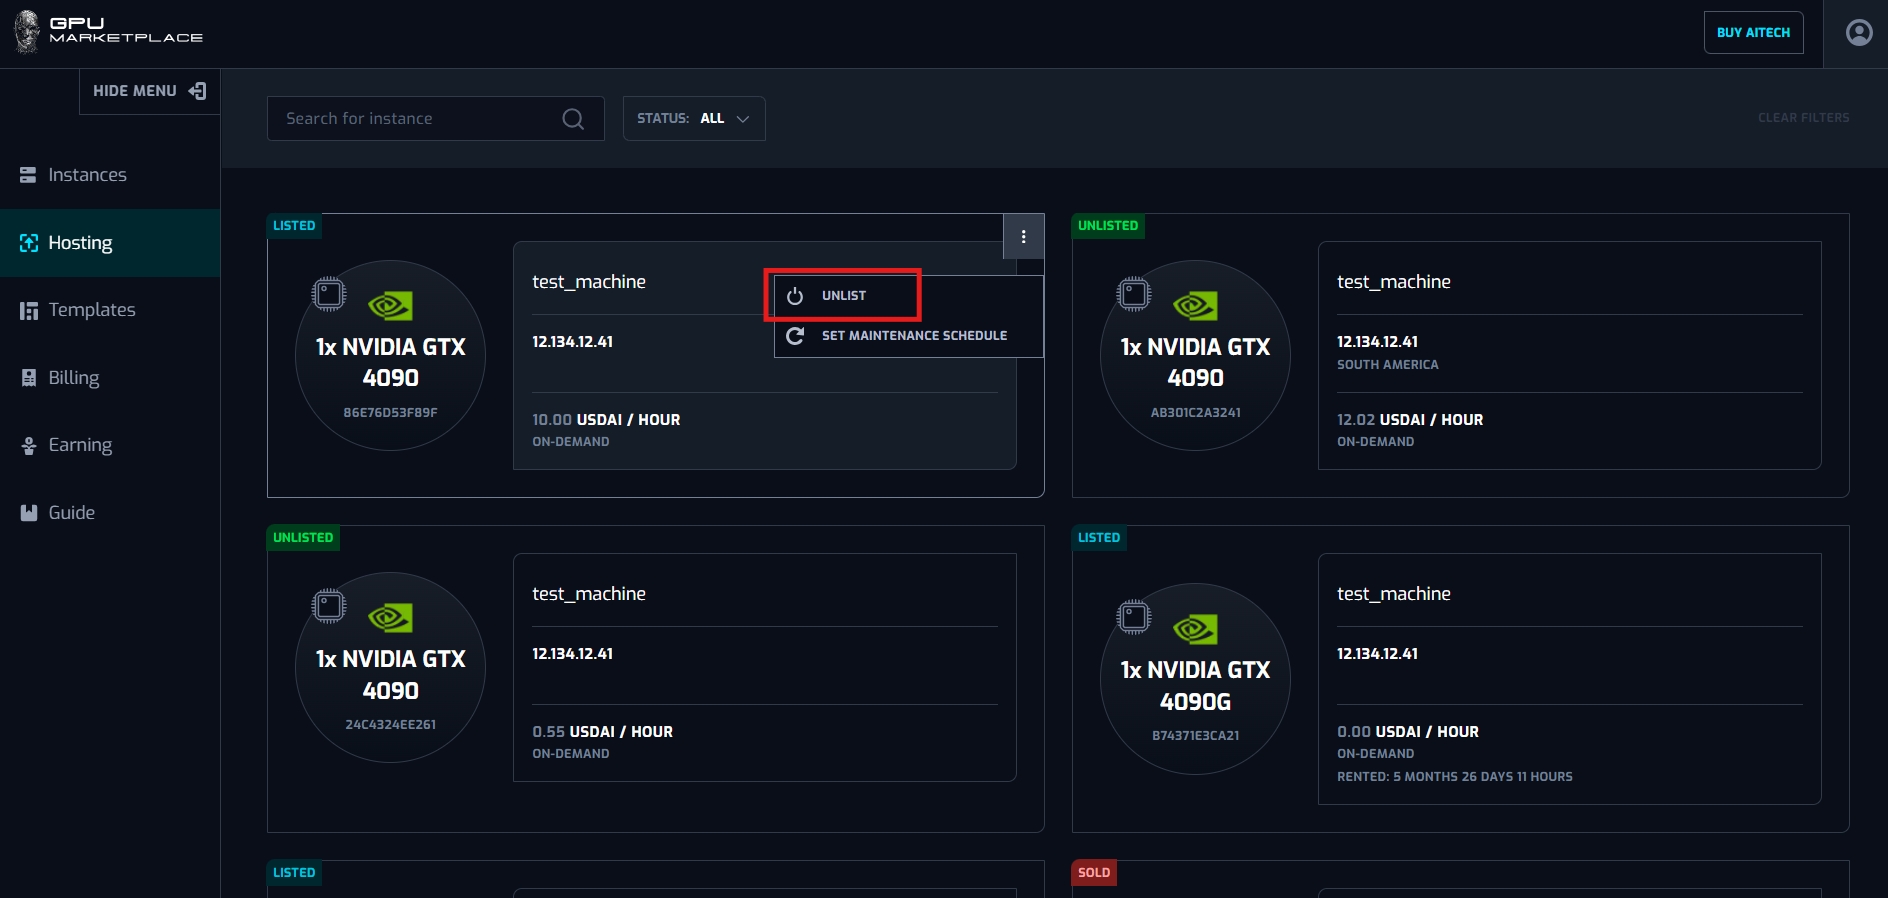
Step 2: Users select a machine with status “Listed”. Click “Unlist”
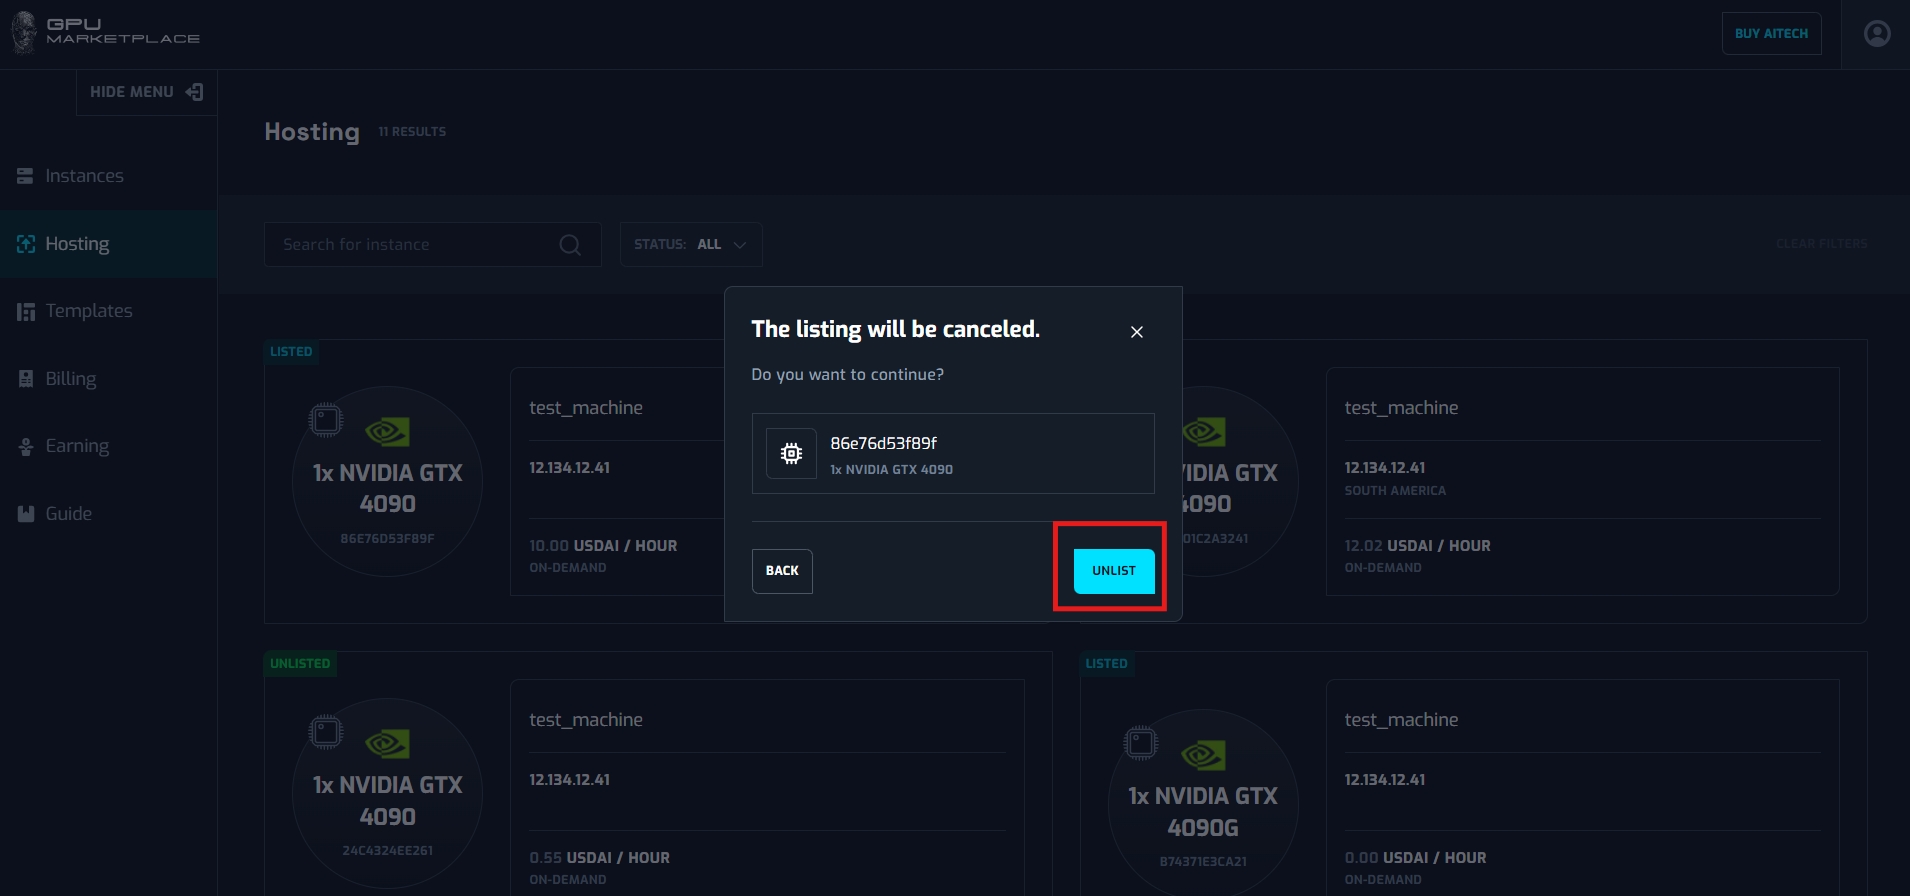
Step 3:A pop up will appear. User clicks “Unlist” to confirm the action
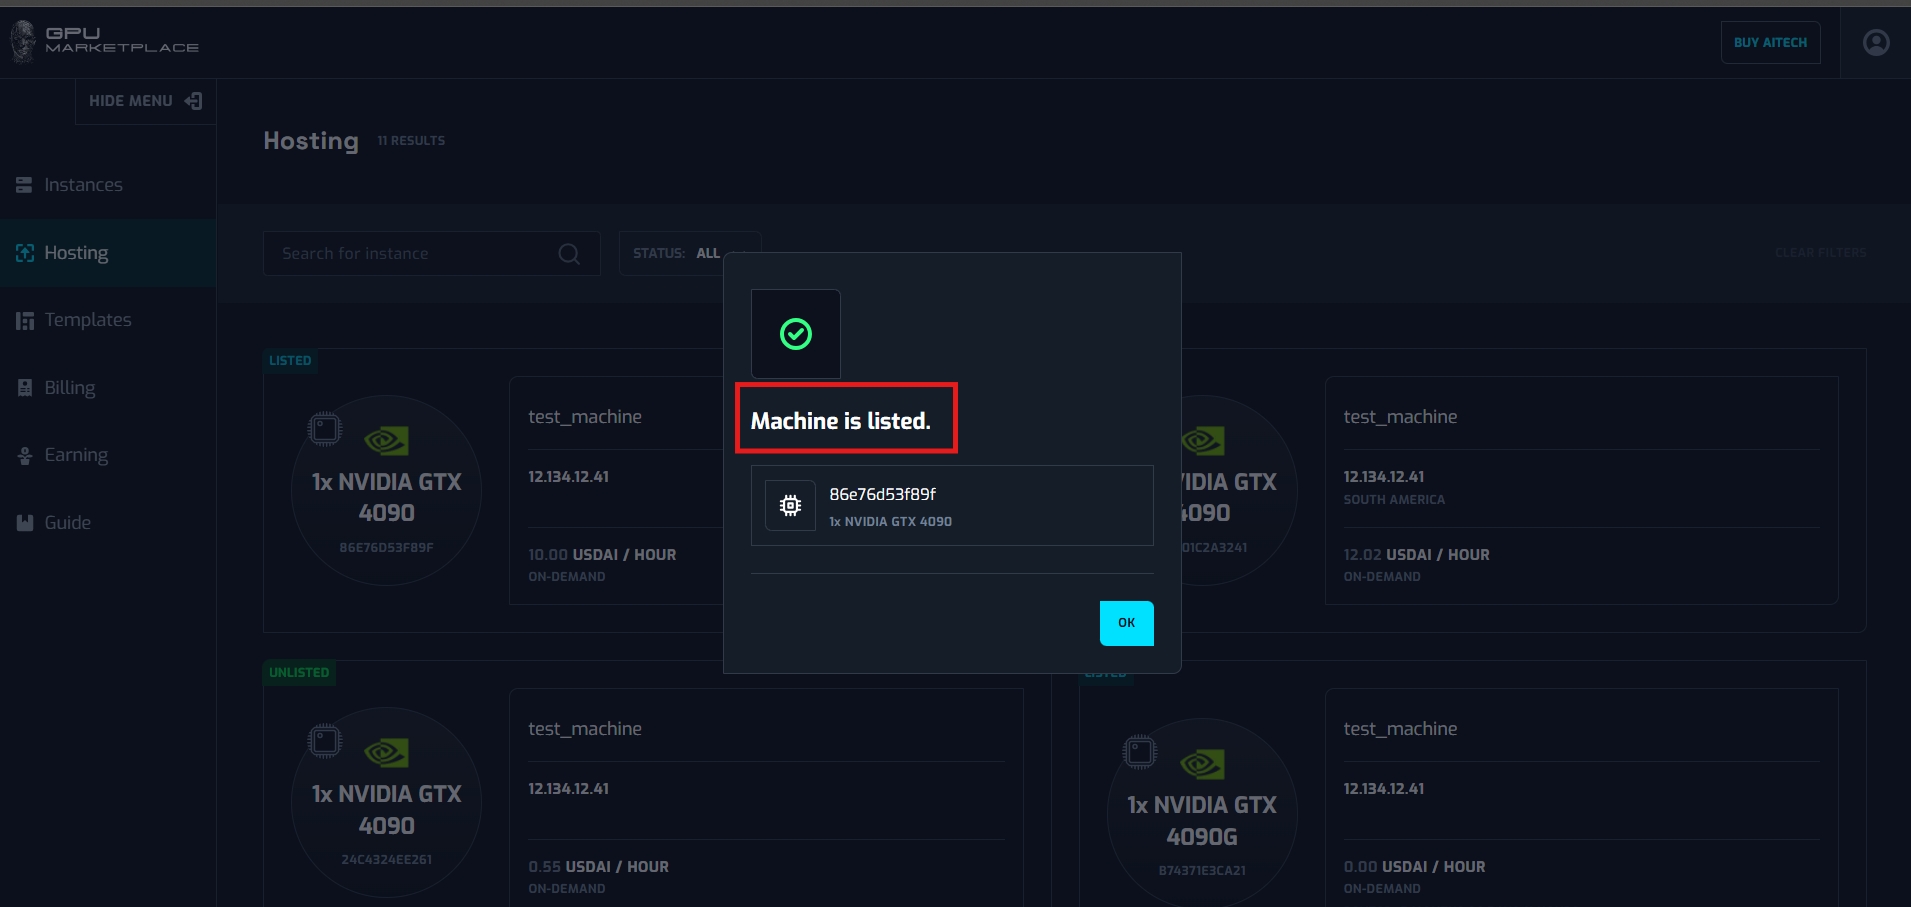
Step 4: After unlist successfully, machine status will be changed to “Unlisted”, and this machine will no longer be available for renting. If the user wants to list again, follow case 1. If a user wants to change the information of the machine on the system, the user will have to unlist and list the machine again.
Case 3: User wants to set the maintenance schedule for the machine
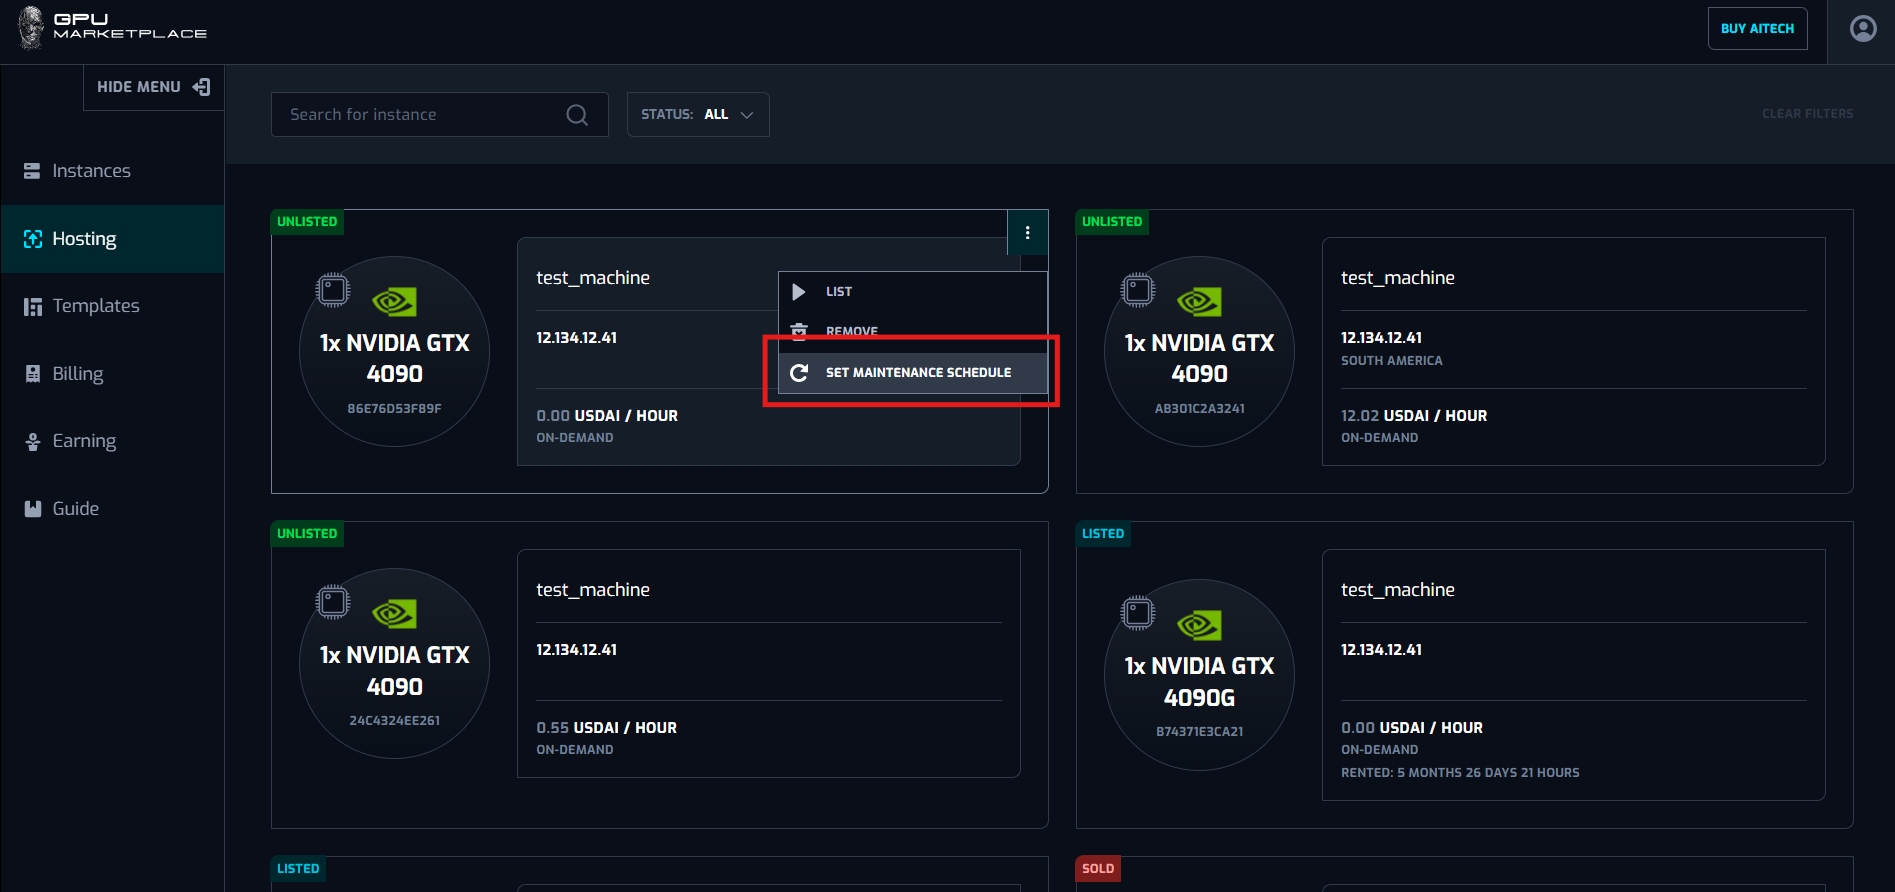
Step 1: Users navigate to “Hosting” on the side bar
Step 2: Users select a machine with status “Unlisted”. Click “Set maintain schedule”
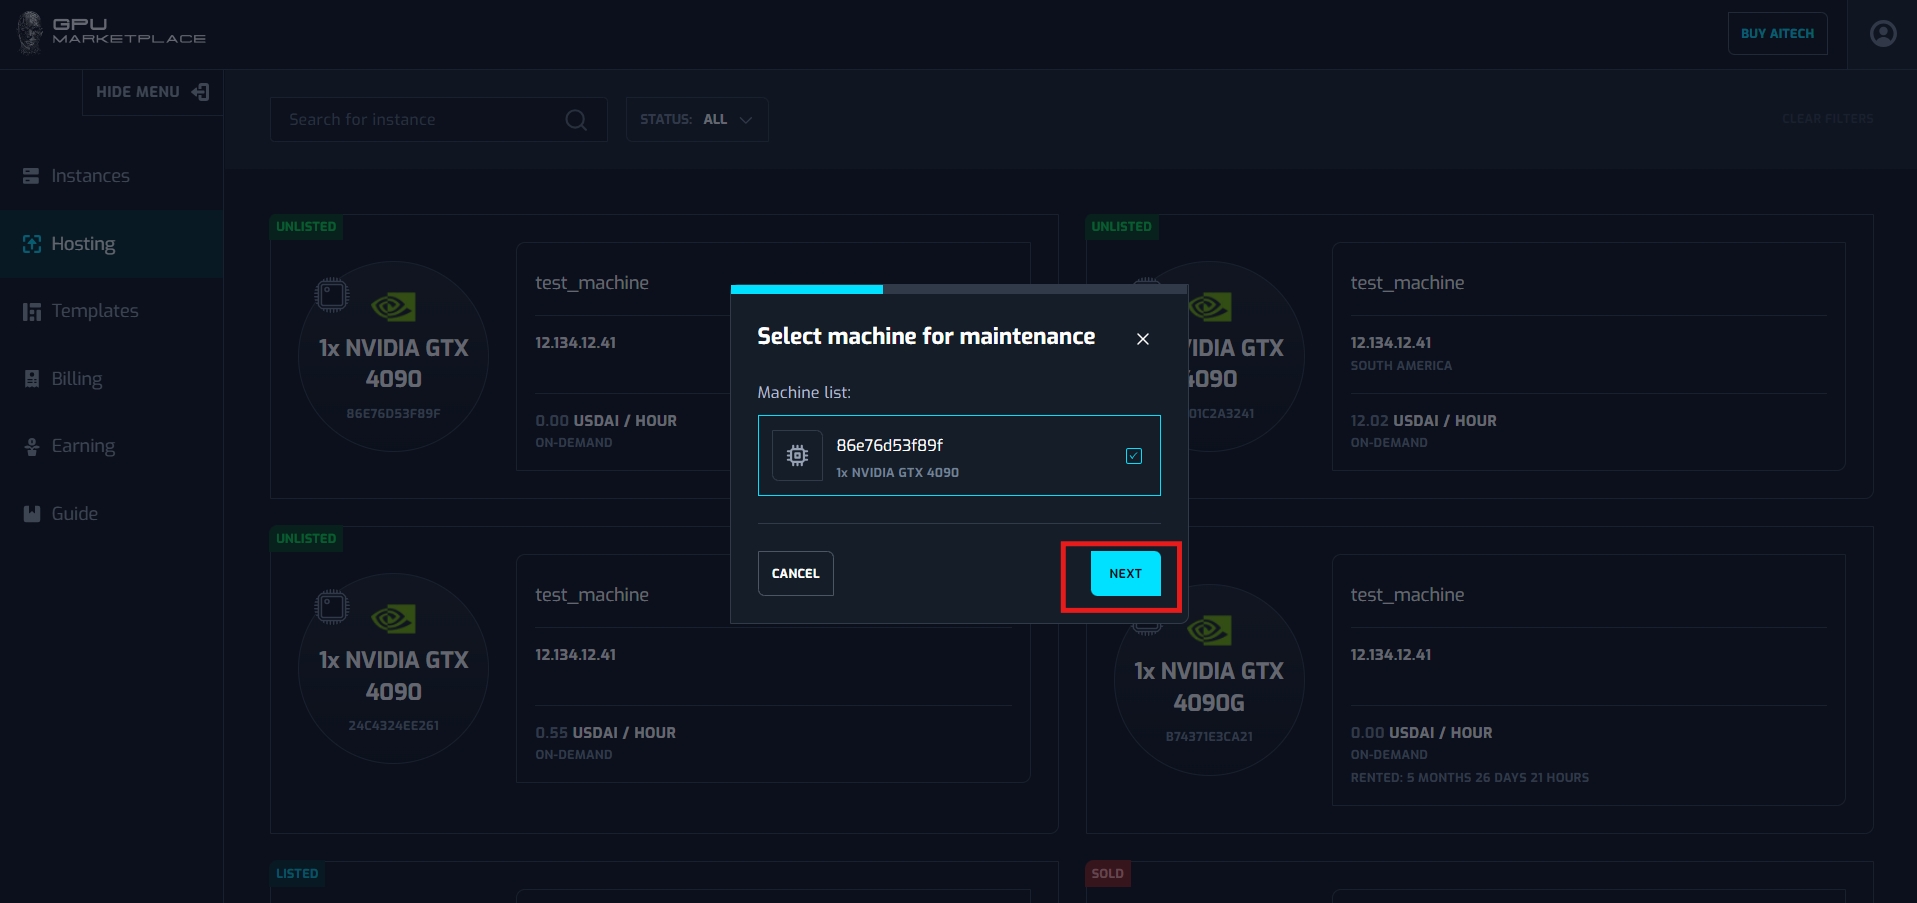
Step 3: A pop up will appear.. User clicks “Next”
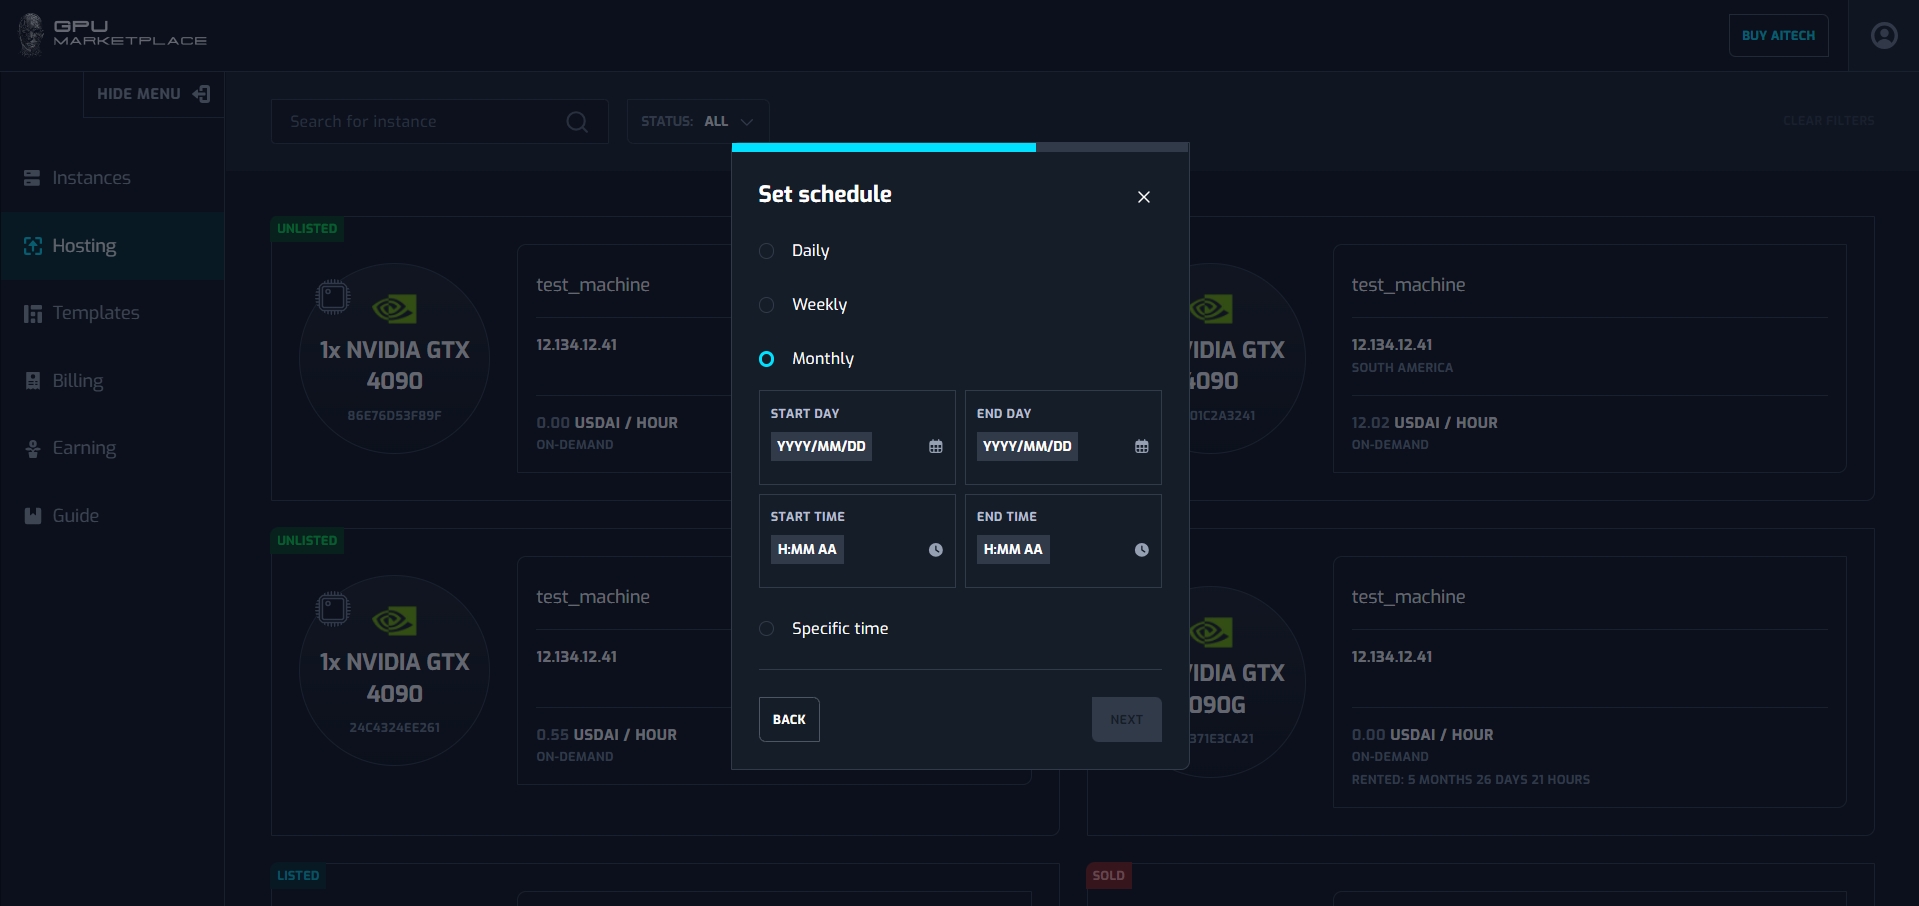
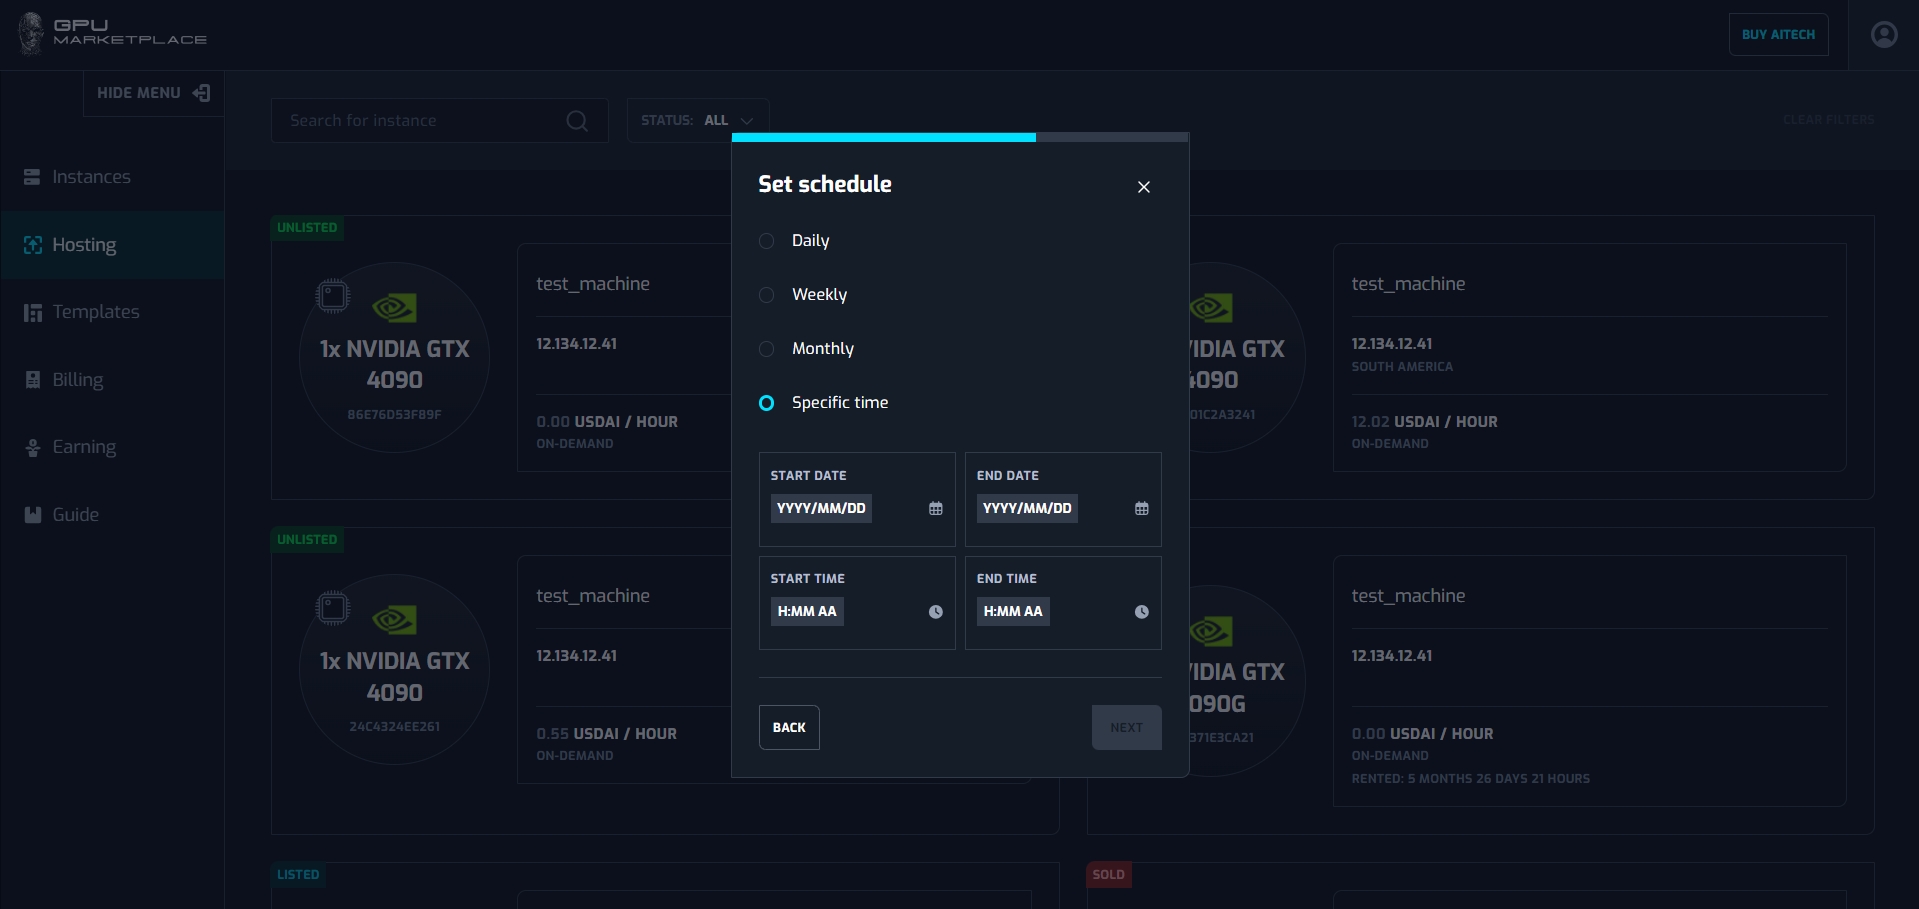
Step 4: Users set their maintenance schedule.
Daily: Maintenance schedule will executed daily
Monthly: Maintenance schedule will be executed monthly
Weekly: Maintenance schedule will be executed weekly
Specific time: Maintenance schedule will be executed at a certain time.
Daily: User select Start time and end time.

Weekly: User select week day with start time and end time

Monthly: User select Start day, end day, start time and end time
Specific time: User select Start date, end date, start time and end time
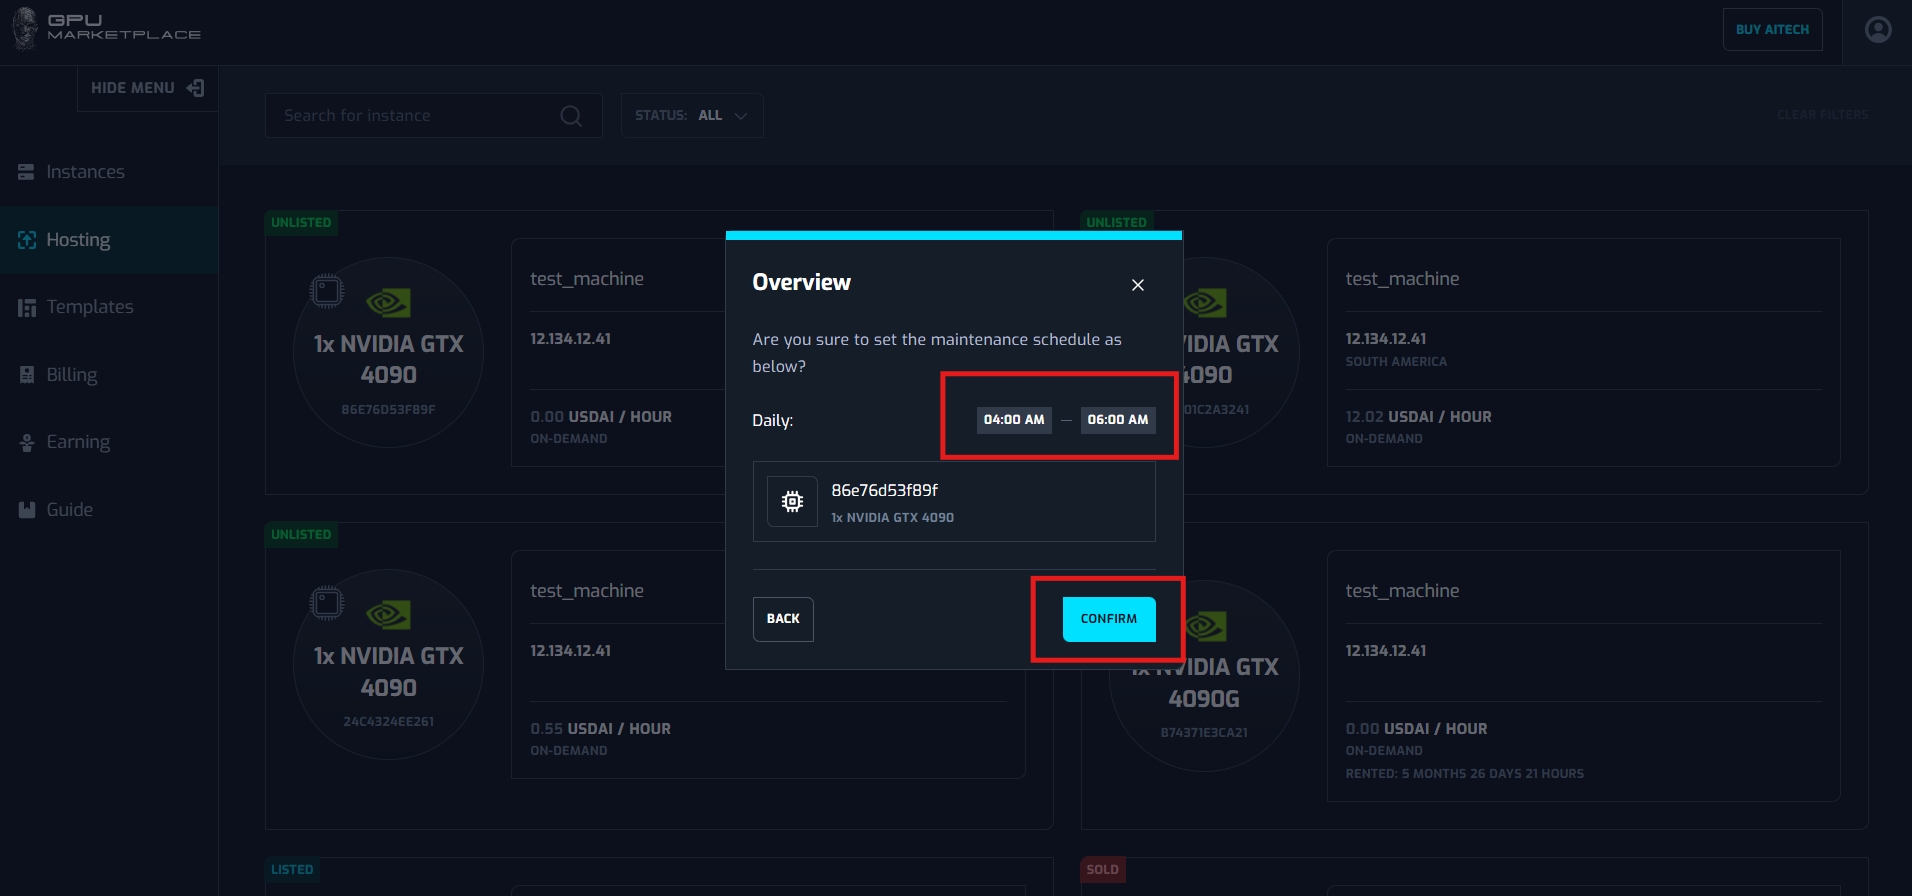
After User has chosen the maintenance date, click “Next”
Step 5: System yields a confirmation popup. User clicks “Confirm”. The maintenance date will be set. If the user cancels, the popup will be closed and the user goes back to the previous screen, no maintenance schedule is set.
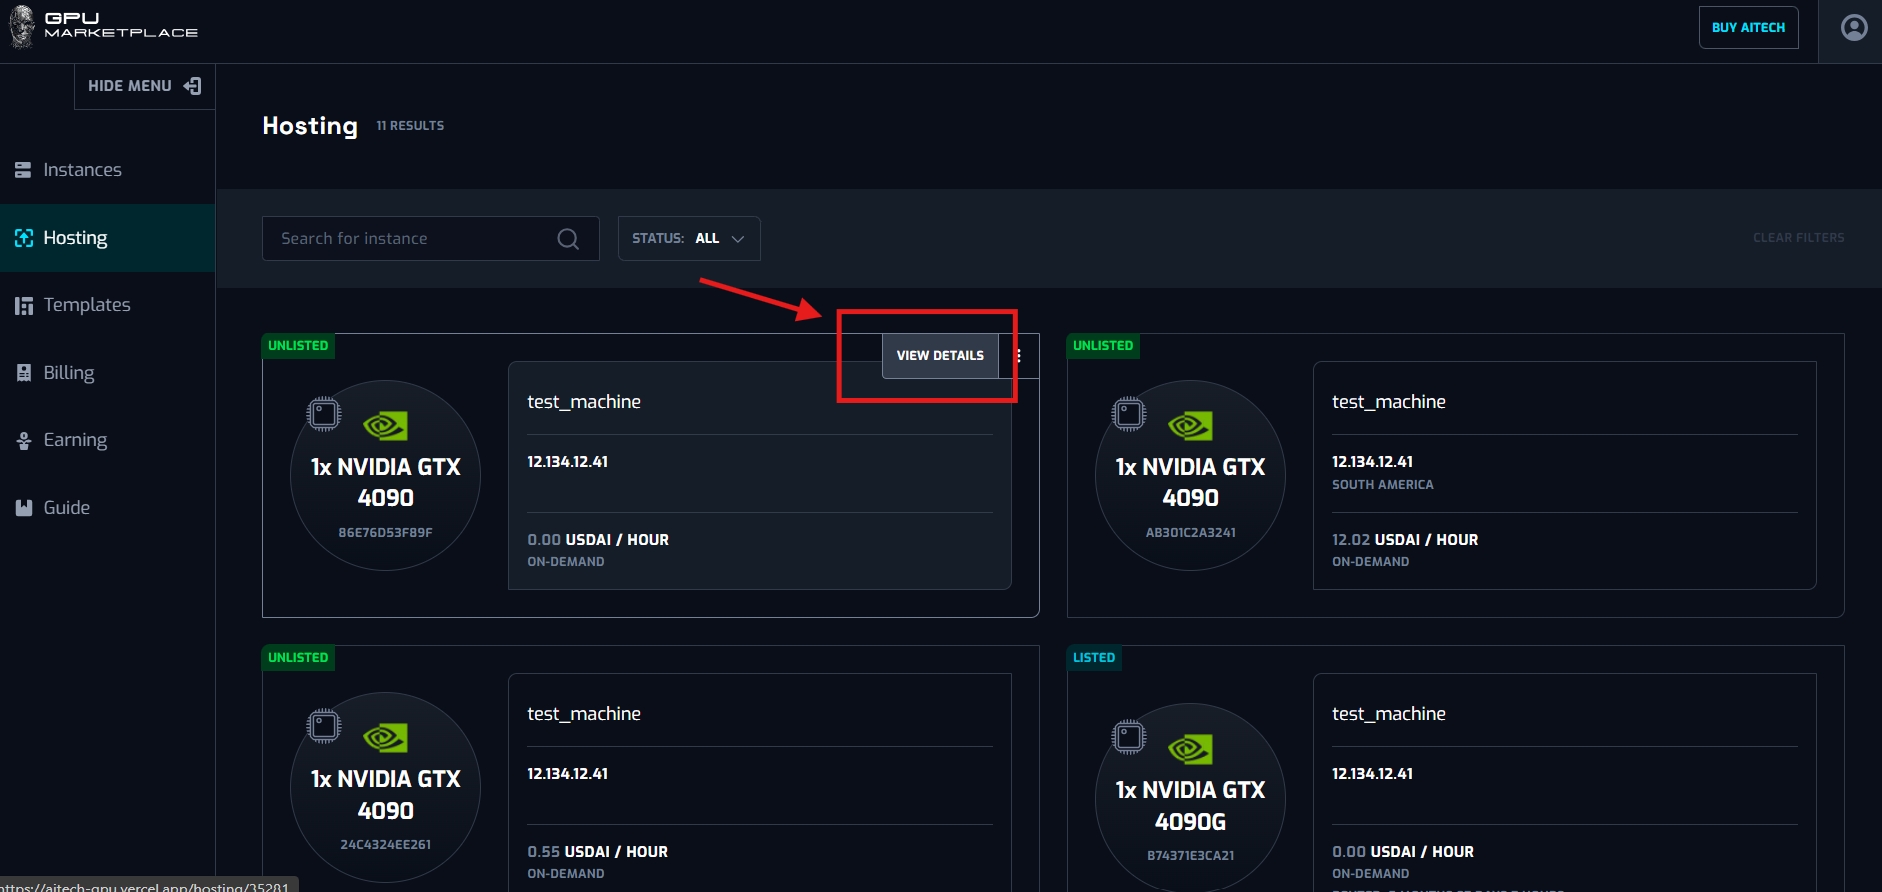
Step 6: User checks schedule information in machine detail. Select the machine and click “View detail”. The maintenance schedule will be shown in the maintenance section.
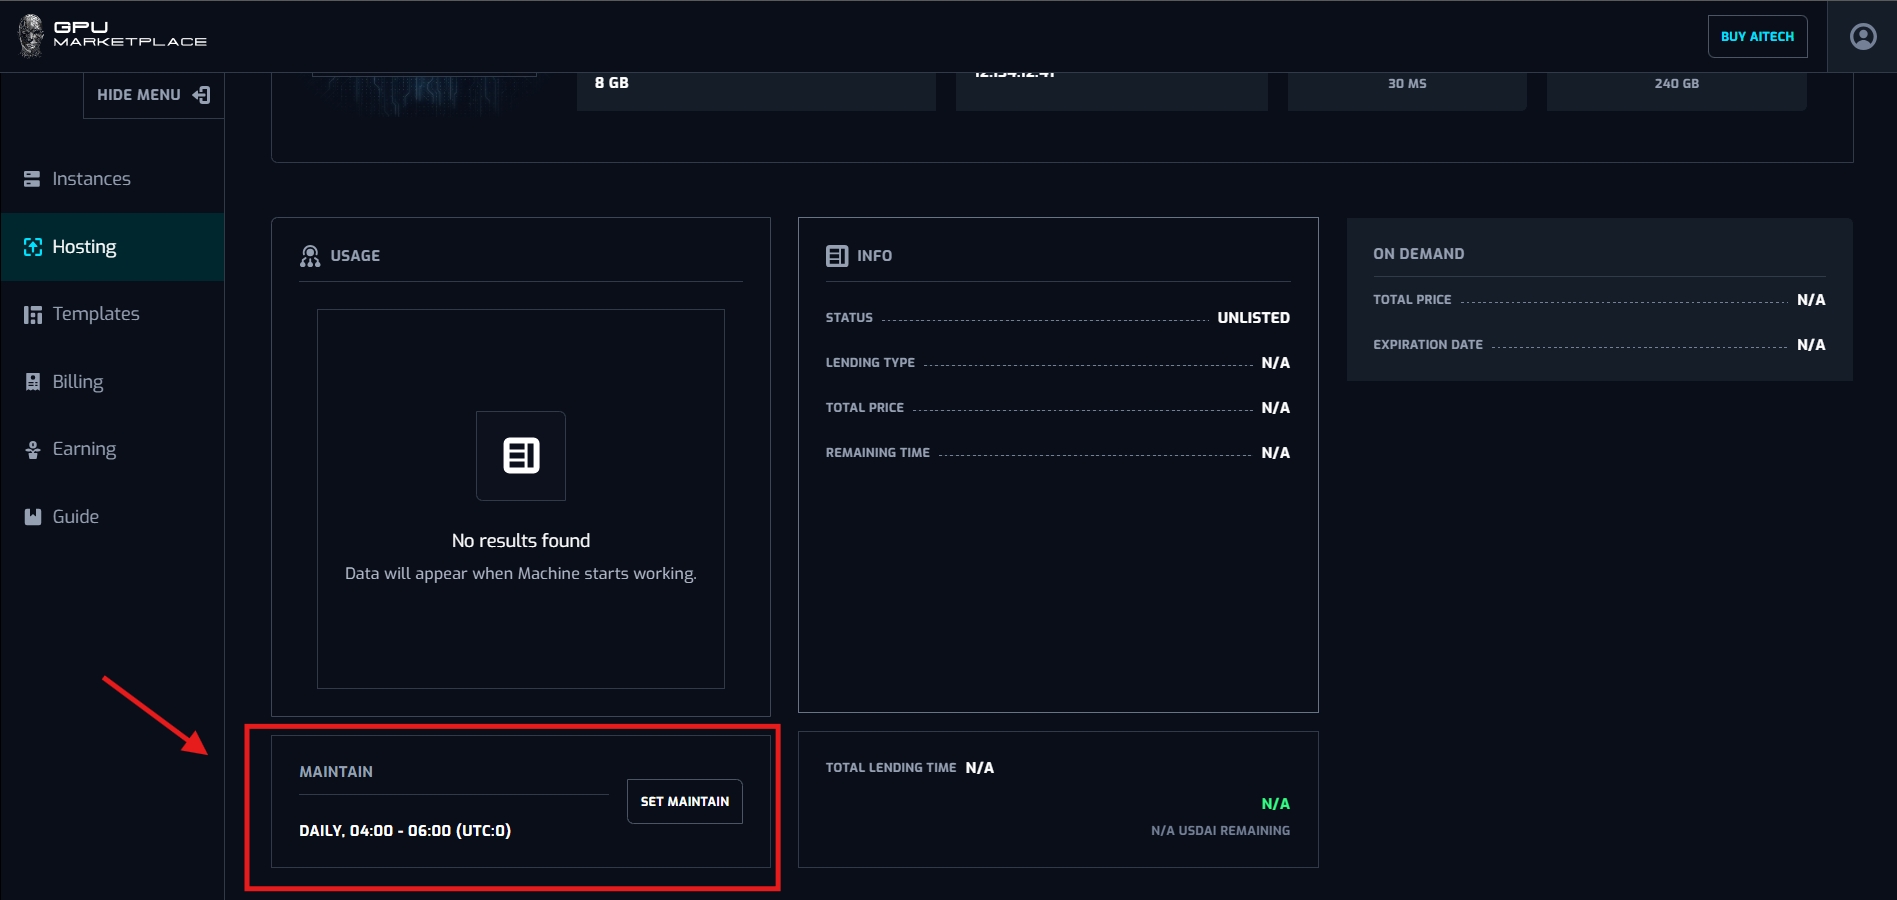
Start maintenance: Select action -> Start maintain(at the top right corner of the screen)
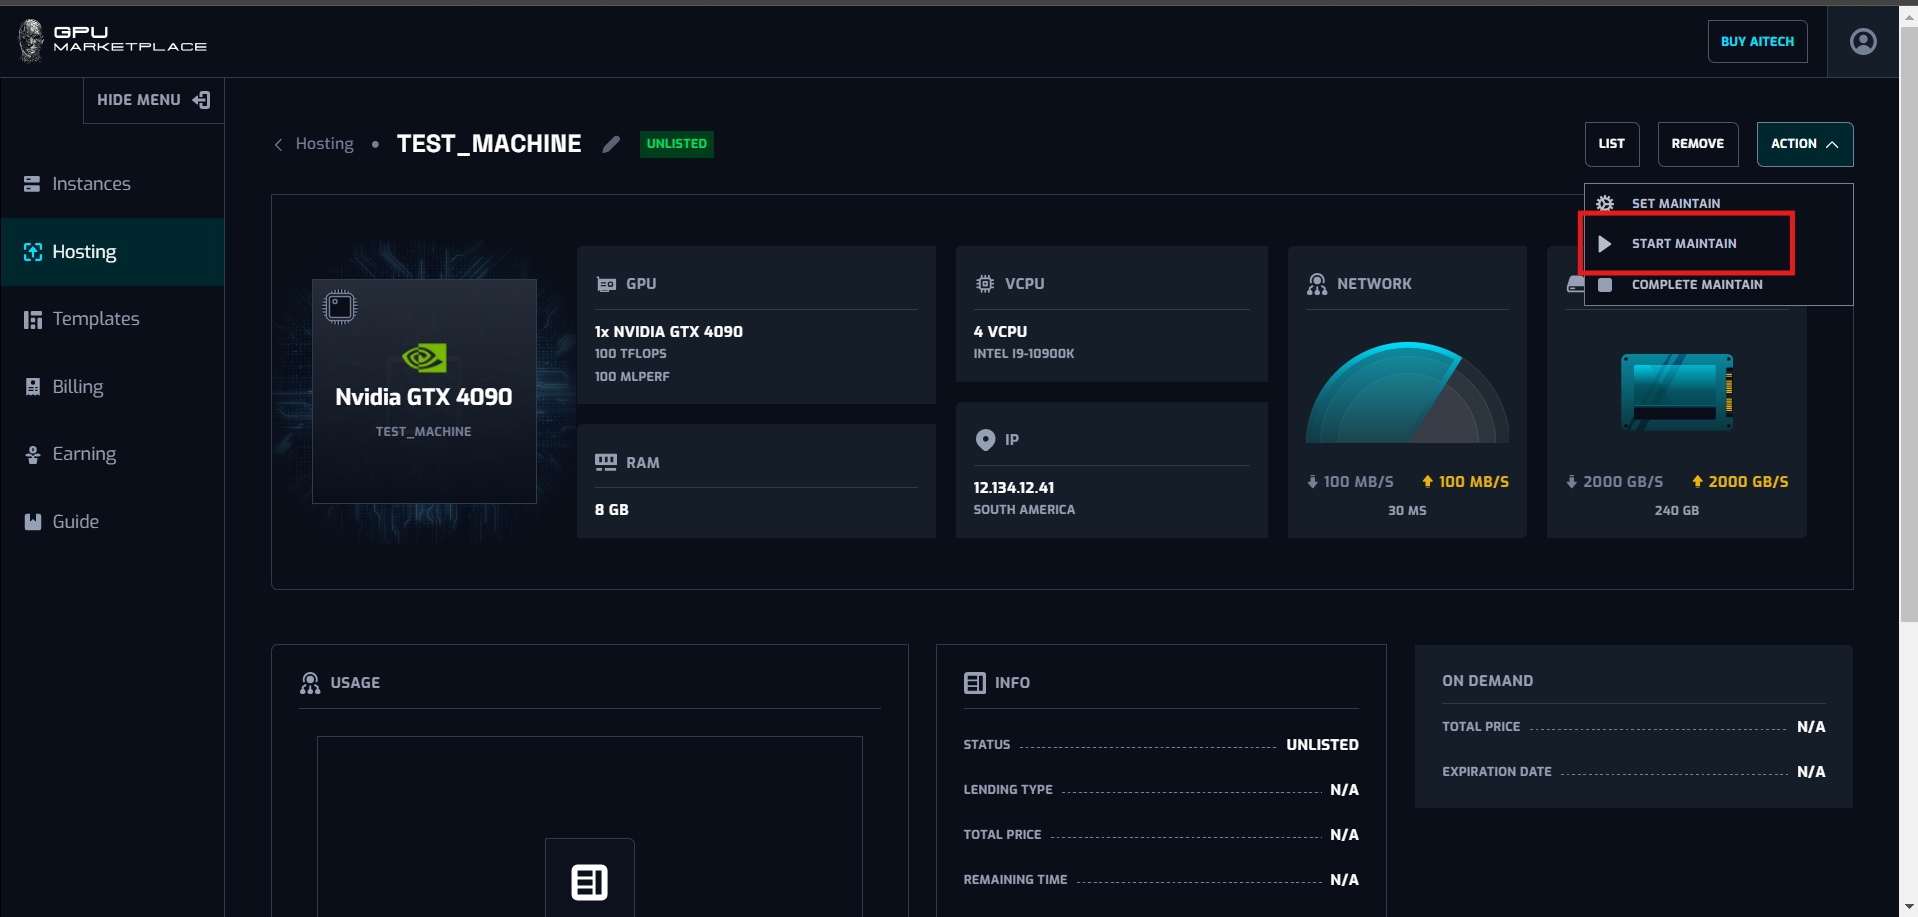
When users select “start maintain”, renter’s instance will be destroyed, and machine status will change to “In maintenance”. Owner can only start maintenance in the timeframe created in the Maintenance section. While maintaining, Renter can not rent the machine.
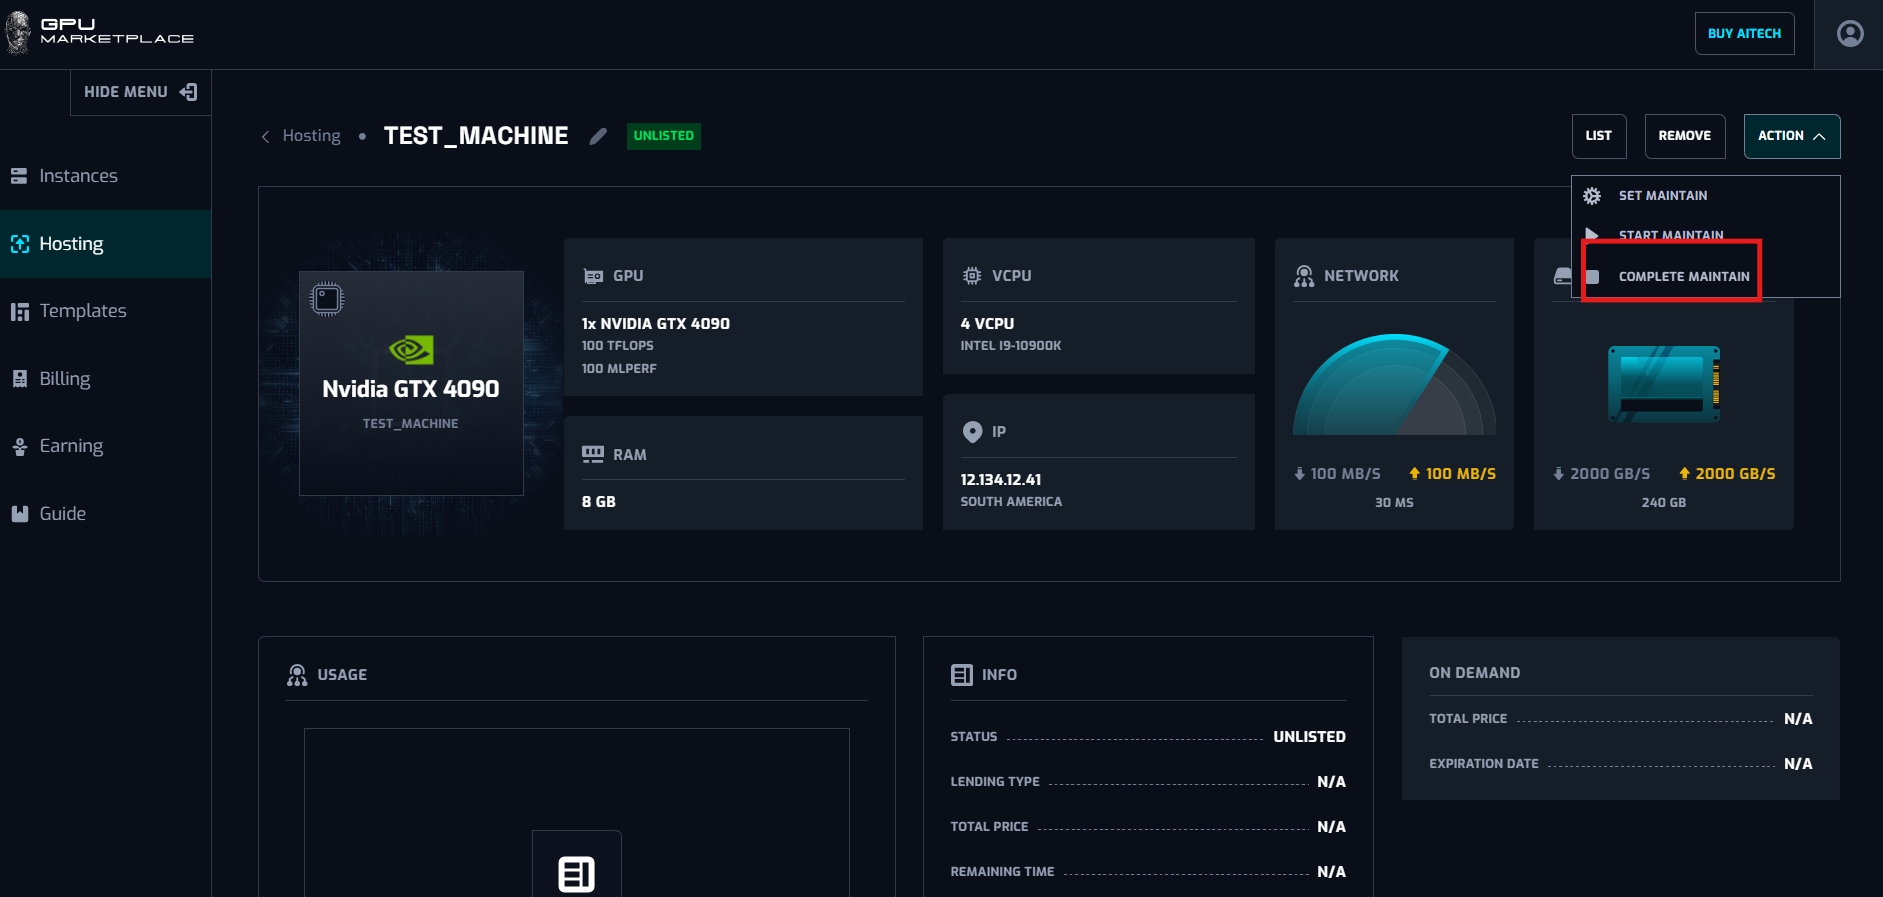
Complete maintenance: Select action -> Complete maintain (at the top right corner of the screen). When maintenance complete, the machine will change status to “Unlisted”
Users can only complete maintenance, when the maintenance schedule starts.
Case 4: User wants to remove the machine from the system.
Step 1: Users navigate to “Hosting” on the side bar
Step 2: Users select a machine with status “Unlisted”, Select “Remove”
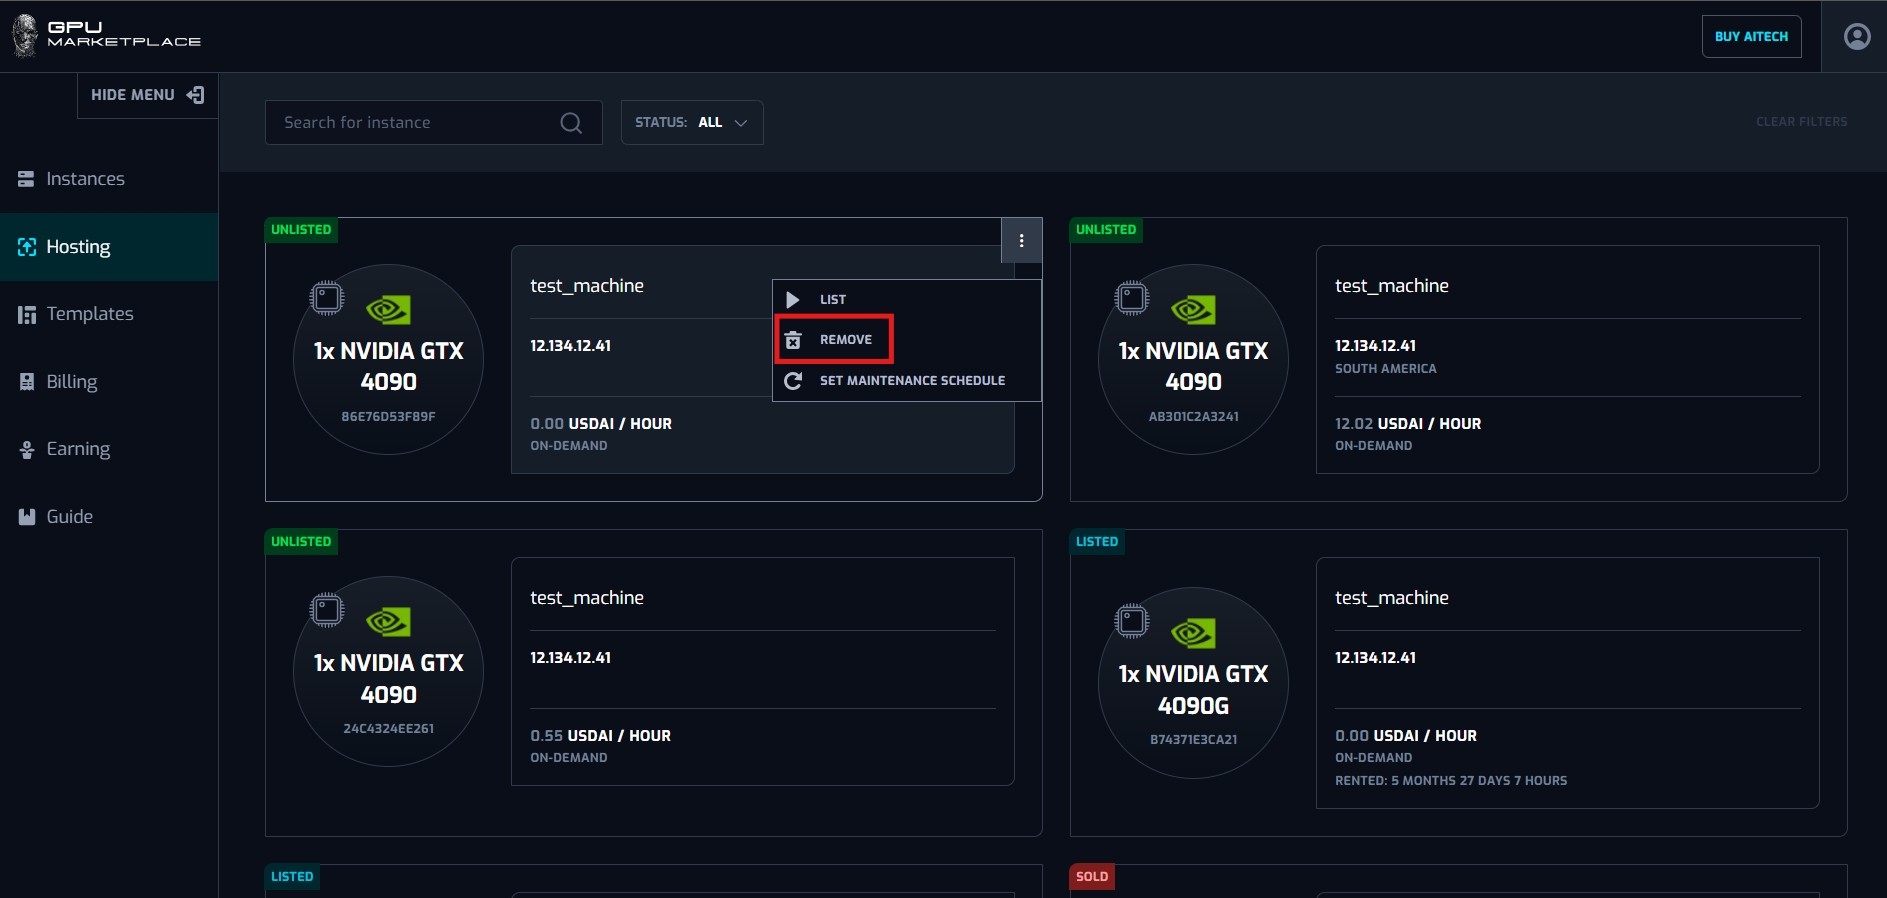
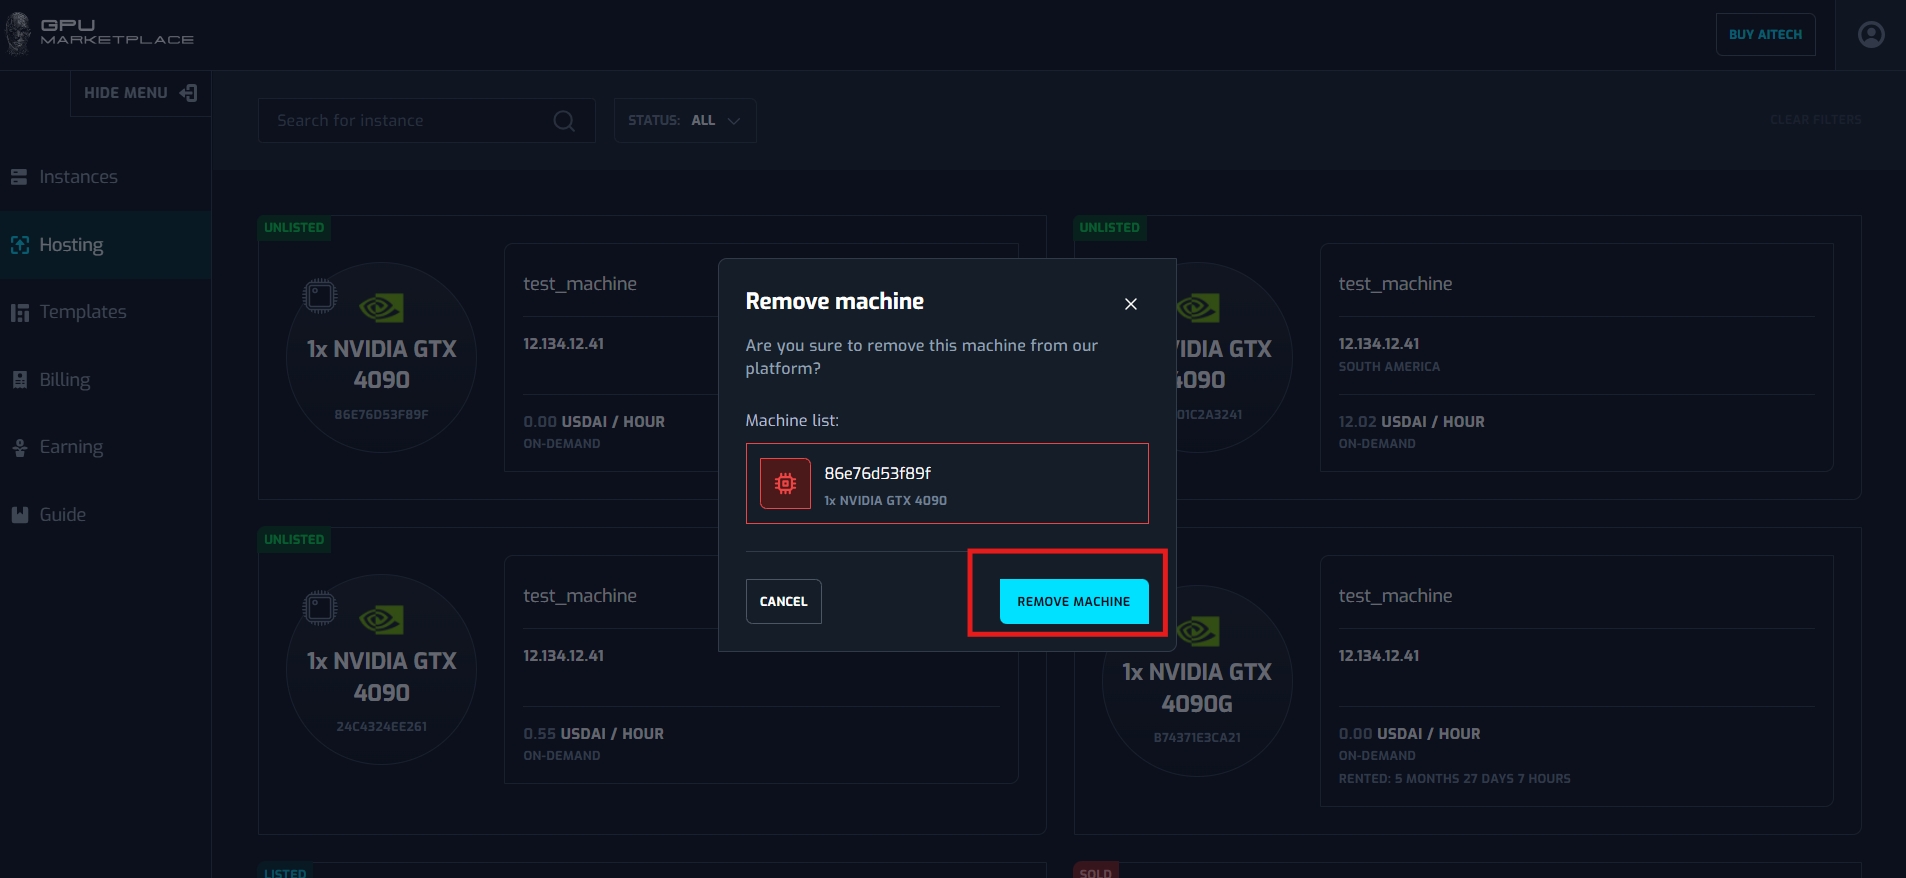
Step 3:A pop up will appear. User selects “Remove machine” if they want to remove it. If not, click “Cancel”.
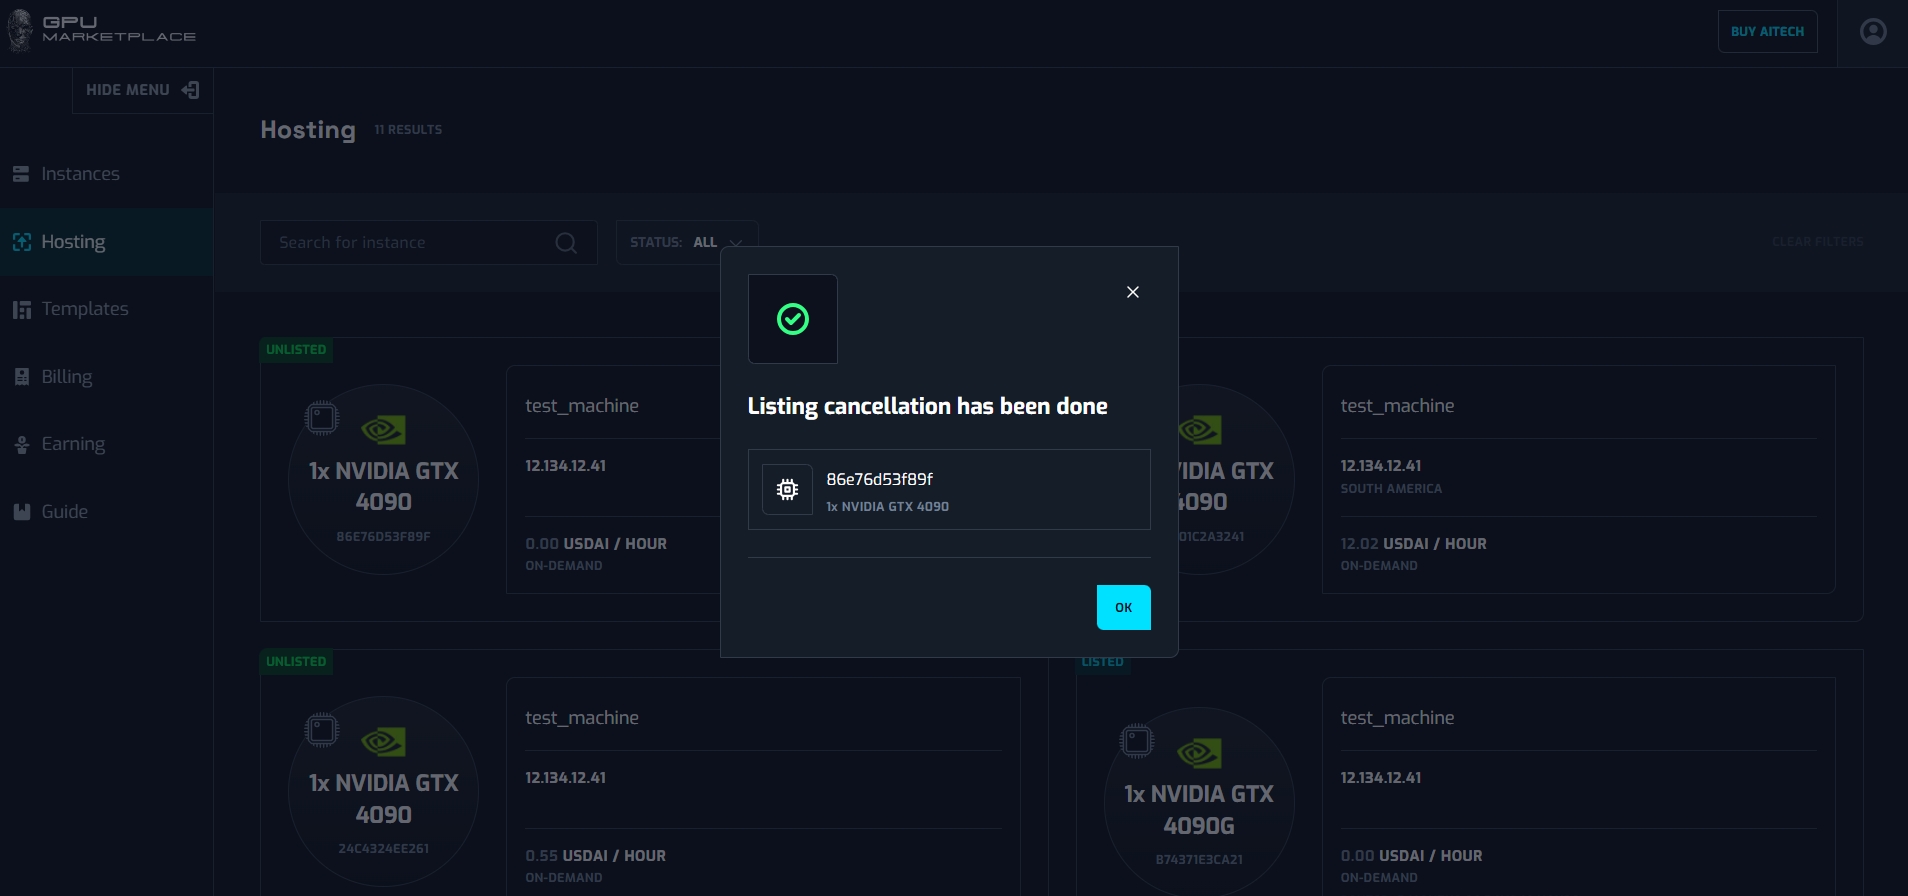
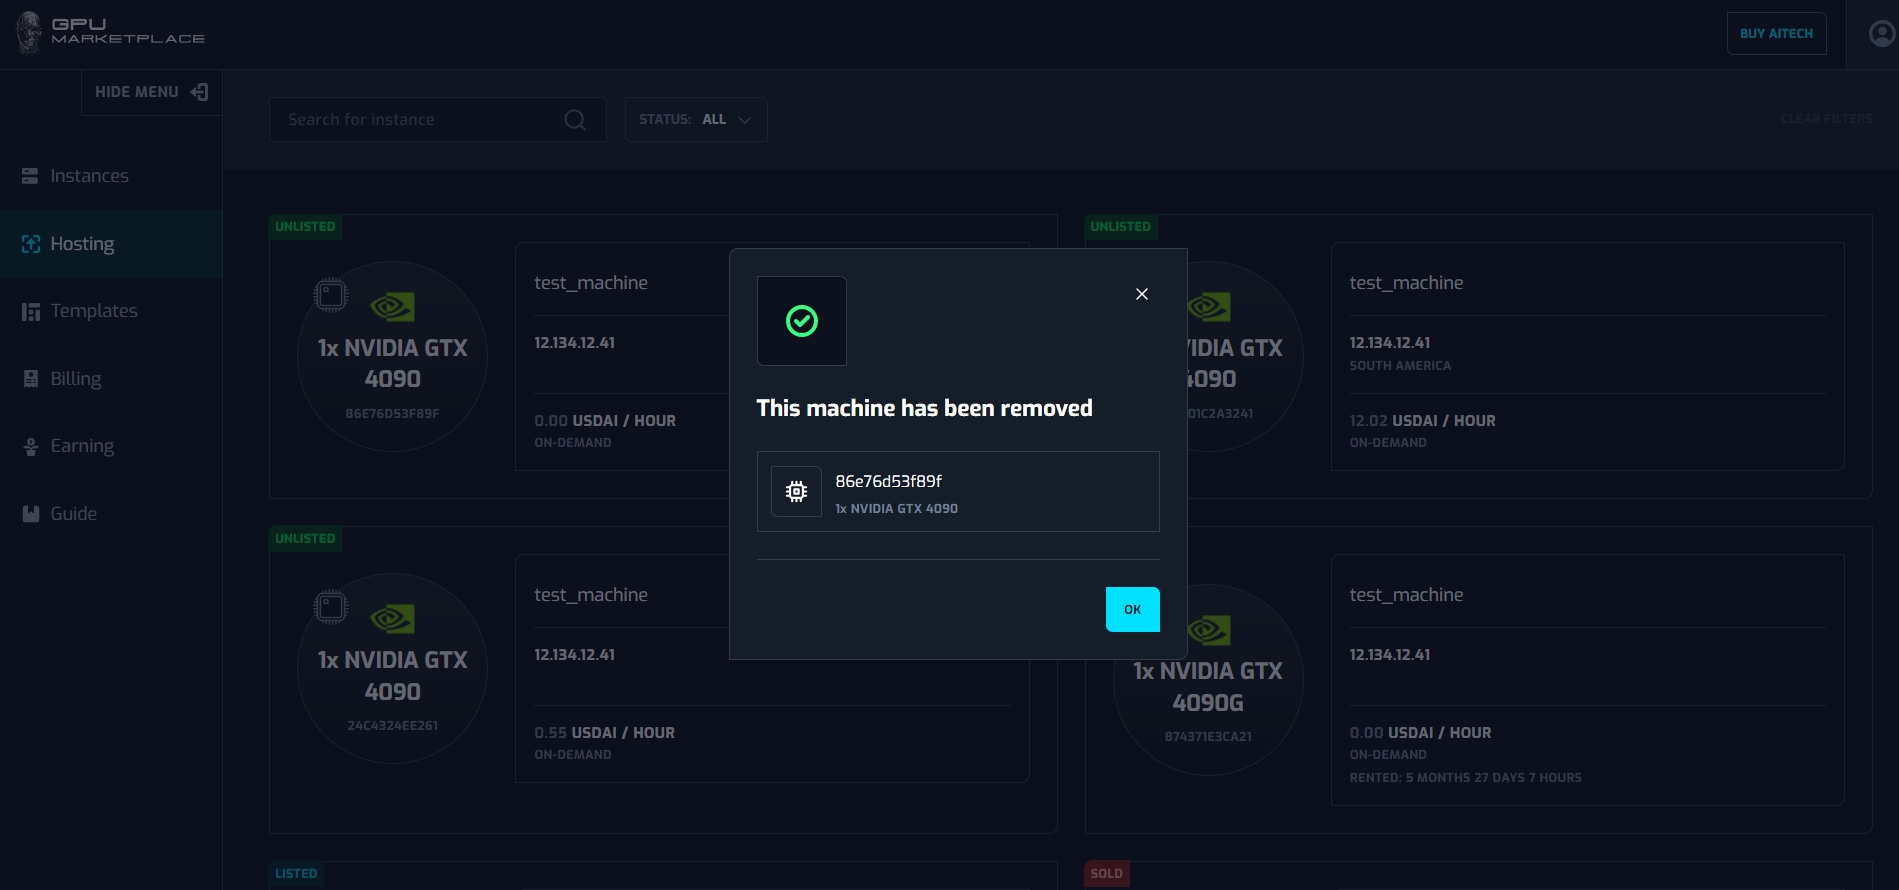
Step 4: System will yield a notification pop up. Click “OK”. The machine will be completely removed from the Hosting section
Case 5: User want to manage machines information
Step 1: Users navigate to “Hosting” on the side bar
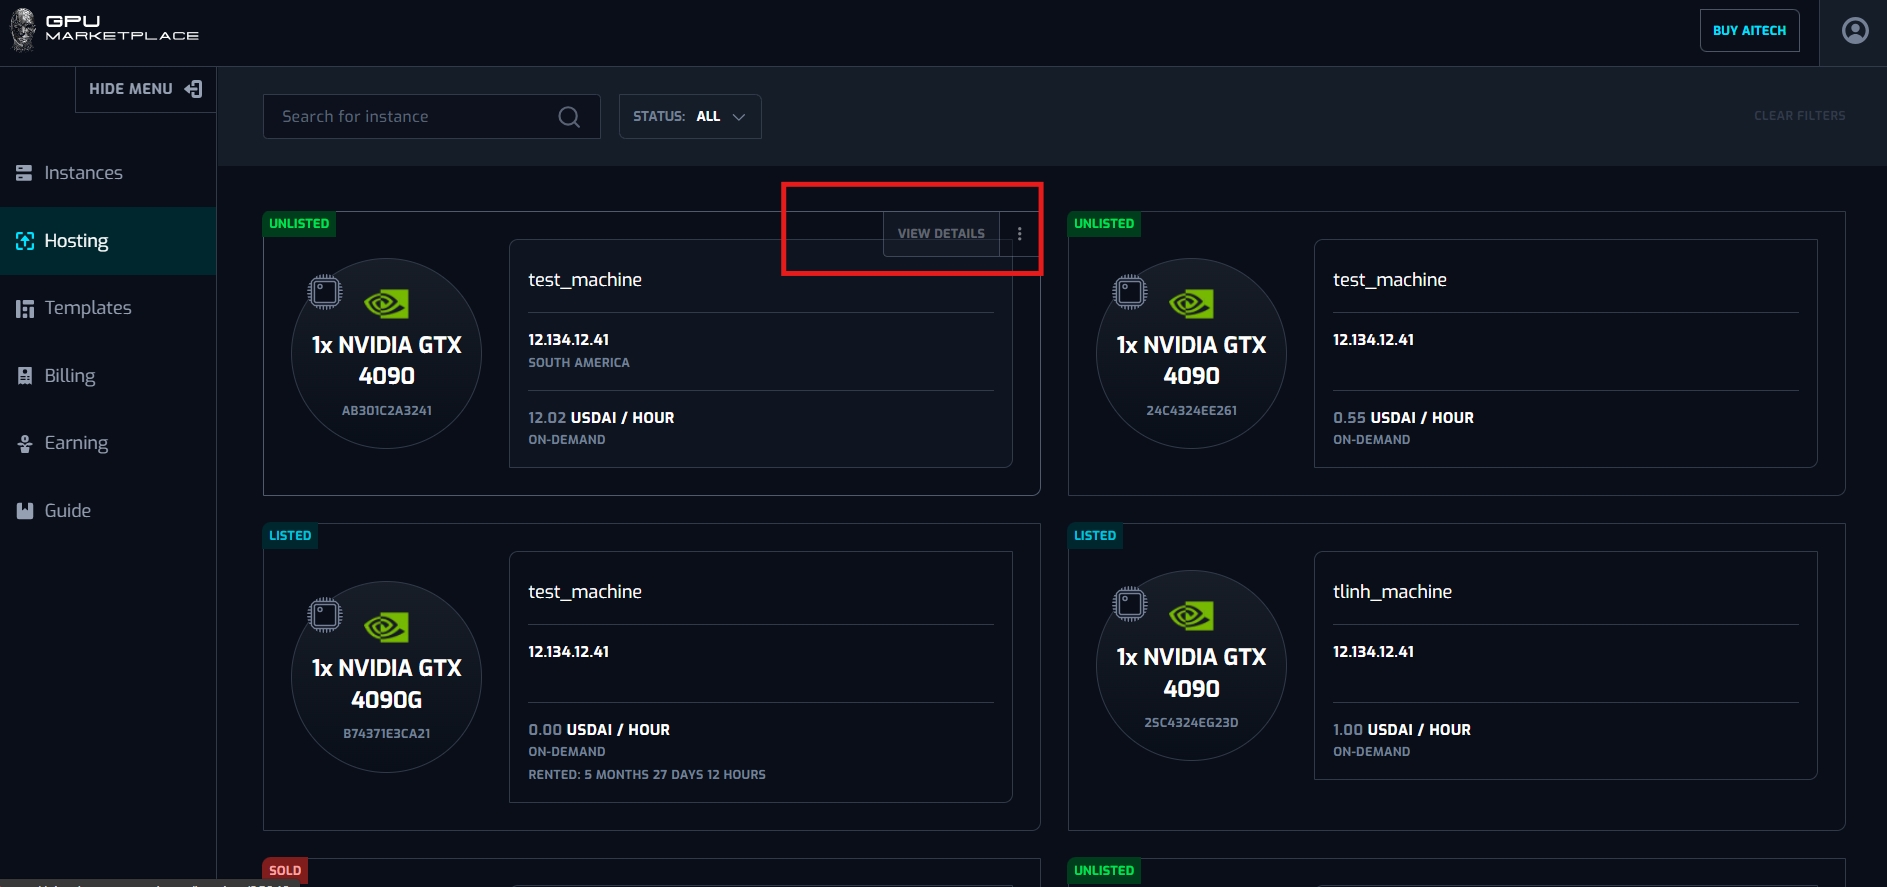
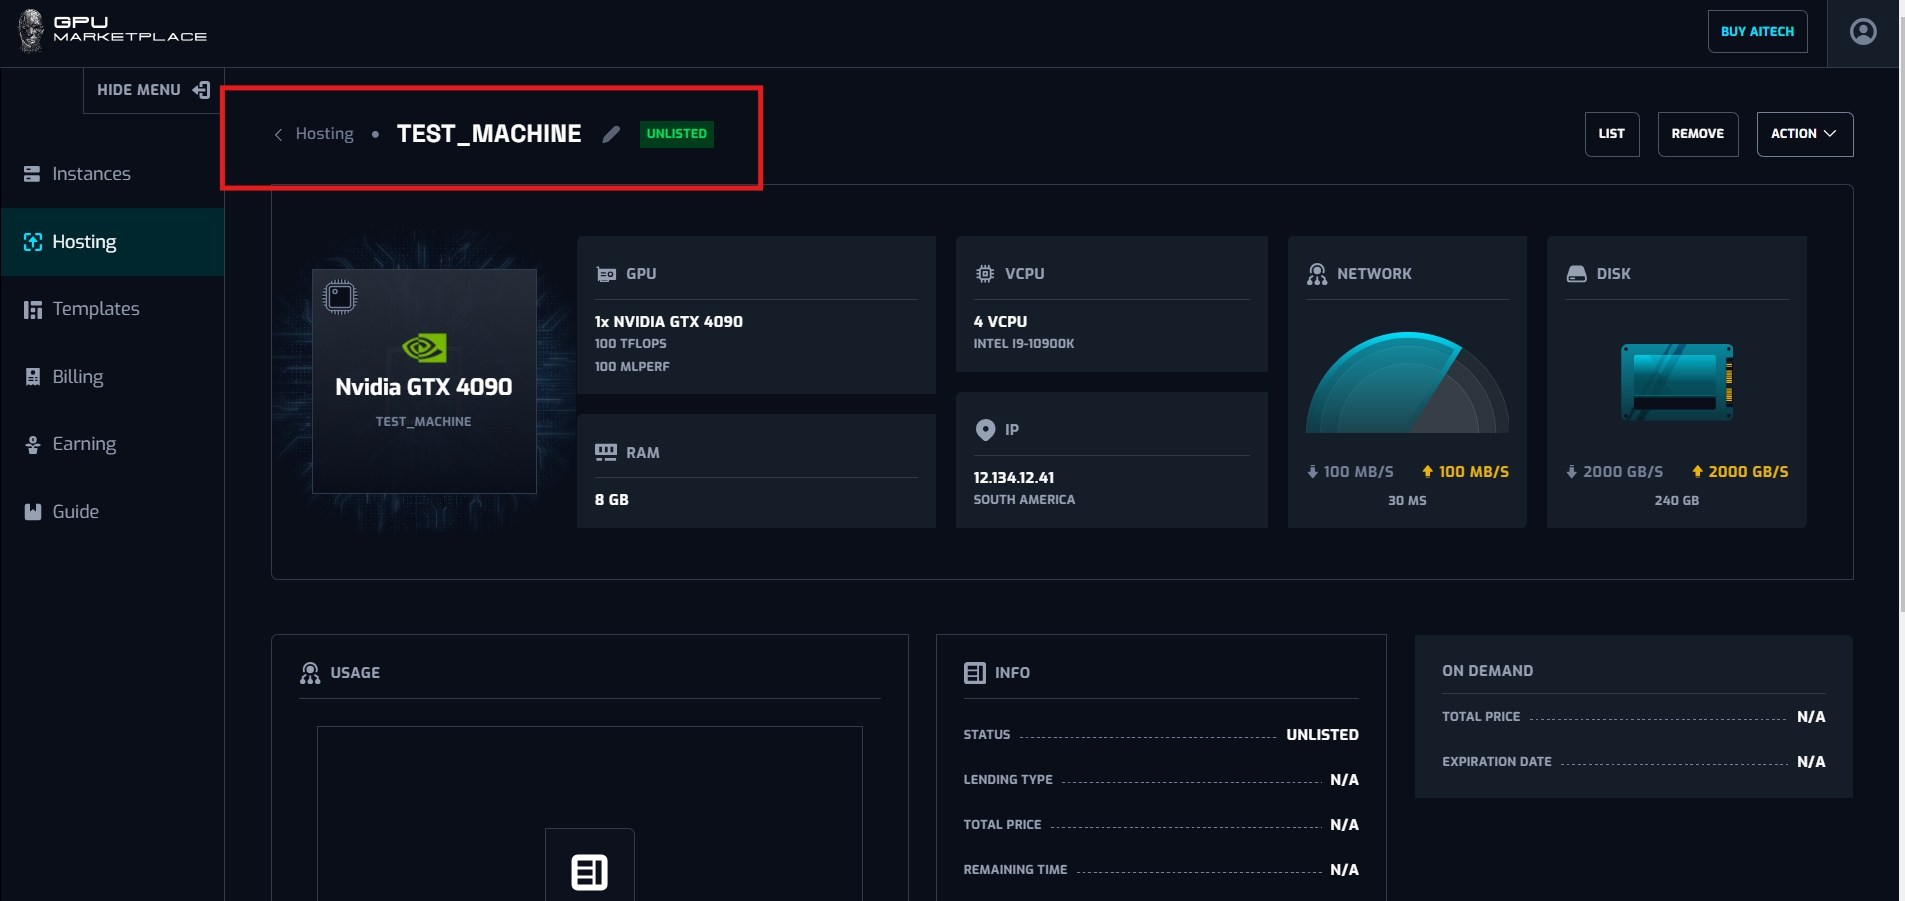
Step 2: User select “View detail” of the machine
Step 3: User will be navigated to the Machine detail screen.User view information in this screen
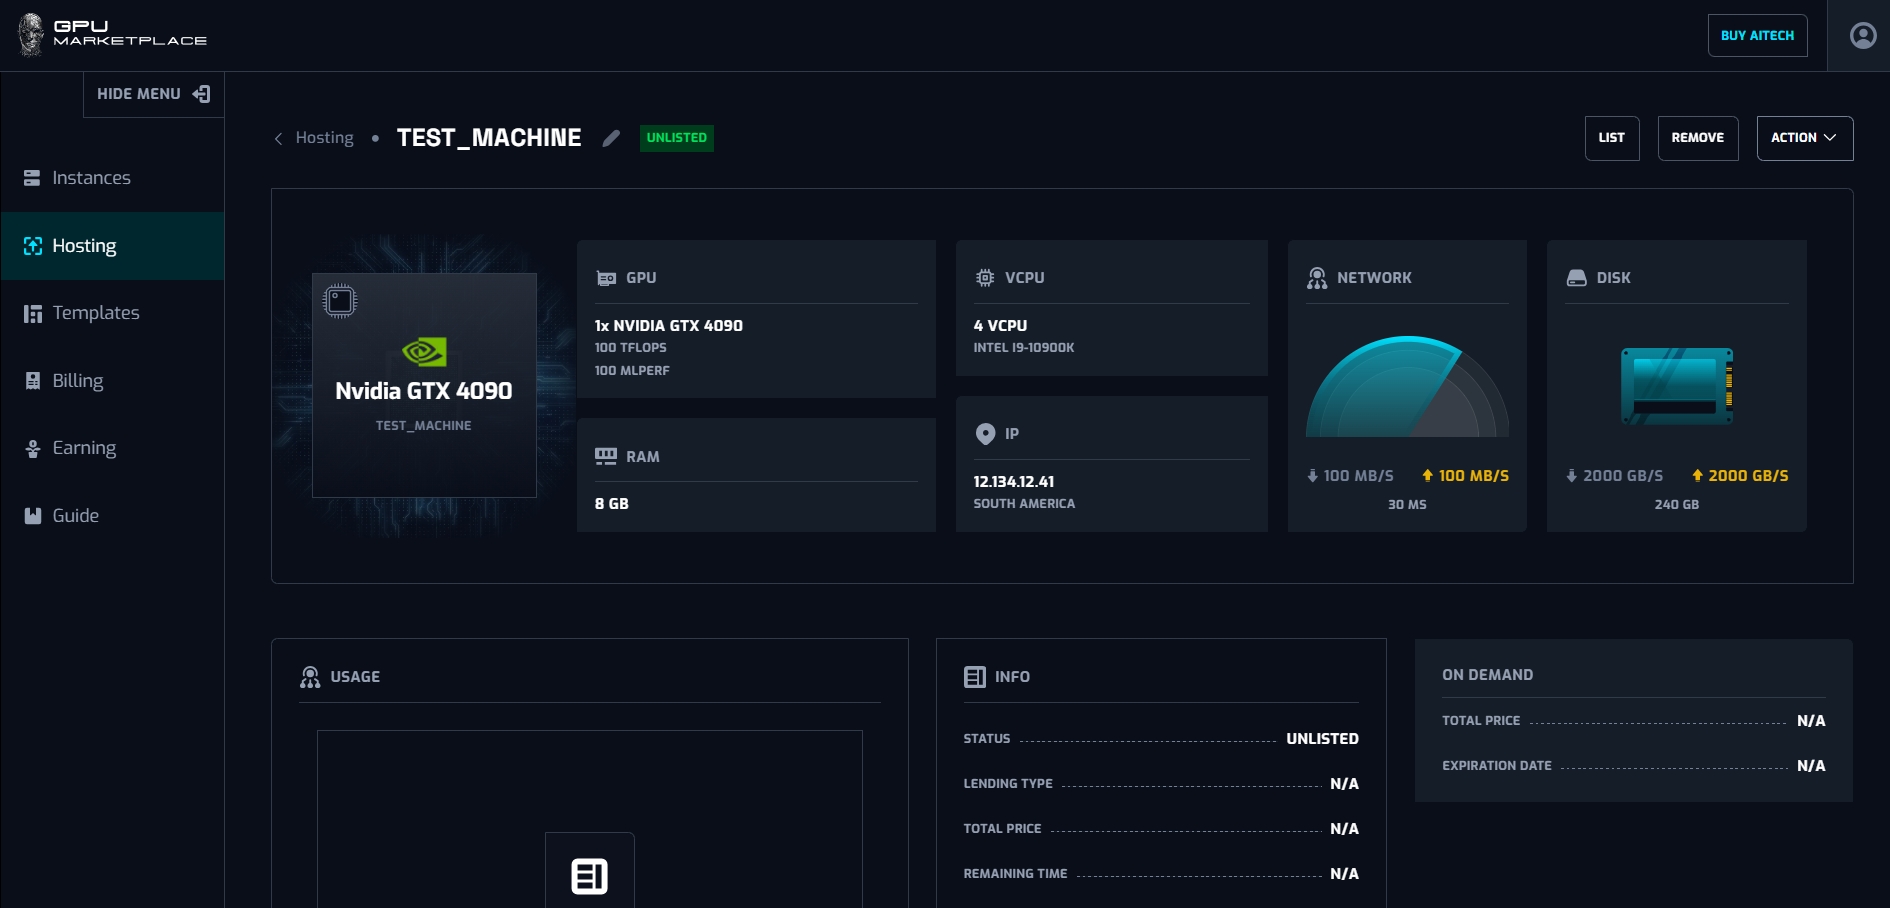
* Users can change machine labels by clicking the Pen icon.
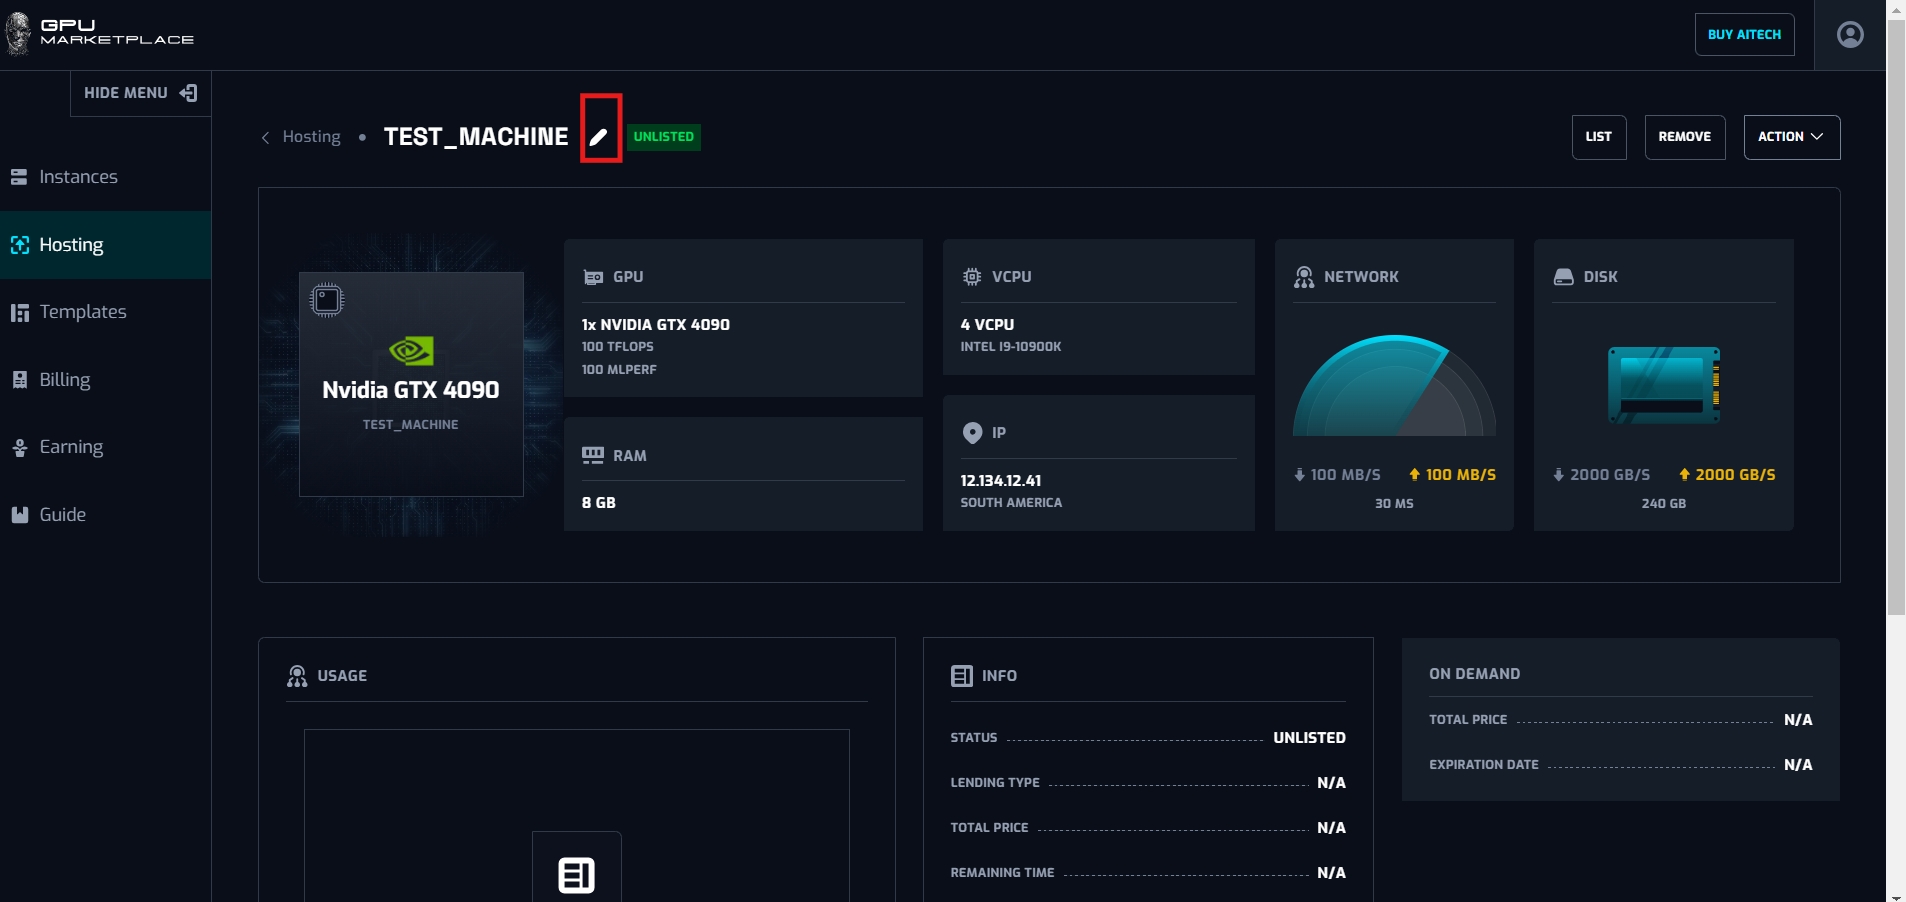
After clicking the pen icon, a pop up will appear. Users can insert a new label of the machine, and click “Change label”. The new label will appear in the top left corner of the screen

No
Component
Type
Description
1
Machine information
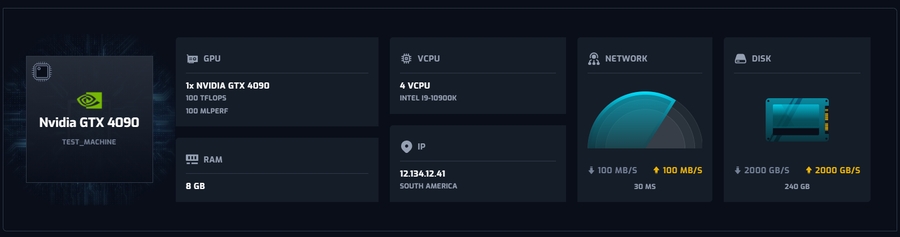
Constance value
Refer to the instance information (Upper table)
2
Usage
Constant value
Describe the usage of the machine.
3
Status
Constant value
Describe machine status (as mentioned above)
4
Lending type
![]()
Constant value
Currently, only on demand. There will be Reservation type in the future
5
Total price
![]()
Constant value
Describe the actual price is used for renting
6
Remaining time

Constant value
Describe the time until the instance expires.
7
On demand pricing

Constant value
Total price: The price set up by the owner
Expiration date: Expiration date of the machine
8
Total lending time

Constant value
Describe the total time a renter has rented this machine, as well as the amount of USDAI the owner has granted for renting the machine.
9
Maintain

Constant value
Describe the maintenance schedule (mentioned in case 3)
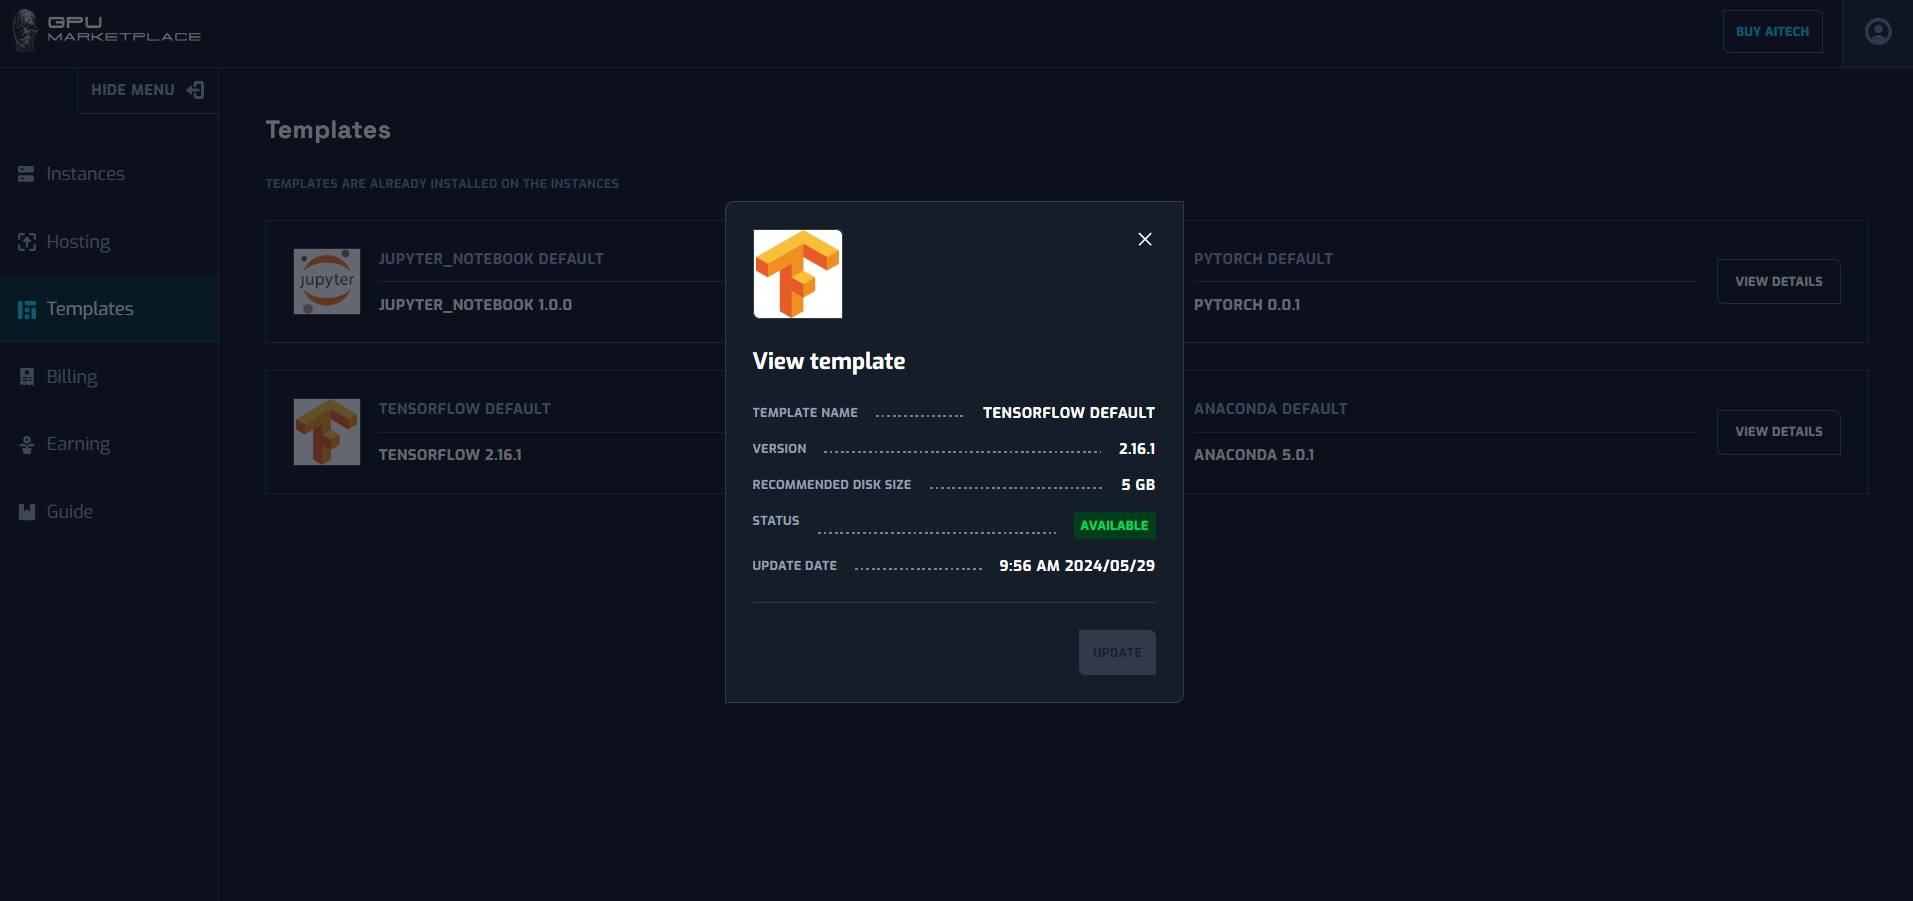
Managing template
Overview: There are 4 default templates created when users start to use the system, including: Jupyter Notebook, Pytorch, Tensorflow, Anaconda. These templates can not be changed (update/delete). Users can only view this template for deploying purposes.
Step 1: Navigate to “Templates” on the sidebar

Step 2: User clicks “View details”
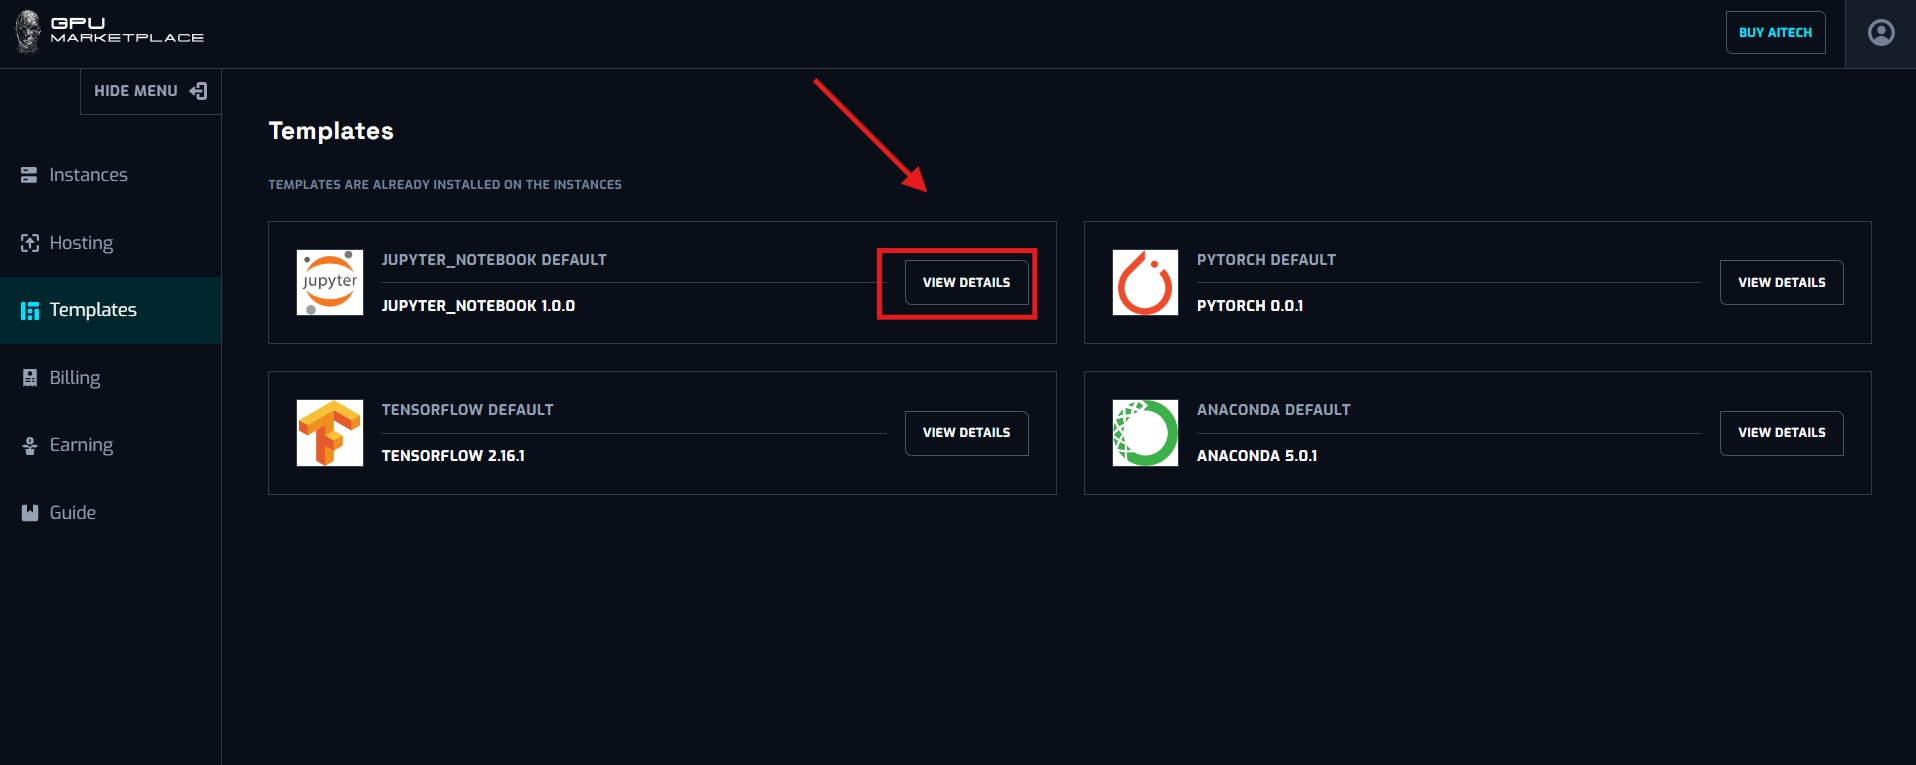
Step 3: System will display the detail pop up of the template
No
Component
Type
Description
1
Template name
![]()
Constance value
Display template name
2
Template version
![]()
Constant value
Display template version
3
Recommended disk size
![]()
Constant value
Display recommended free disk space user needed to install this template
4
Status

Constant value
Display instance status, including:
Available
Unavailable
5
Update date
![]()
Constant value
Display the nearest updated date of the template
6
Remaining time

Constant value
Describe the time until the instance expires.