Publisher Flow Layer 2
Introduction
This guide provides instructions on how to create a Layer 2 Products
Steps
Login to Publisher site
Access the Publisher site by entering your credentials
Api:
- Get OTP:
- Endpoint: POST api/v1/publisher/auth/email/login_otp
- Swagger: Get otp
- Login with OTP receipt above:
- Endpoint: POST api/v1/publisher/auth/email/login
- Swagger: Login
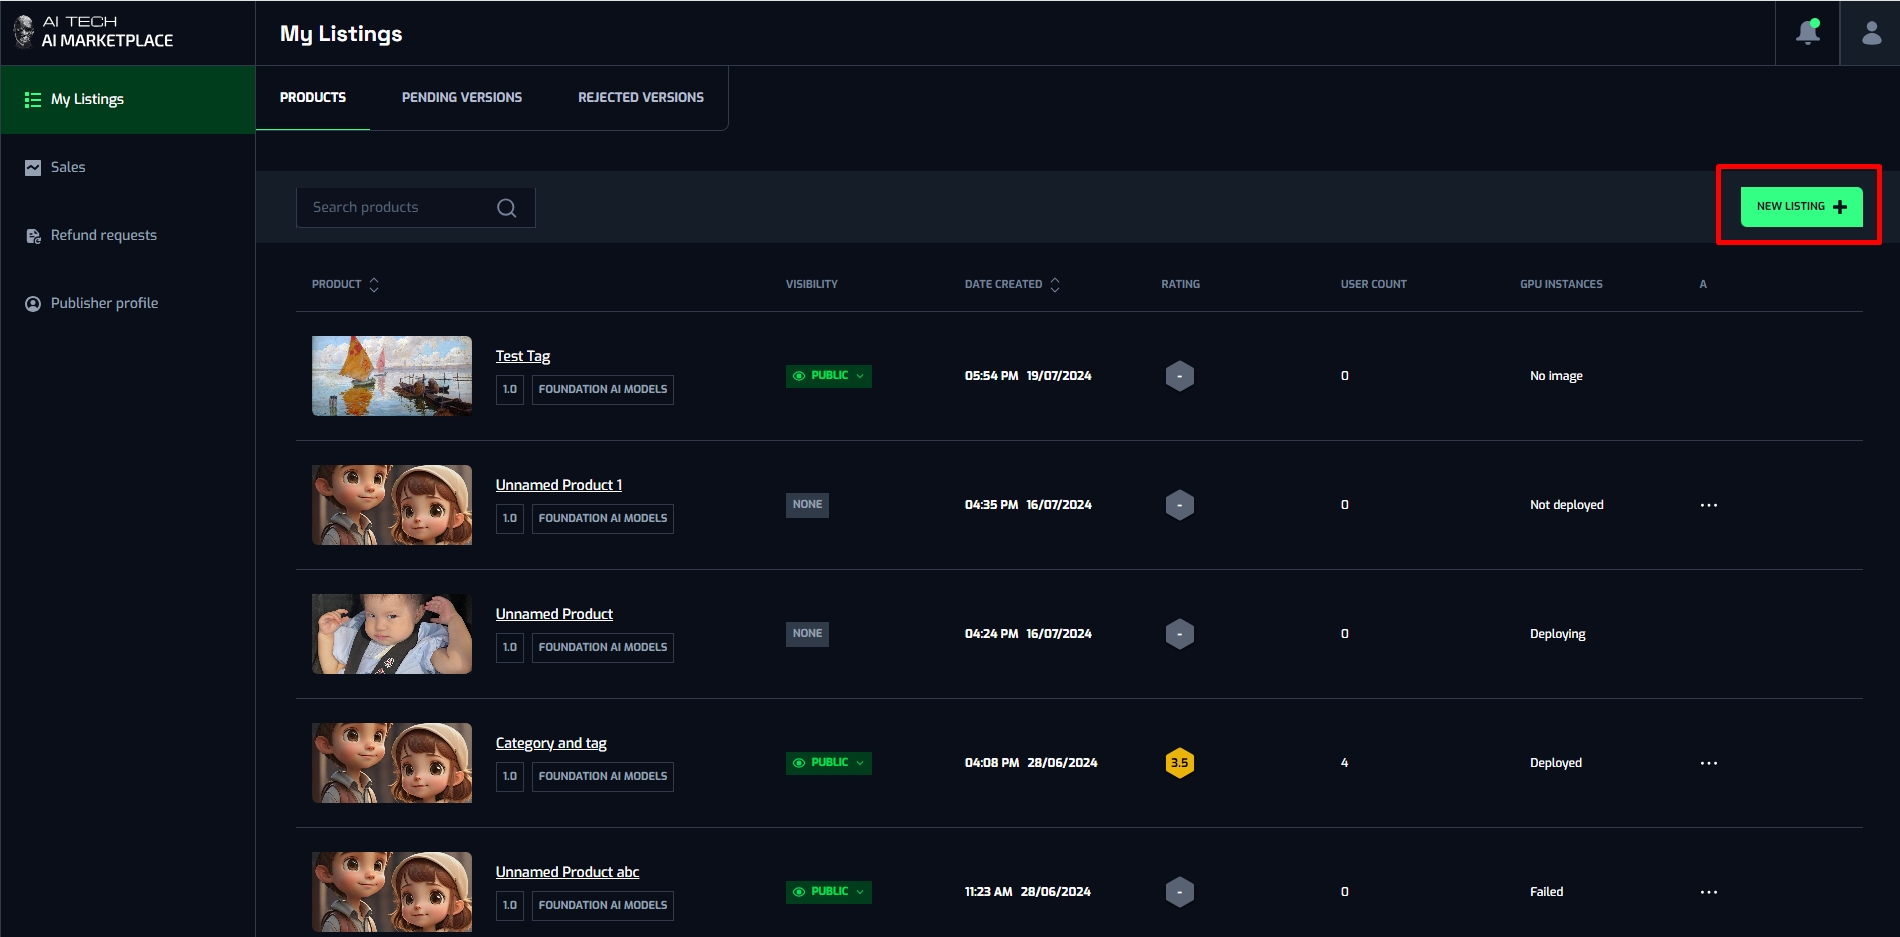
Navigate to New Listing screen
When accessing the Publisher site successfully, the user can see the “New Listing” button on the My Listings page. Click on “New Listing” button to open a new listing popup
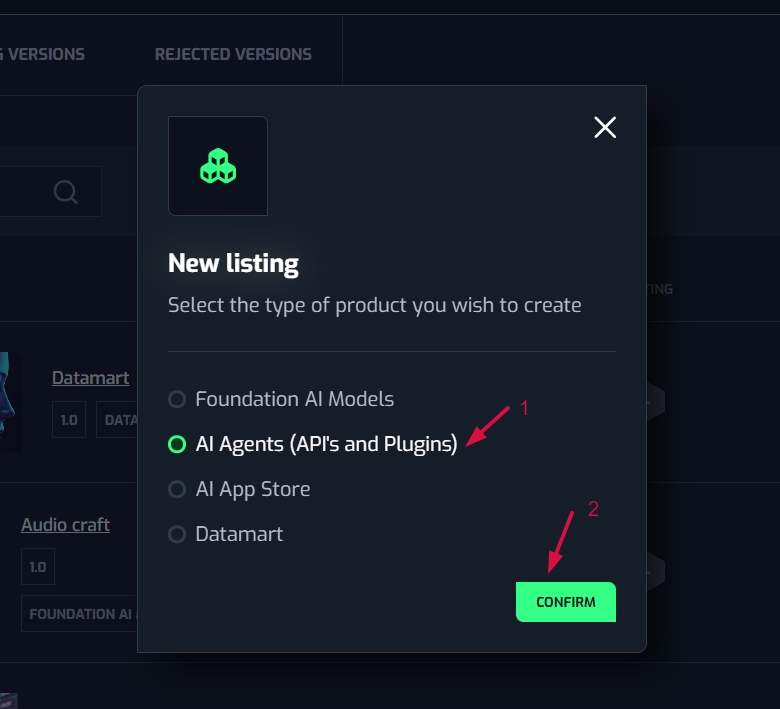
Choose the Layer 2 Product (Foundation AI Models)
On the New Listing popup, choose the first option (Foundation AI Models), then click on “Confirm” button
Api:
- Create Product (Create productId for draft):
- Endpoint: api/v1/publisher/marketplaces/products
- Swagger: POST Publisher create product
Change your version name of the product (optional)
Clicking the Draft button to open a “Change version name” popup
On the “Change version name” popup, enter the new version name and click on the “Change” button to save.
Api:
- Save version changes:
- Endpoint: api/v1/publisher/marketplaces/submissions
- Swagger: POST Save version
About tab
On the Create New Listing screen, the About tab is default selected.
User need to fill the product information into the required fields, including:
- Product Name - this field is default displayed in Unnamed Product, you can fill by another name
- Thumbnail: upload a product’s thumbnail
- Product Description
- About Section
- Tags: you can search the tags for your product
- Category: you can search the category for your product
Other the optional fields you can fill up, including:
- Video URL
- App Demo URL
Usage tab
Navigate to Usage tab by clicking on the “Next” button on the About tab
- If you deploy manually, you will need to do the entire deployment of your AI app yourself according to the standard documentation there. After deploying successfully, please enter the public url of the AI app here.
- If you can't deploy it yourself, please save the contact support email. After submitting your product, please email us here to speed up your product deployment.

- Fill the max number of user
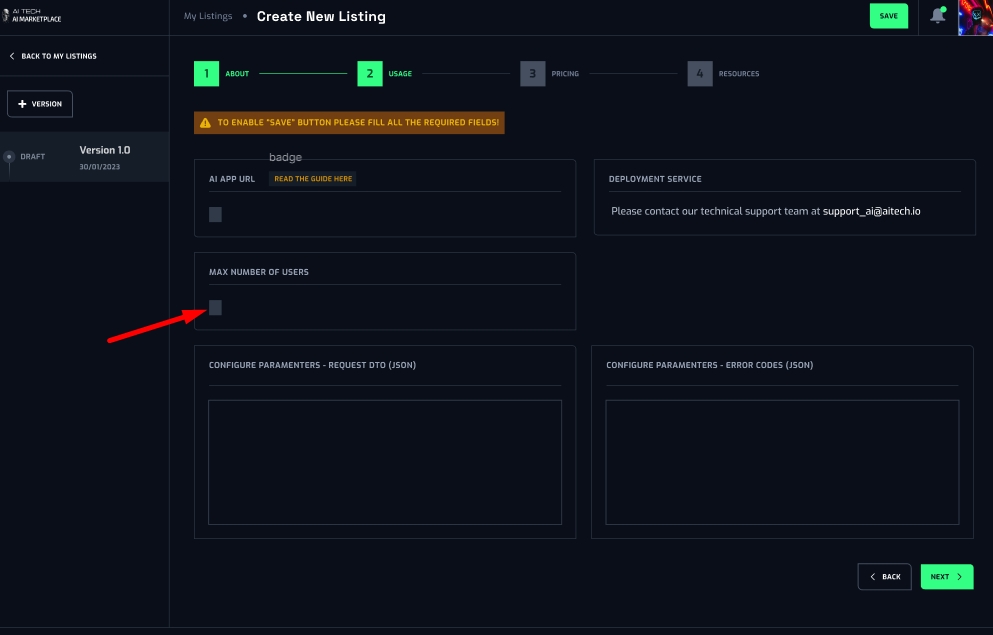
- Enter Json format into Request DTO and Response DTO
- Request DTO and Response DTO is the definition of input and output data that helps users understand and use AI App
- They must be JSON type
- Request DTO must follow by standard development documentation
Pricing tab
Go to Pricing tab by clicking on “Next” button on the Usage tab
- Choose the Product Model:
- One time purchase
- Subscription
- Enter your product net price. The system will automatically calculate your corresponding product price which includes a system fee
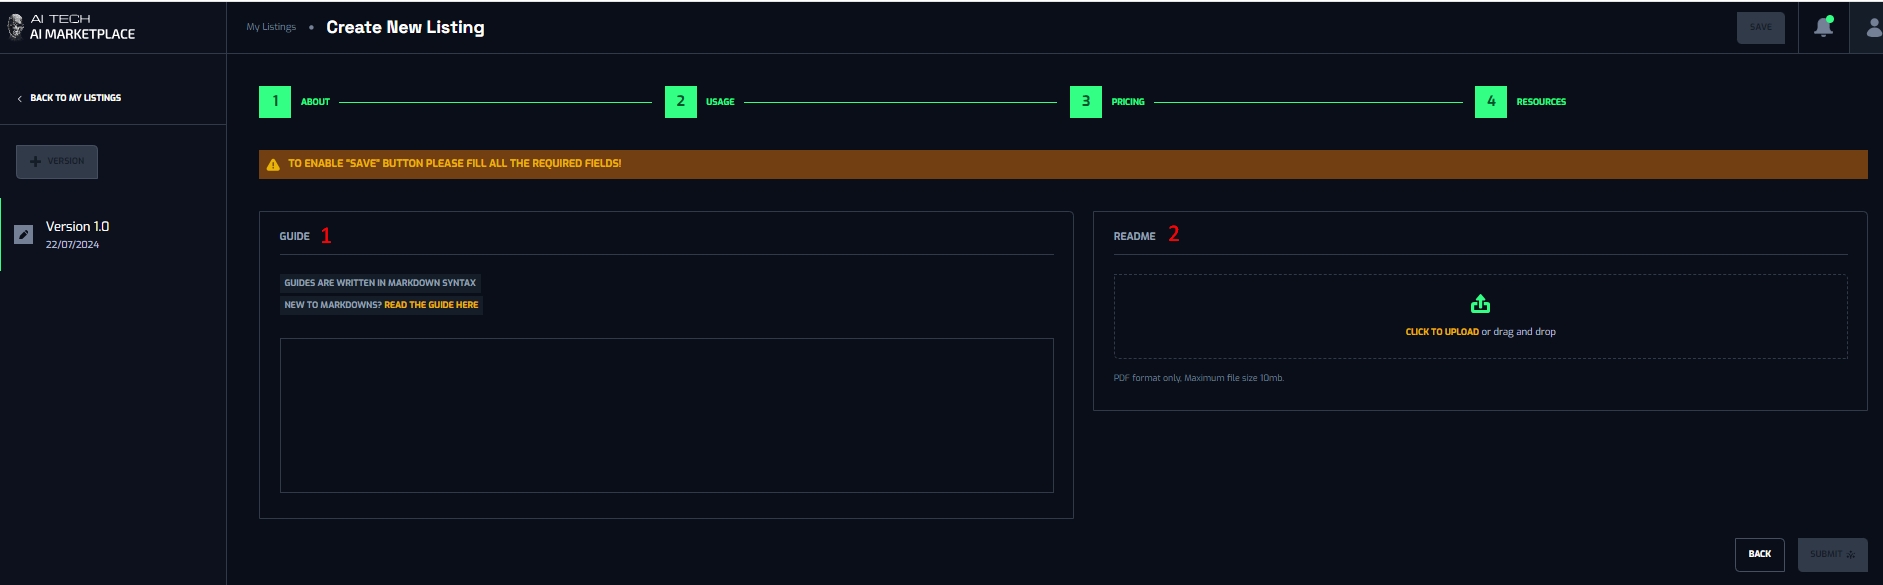
Resources tab
- Enter your product guide
- Upload your Readme file
Note: Two fields in the Resources tab is optional fields
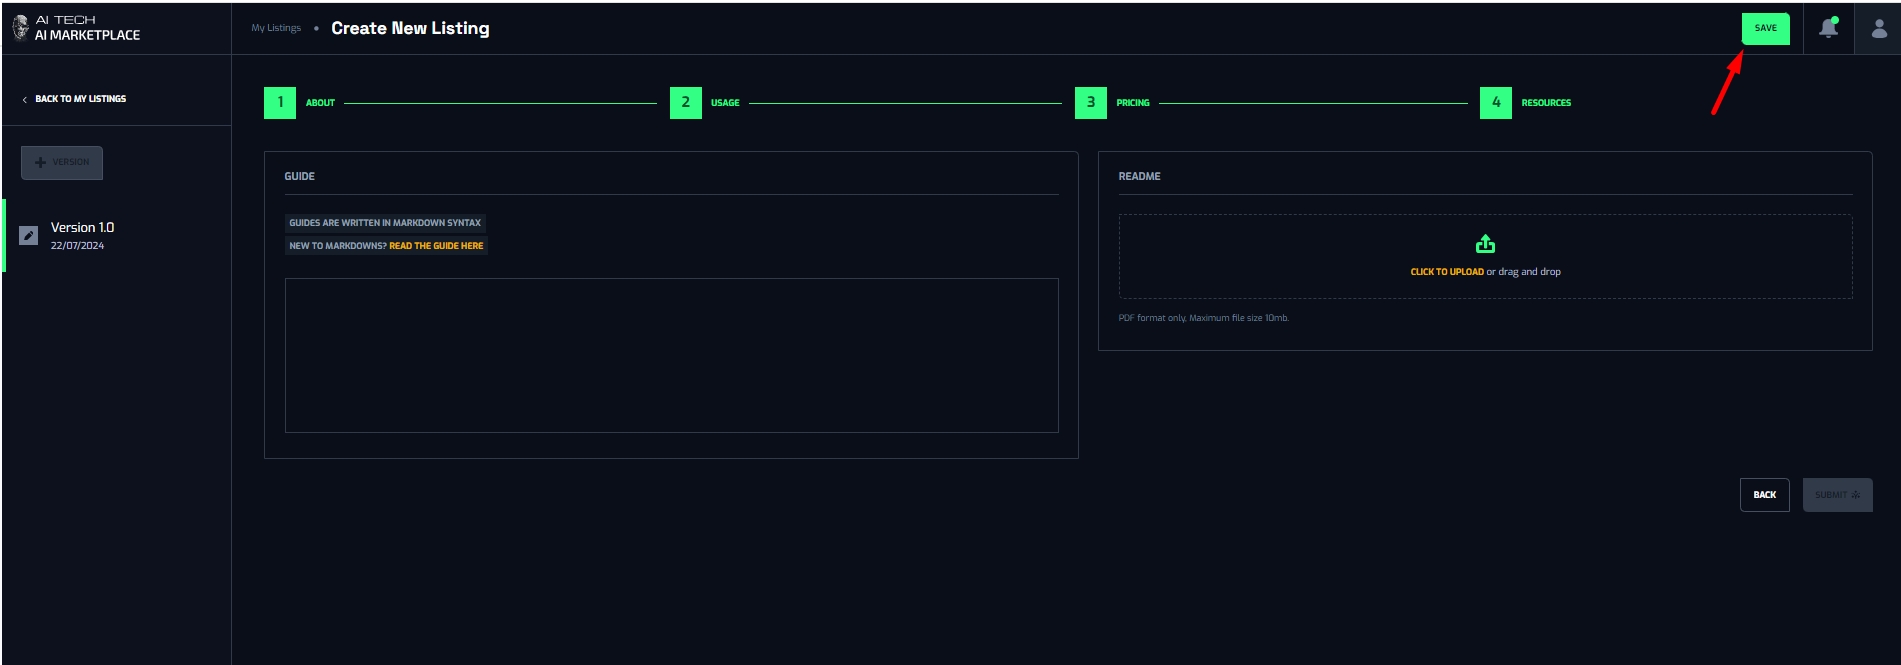
Save your process
After filling up the value into all mandatory fields in each tab, the “Save” button will be enabled to click.
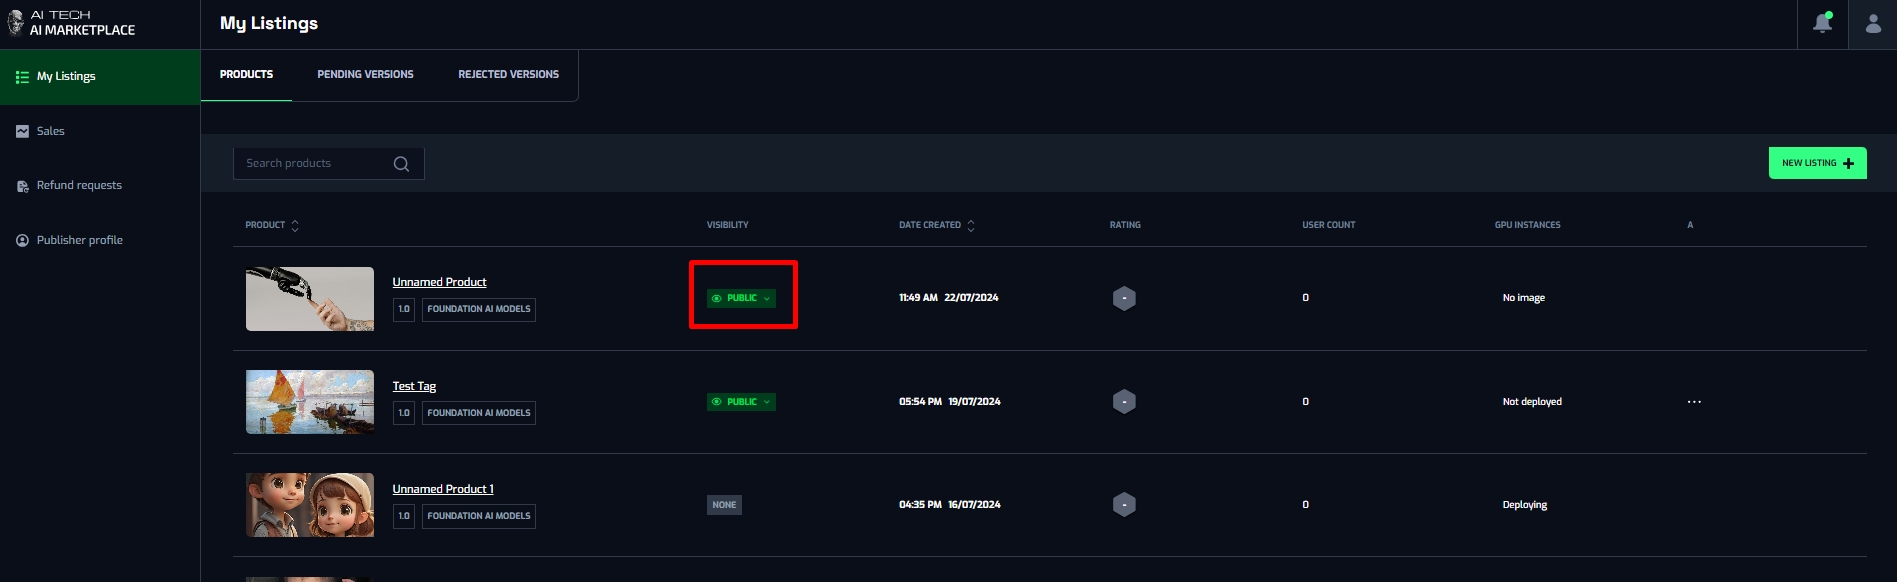
Click on Save, the new product has been created successfully and displayed in the My Listing page with the Draft version.
Api:
- Save version changes:
- Endpoint: POST api/v1/publisher/marketplaces/submissions
- Swagger: Save version
Submit product
After saving your product, “Submit” button will be enabled. Click on it to submit your product to Admin to review.
Api:
- Save version changes:
- Endpoint: POST
api/v1/publisher/marketplaces/submissions/{productId}/submit - Swagger: Submit submission
- Endpoint: POST
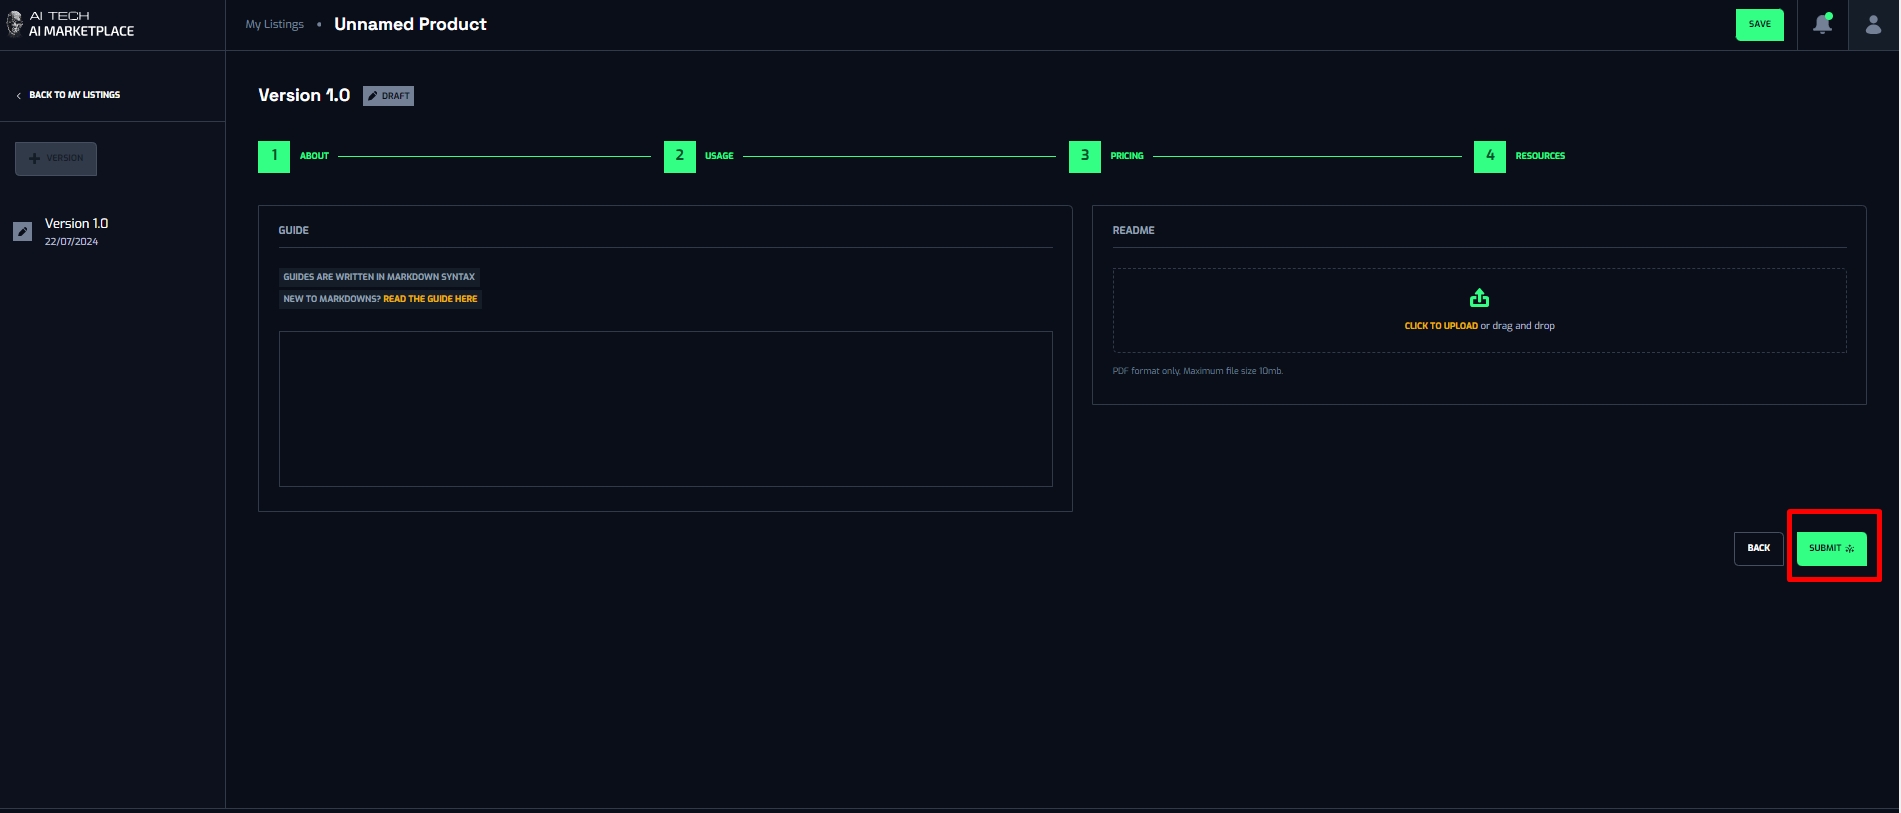
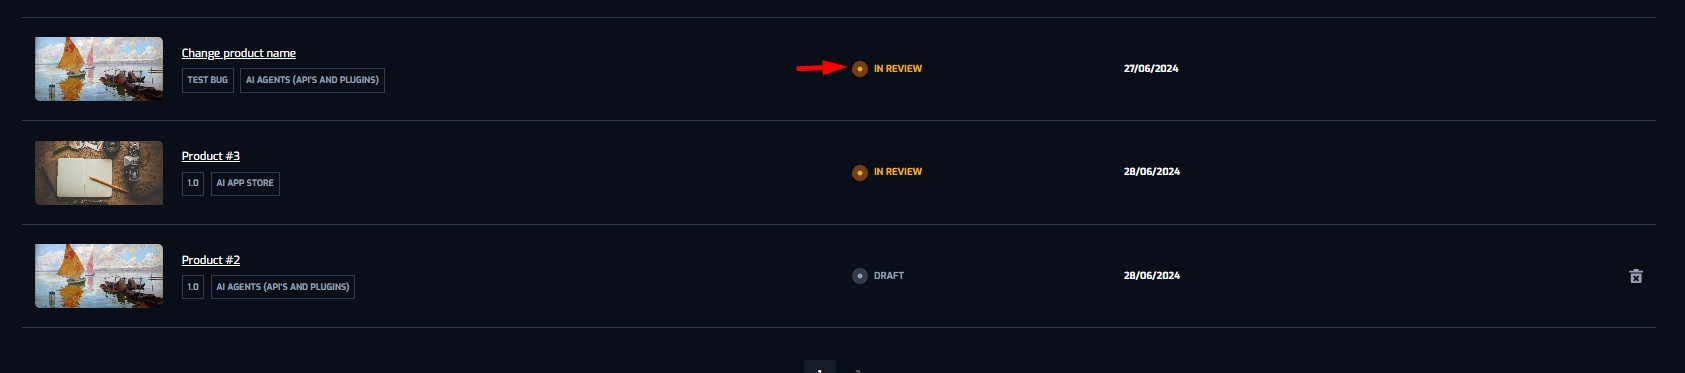
The submitted product will be displayed in the Pending tab with status “In review”
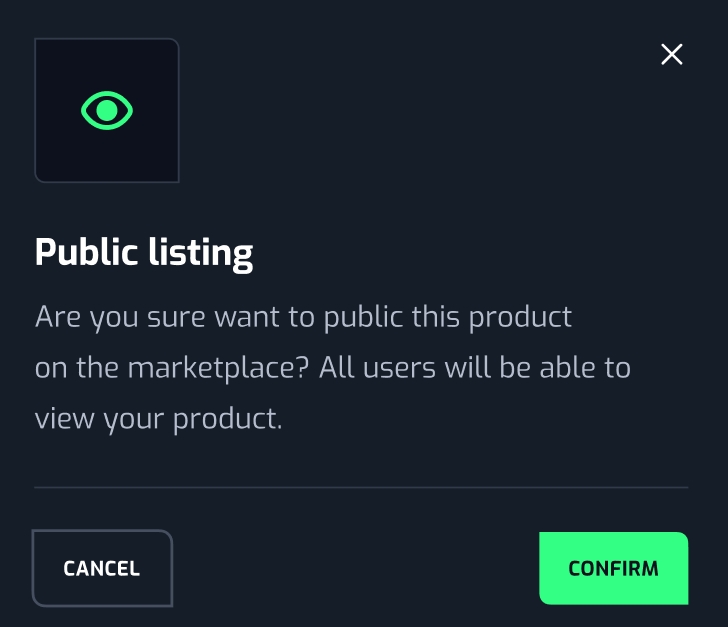
Public product
After approval by Admin, the product’s visibility in the Products tab will be “Private”. Click on it, a confirmation popup will appear.
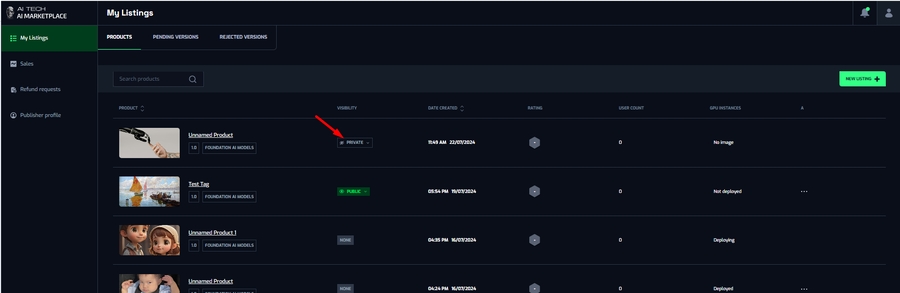
Click on the “Confirm” button on the “Public listing” popup to publicize your product on Marketplace
Api:
- Save version changes:
- Endpoint: POST
api/v1/publisher/marketplaces/products/{productId}/change-visibility - Swagger: Publisher change visibility
- Endpoint: POST
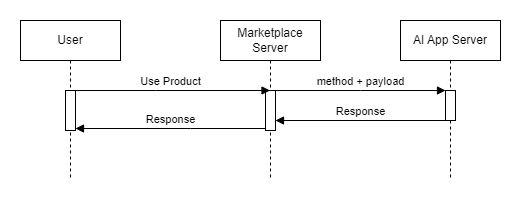
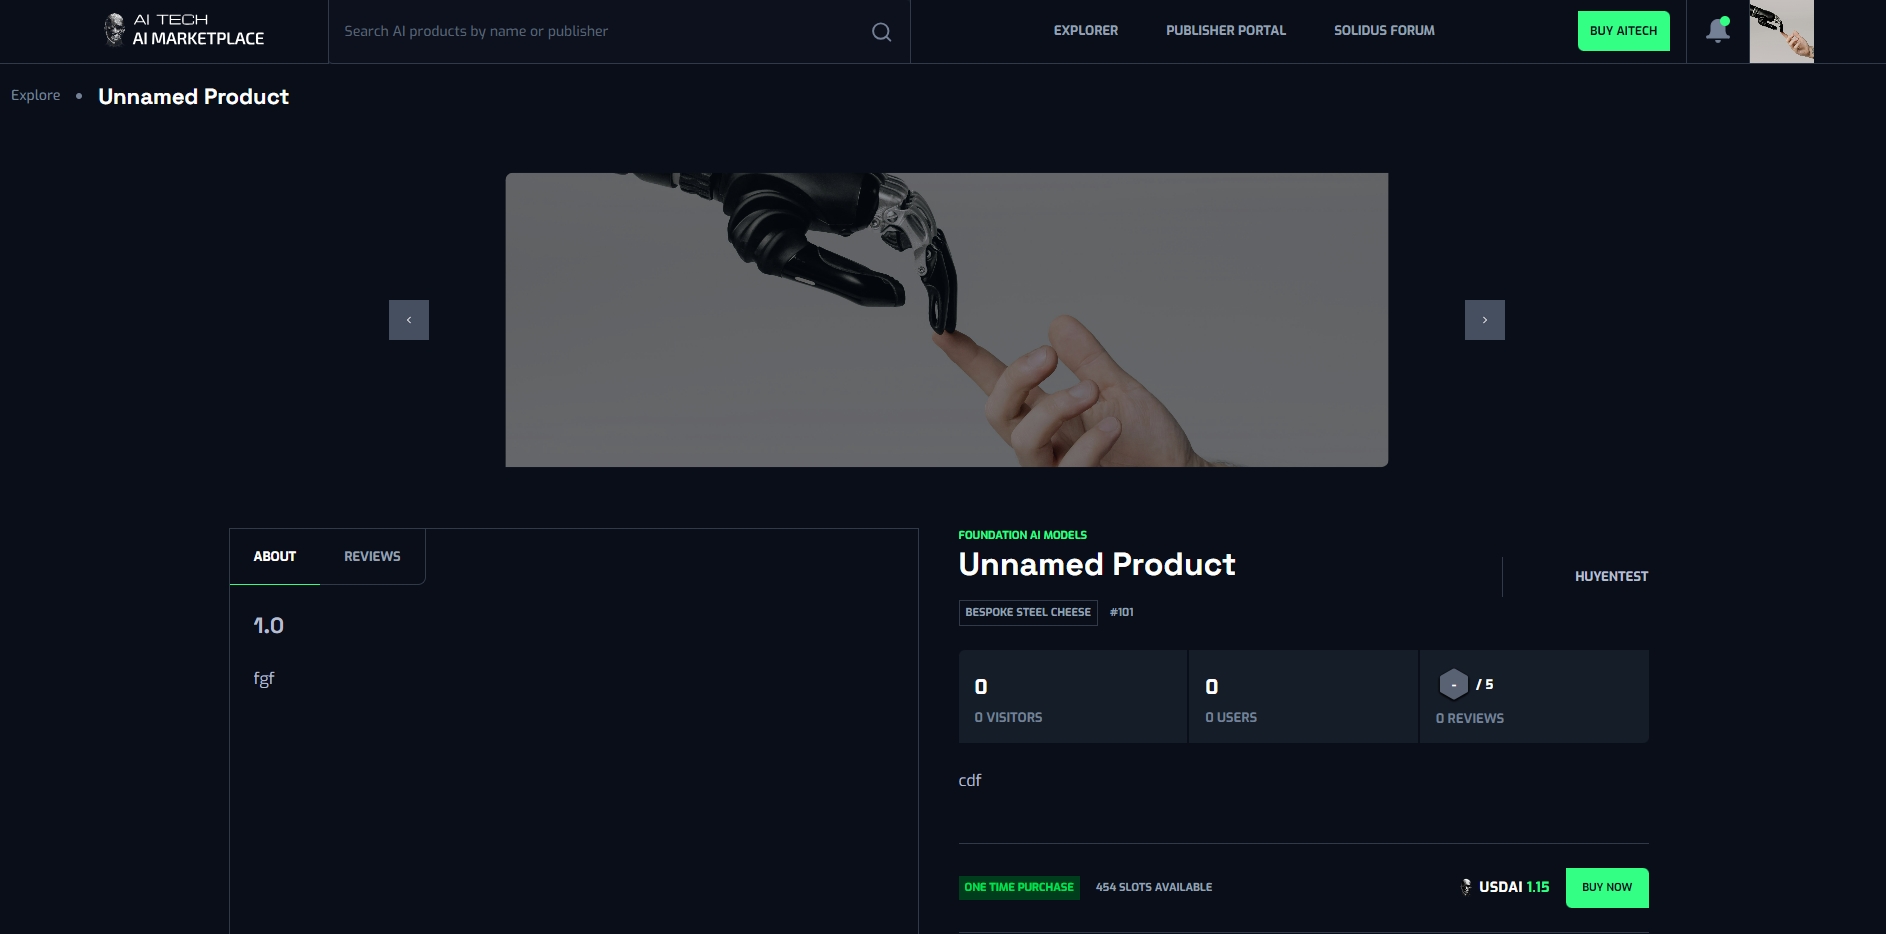
Use product
Documentation on using the app is described in detail here: L1 - L2 usage guide
- Open product detail
- Click on Usage tab

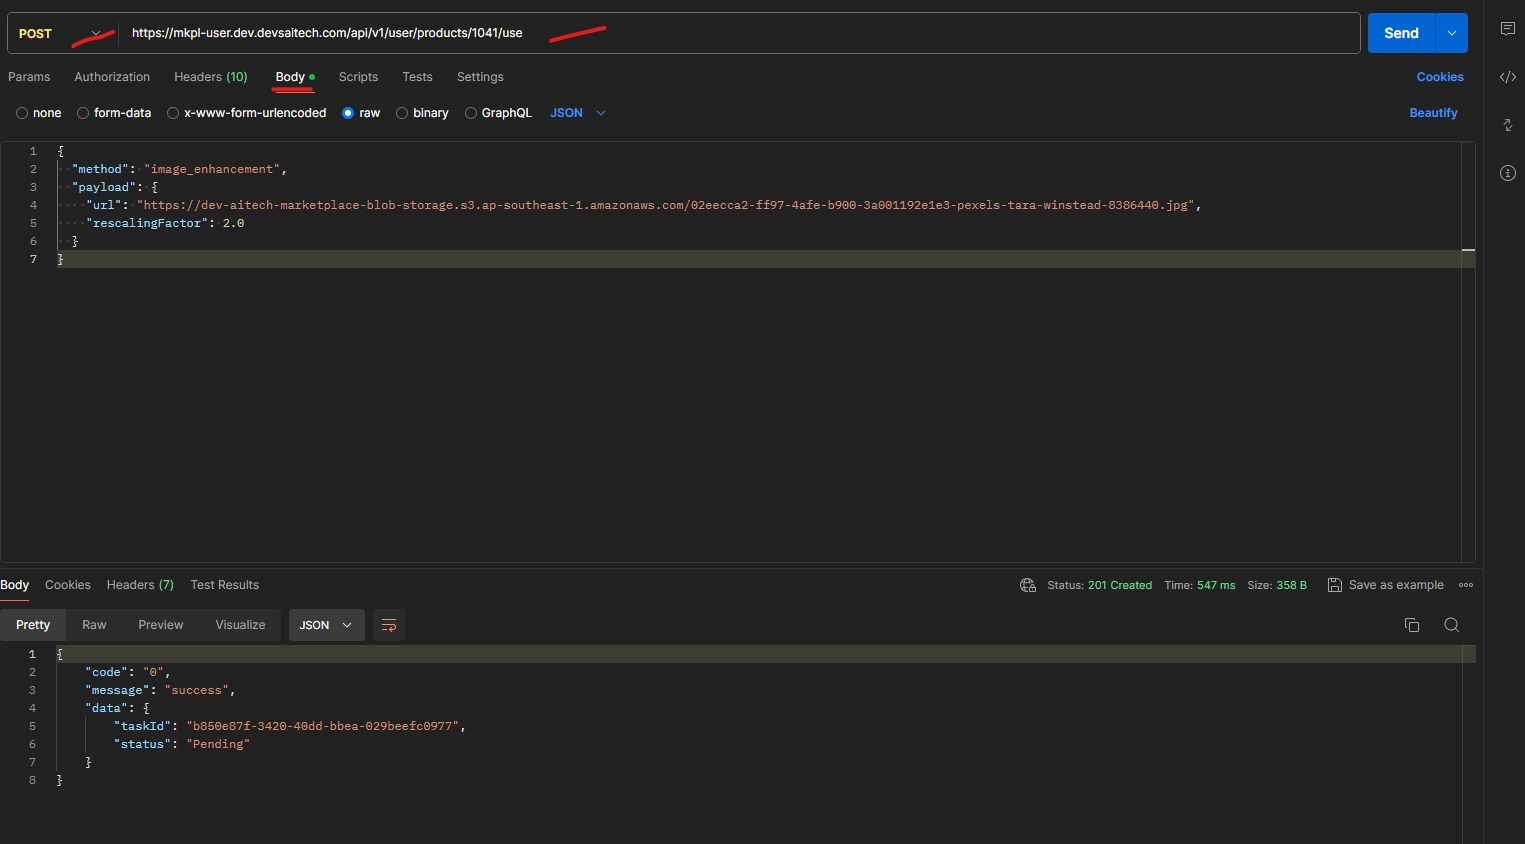
- Example with Postman:
Method: POST
URL get from Usage tab - Product - URL
Header: x-product-api-key: get from Usage tab - Product - Access token Body
Deploy AI model to machine
- Install docker and docker compose: https://docs.docker.com/engine/install/ubuntu/
- Install NVidia driver on vm:
- Add the NVIDIA package repositories
- sudo apt update
- sudo apt install -y software-properties-common
- sudo add-apt-repository ppa:graphics-drivers/ppa
- sudo apt update
- Install the NVIDIA driver:
- Find the recommended driver version for your GPU from the repository:
- ubuntu-drivers devices
- Install the recommended driver (current the nvidia-driver-535 is suitable):
- sudo apt install -y nvidia-driver-535
- Install NVIDIA docker toolkit https://docs.nvidia.com/datacenter/cloud-native/container-toolkit/latest/install-guide.html
- Add the NVIDIA package repositories
- Prepare docker-compose for AI services:
- Here is an example of docker-compose.yaml file that wrote for storyboard before:
version: '3.8'
services:
  story_board:
    image: storyboard
    container_name: storyboard
    restart: always
    port:5000:5000
    networks:
      - aimarket-audiocraft
    runtime: nvidia
    environment:
      - NVIDIA_VISIBLE_DEVICES=0