Renting Instances
After the user finishes all the basic set up in “Account settings”, User can start exploring the system. One of the main functions, as mentioned above, is renting.
Renting instances on demand
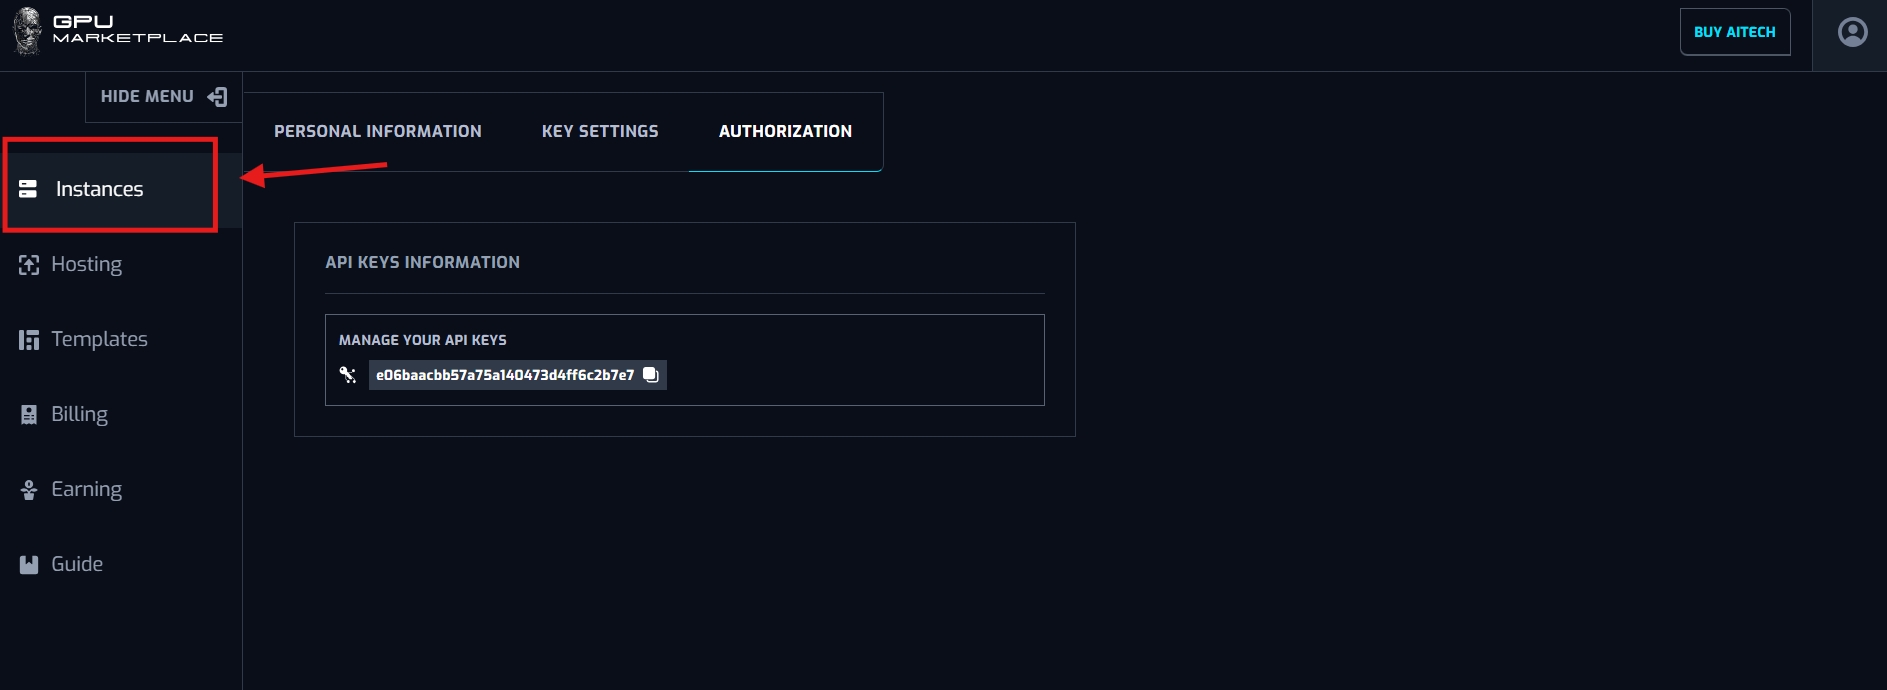
Step 1: Navigate to “Instance” on the sidebar
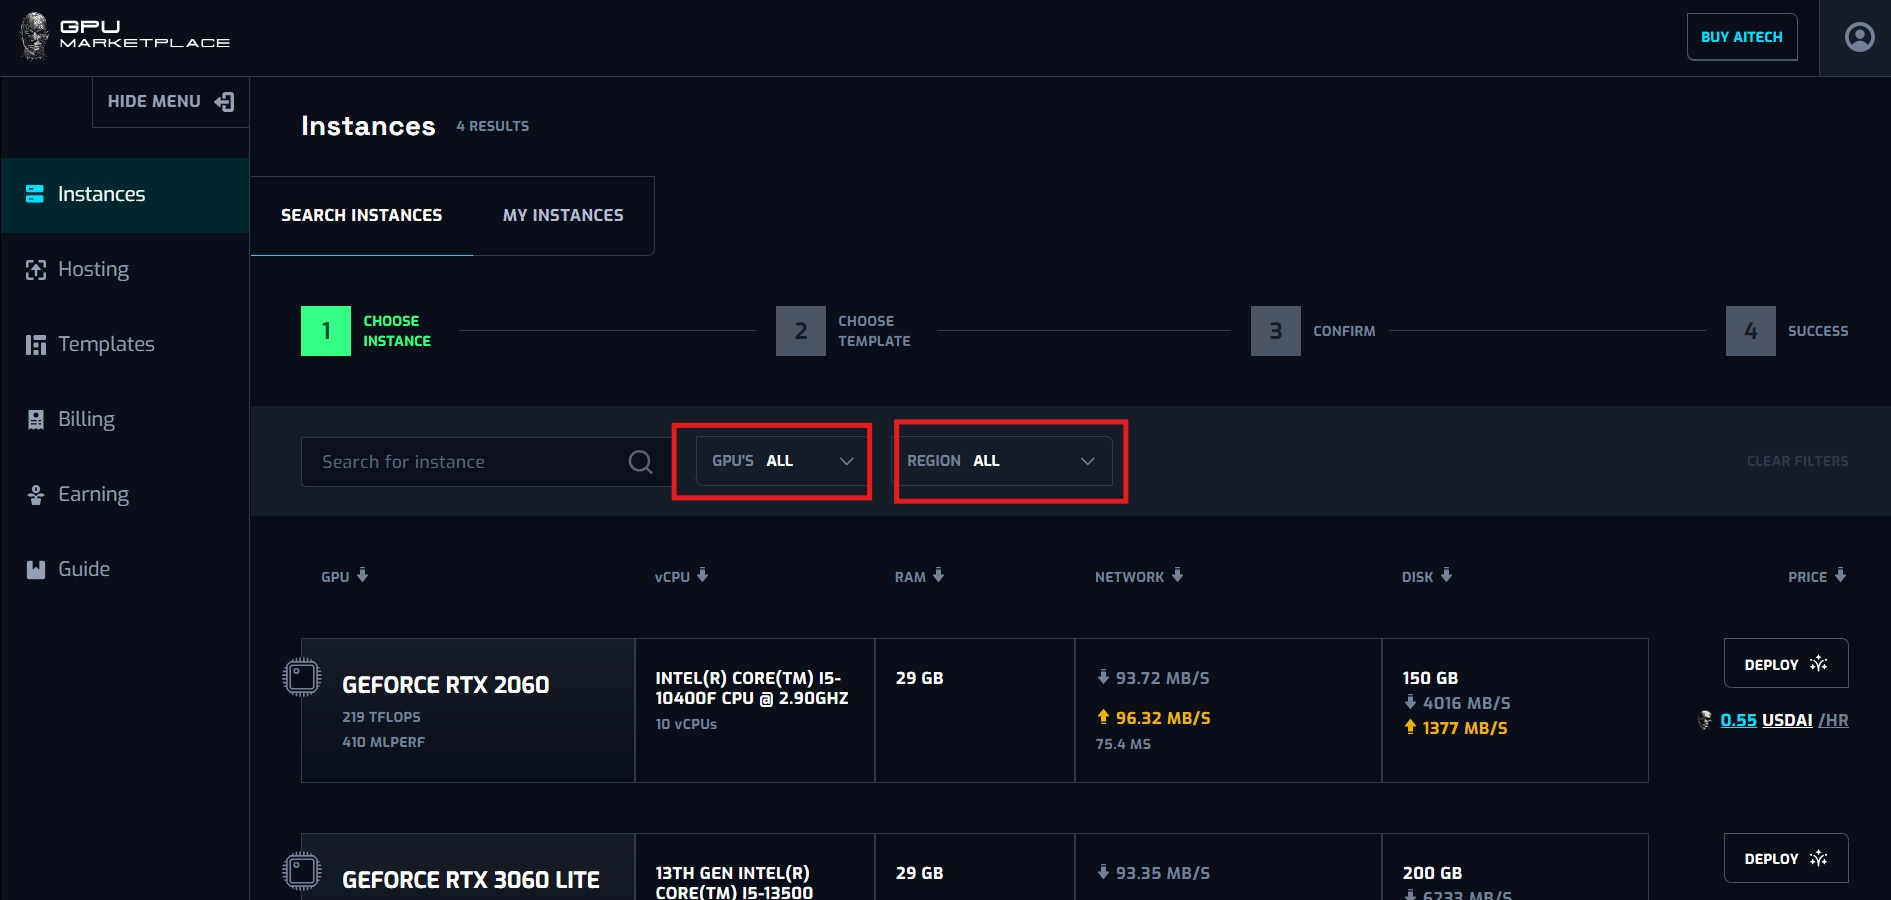
Step 2: User now has access to the marketplace. Here he/she can choose instances of their needs. Users can use a search function, to search for GPU/CPU names, or can utilize GPU and Region Filter to find what they need
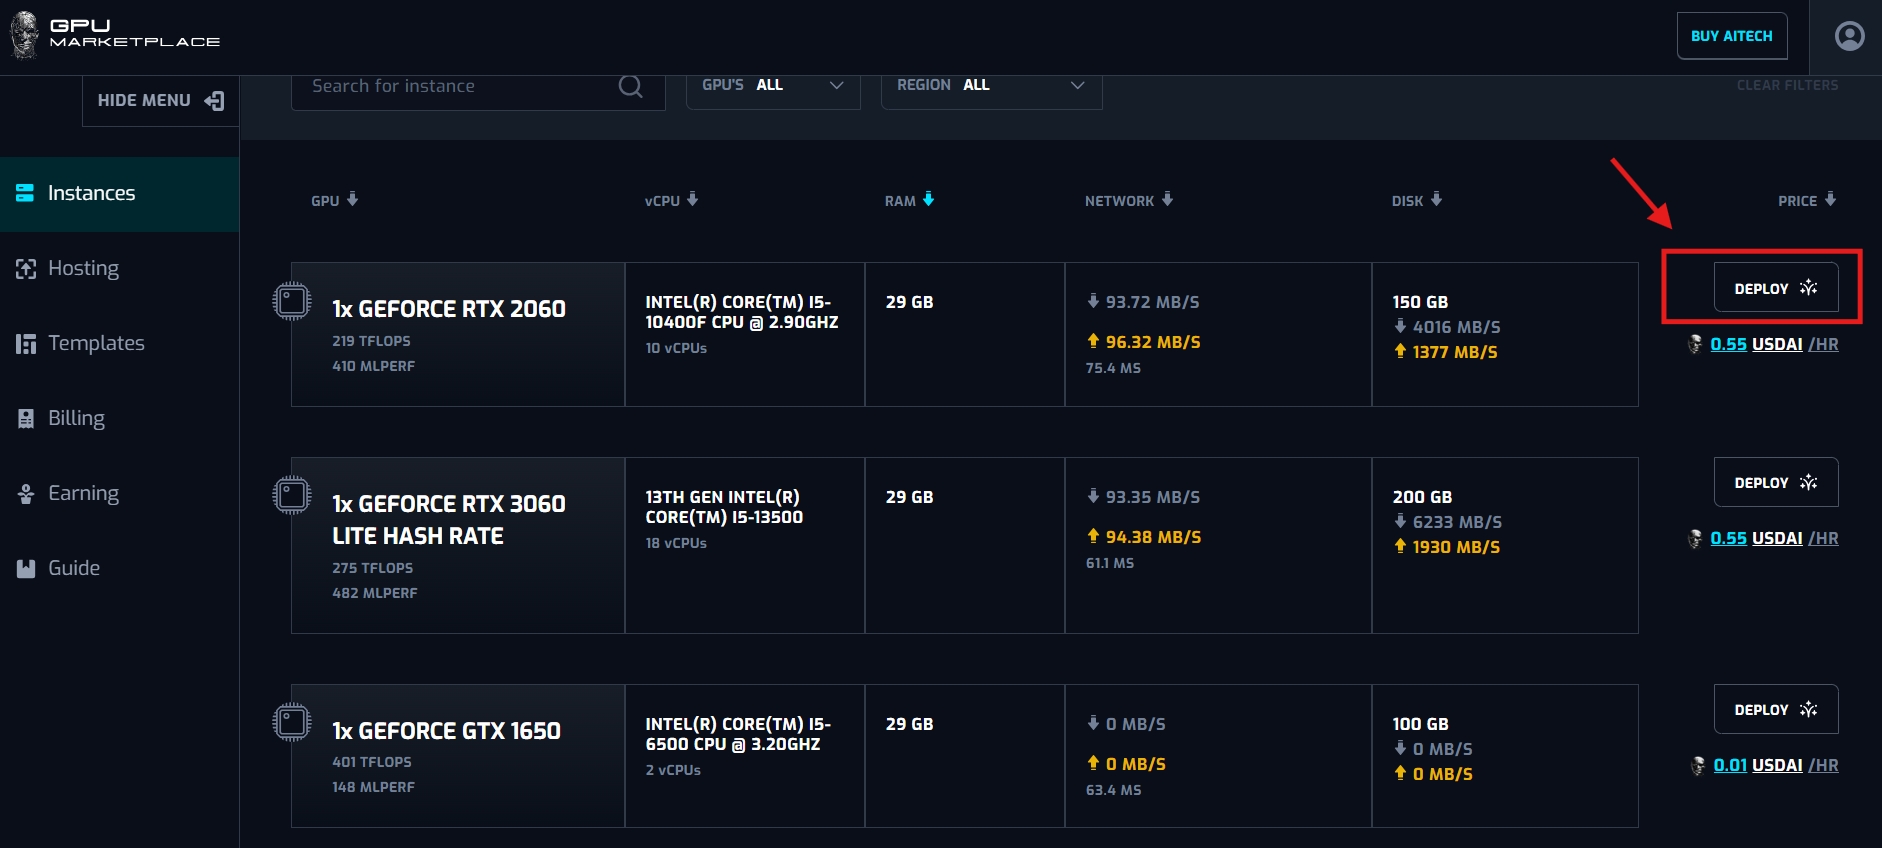
Step 3: After the user has decided on the machine configuration, click “Deploy”.
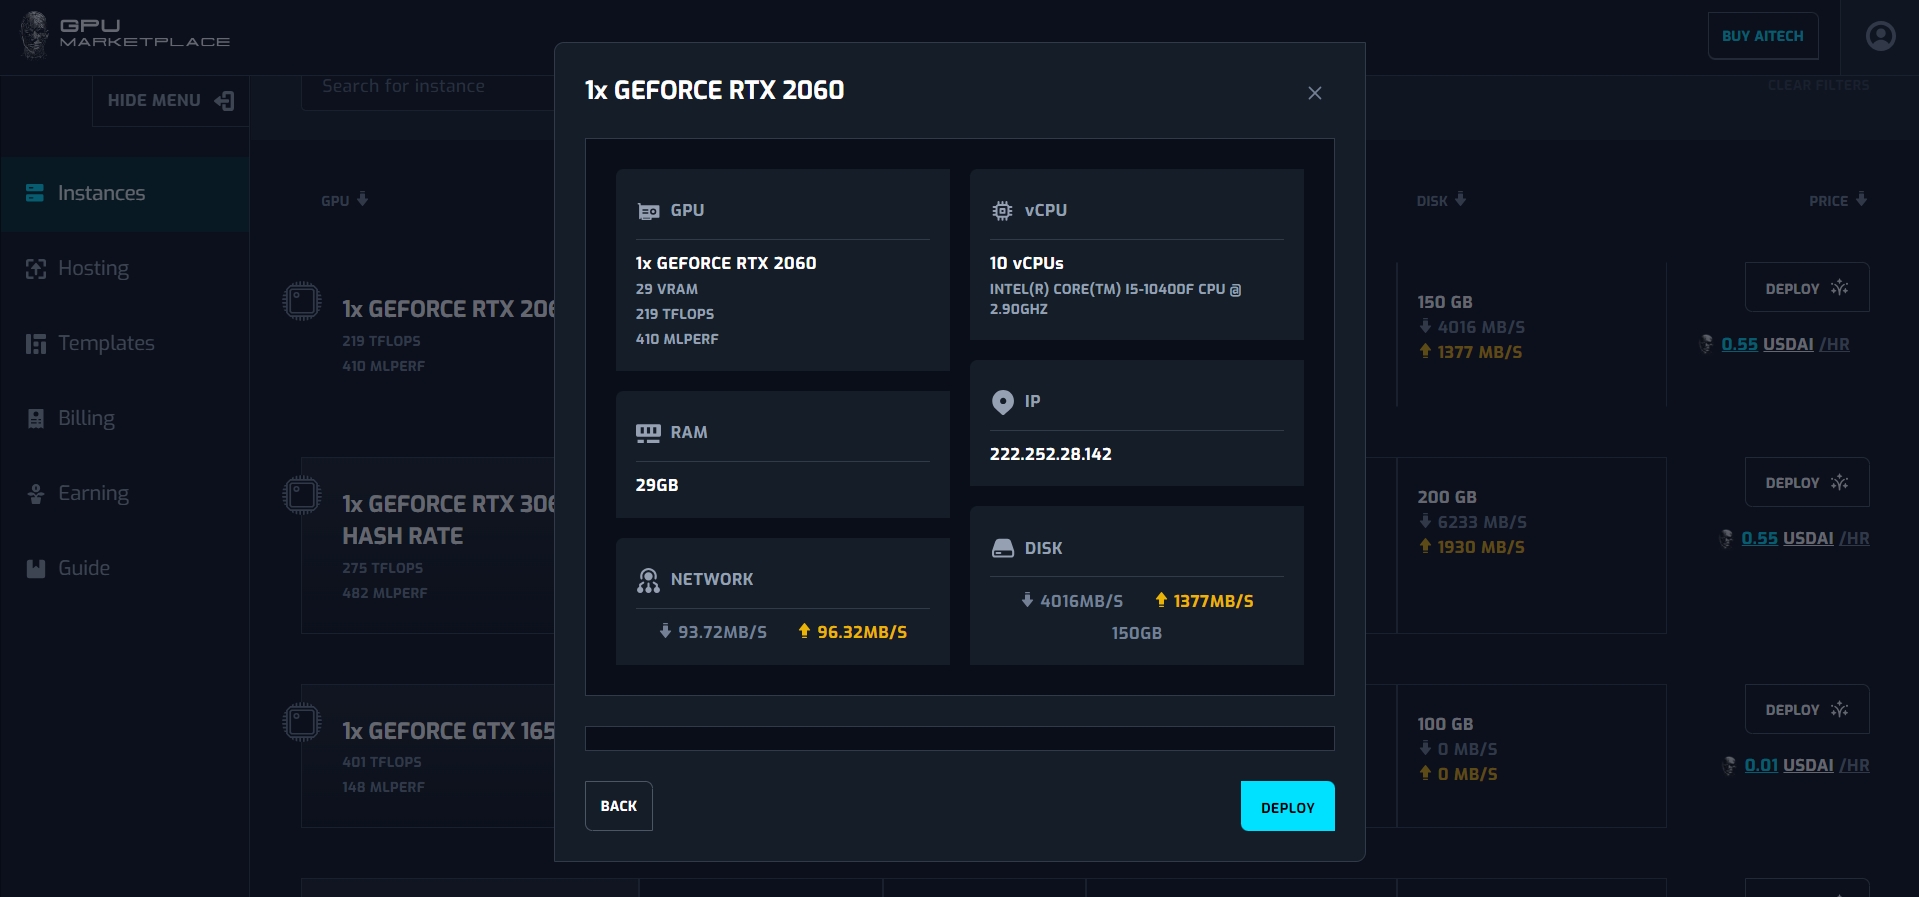
Step 4: A pop up will appear, including machine information. If the user agrees, click “deploy” and navigate to step 5. If users do not agree with the selected machine, click “cancel”. The pop up will disappear and user stay at ‘Search instance” screen
Step 5: User will select a template at this step. Templates will include 3 default extensions, including: Pytorch, Tensorflow and Anaconda. User selects 1 in 3 default extensions and clicks “Confirm”. If users want to remove their previous selection, double clicking on the record will Un - select the extensions.

Step 6: After confirmation, the user will be navigated to the final confirmation page. This will have the option “Start jupyter notebook”. If renter selects this check box, when deploying an instance, renter can connect to the instance via Jupyter Notebook. User clicks “Confirm renting”, and the instance will be deployed.
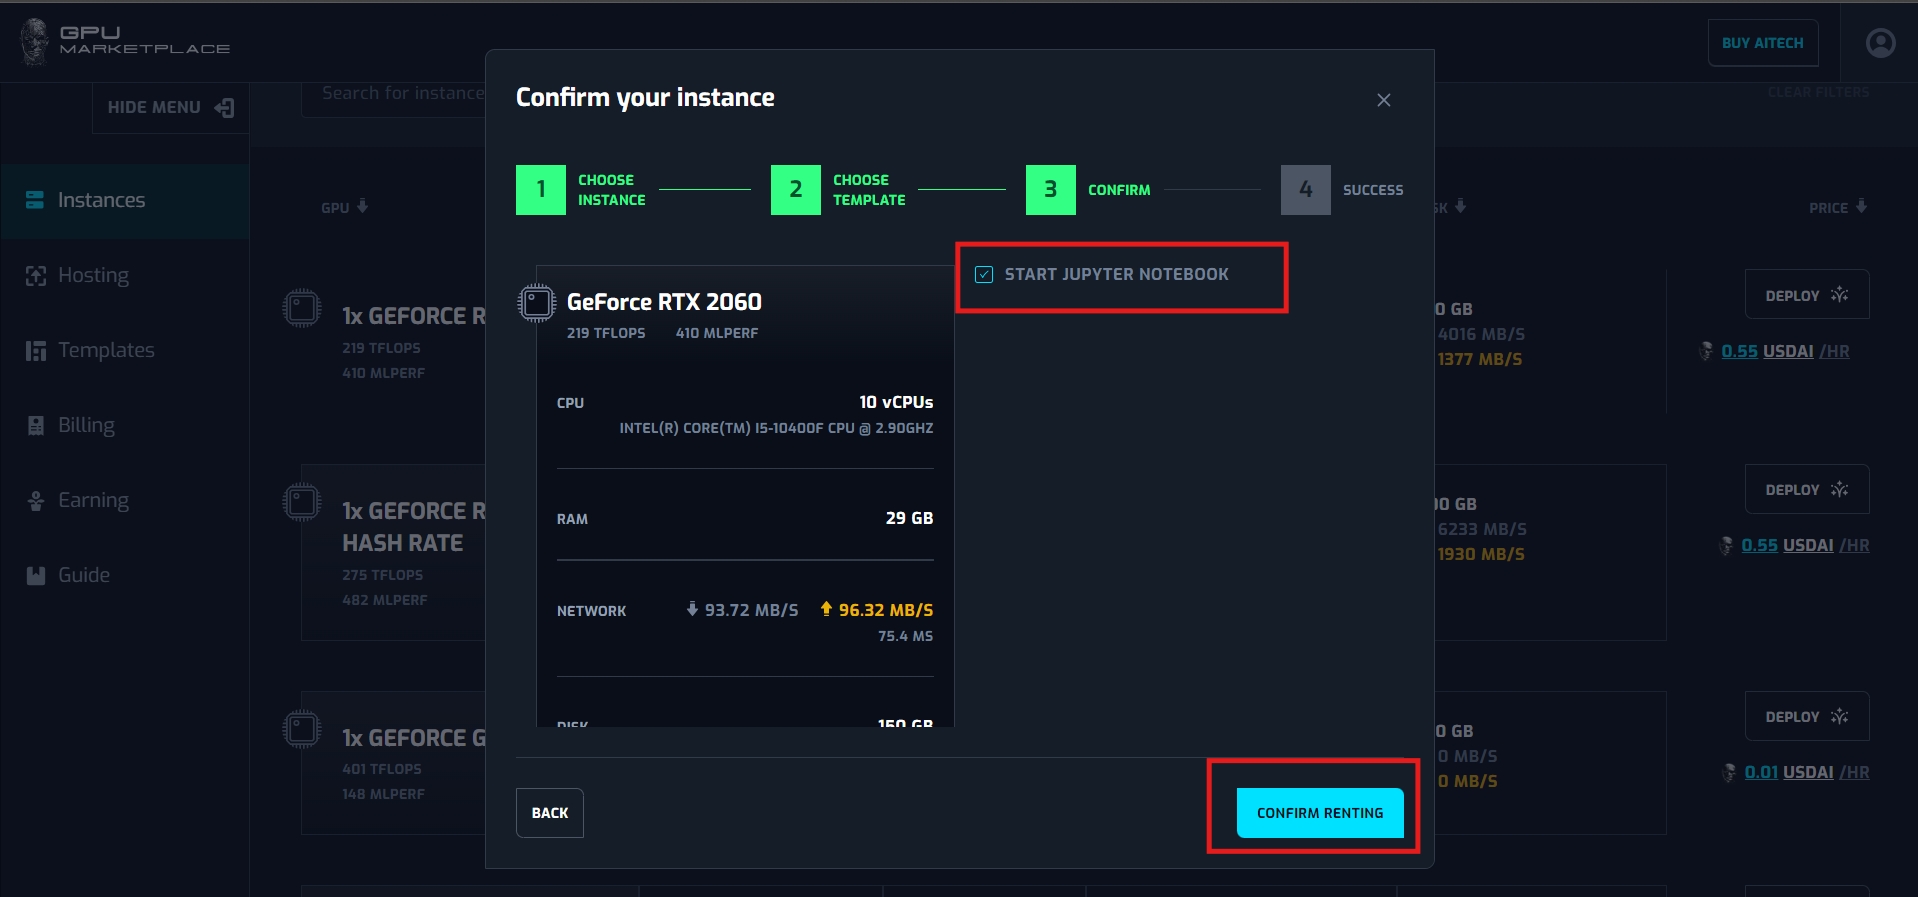
*If user do not have enough balance for renting, system will yield toast message “Insufficient balance”

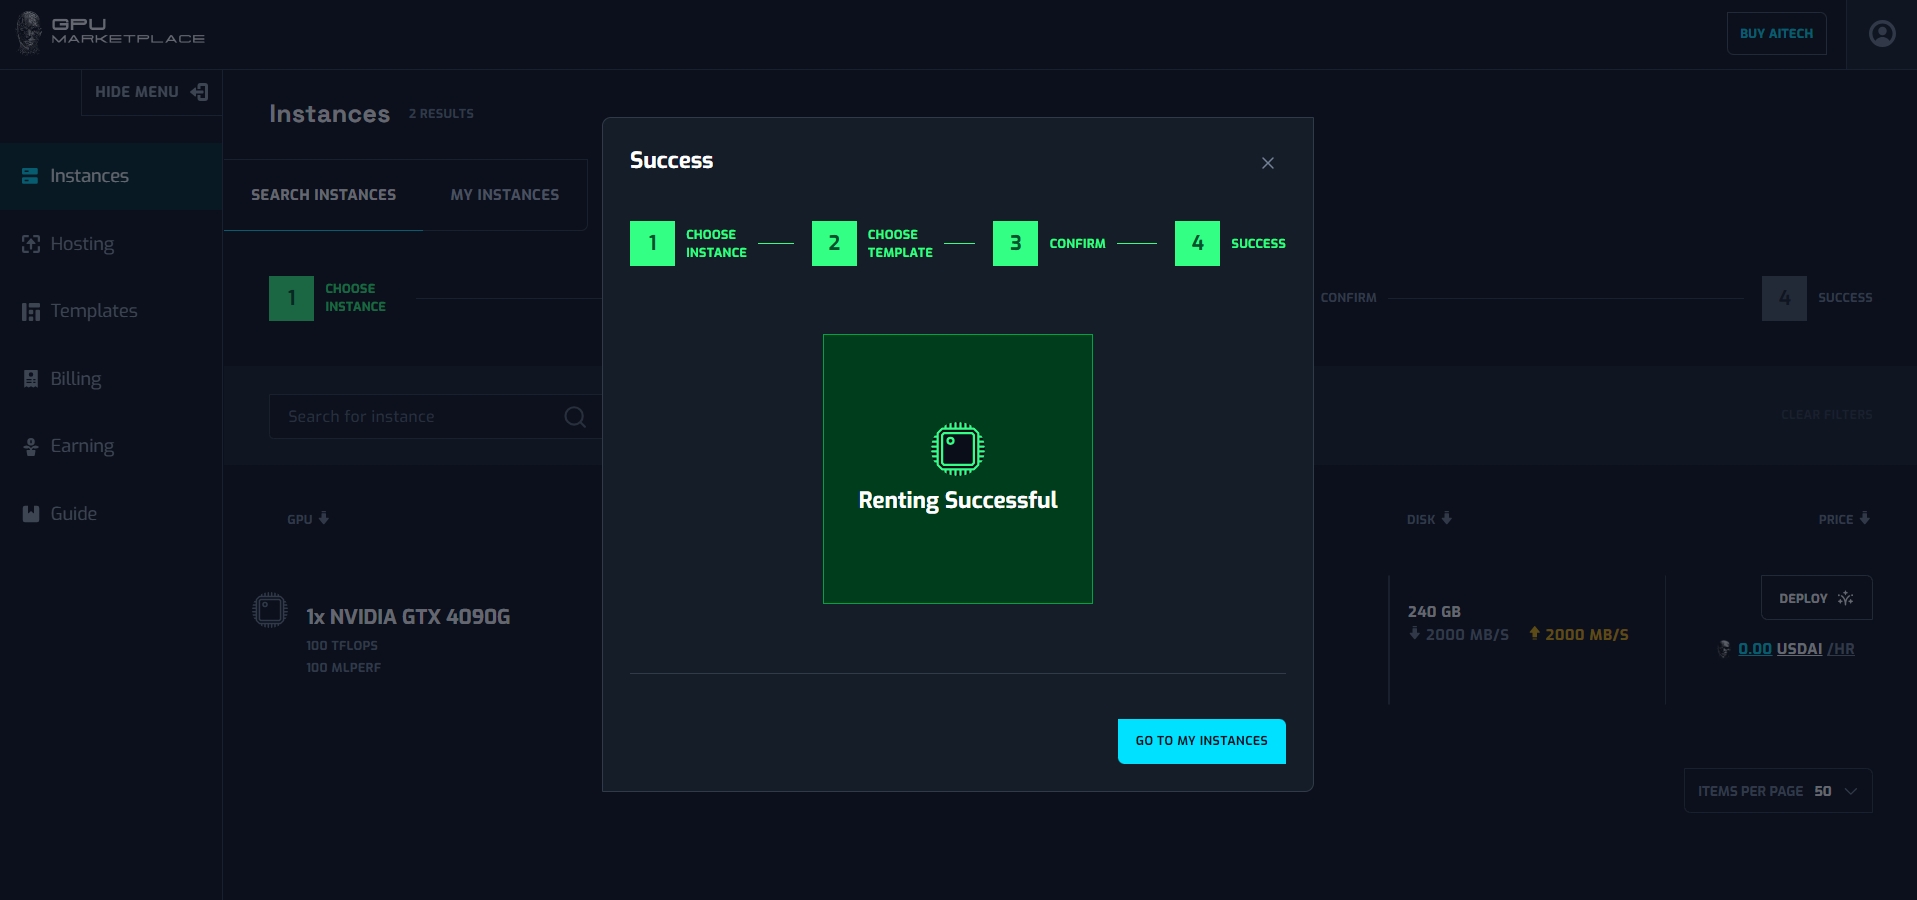
Step 7: After confirmation successfully, the system will yield a pop up of renting successfully.
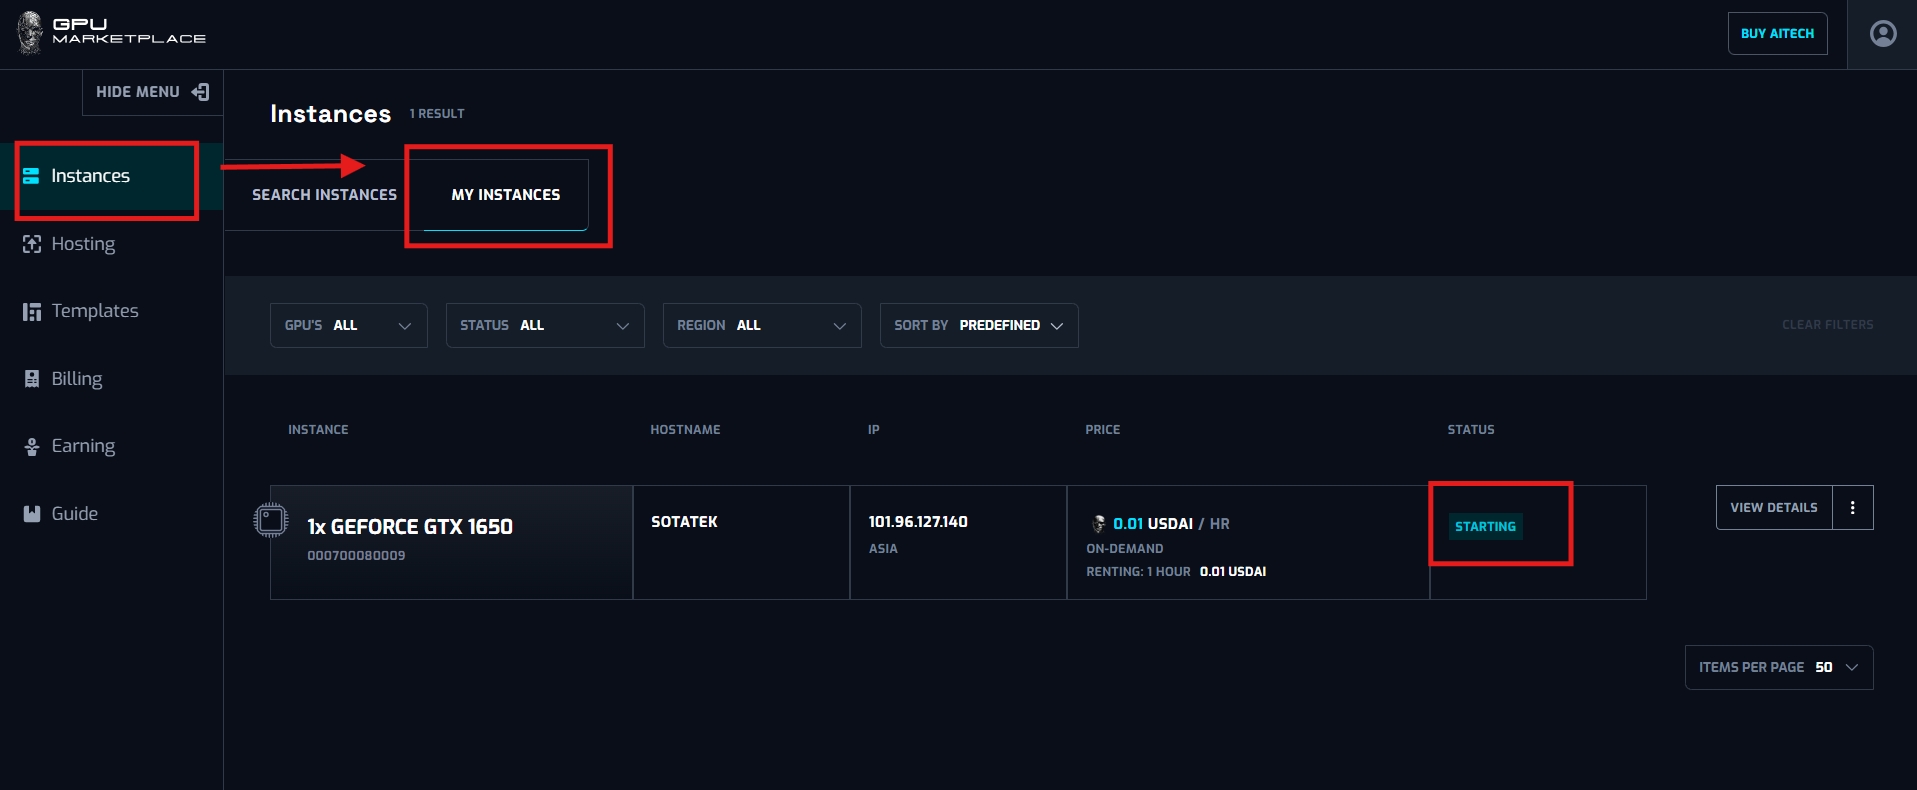
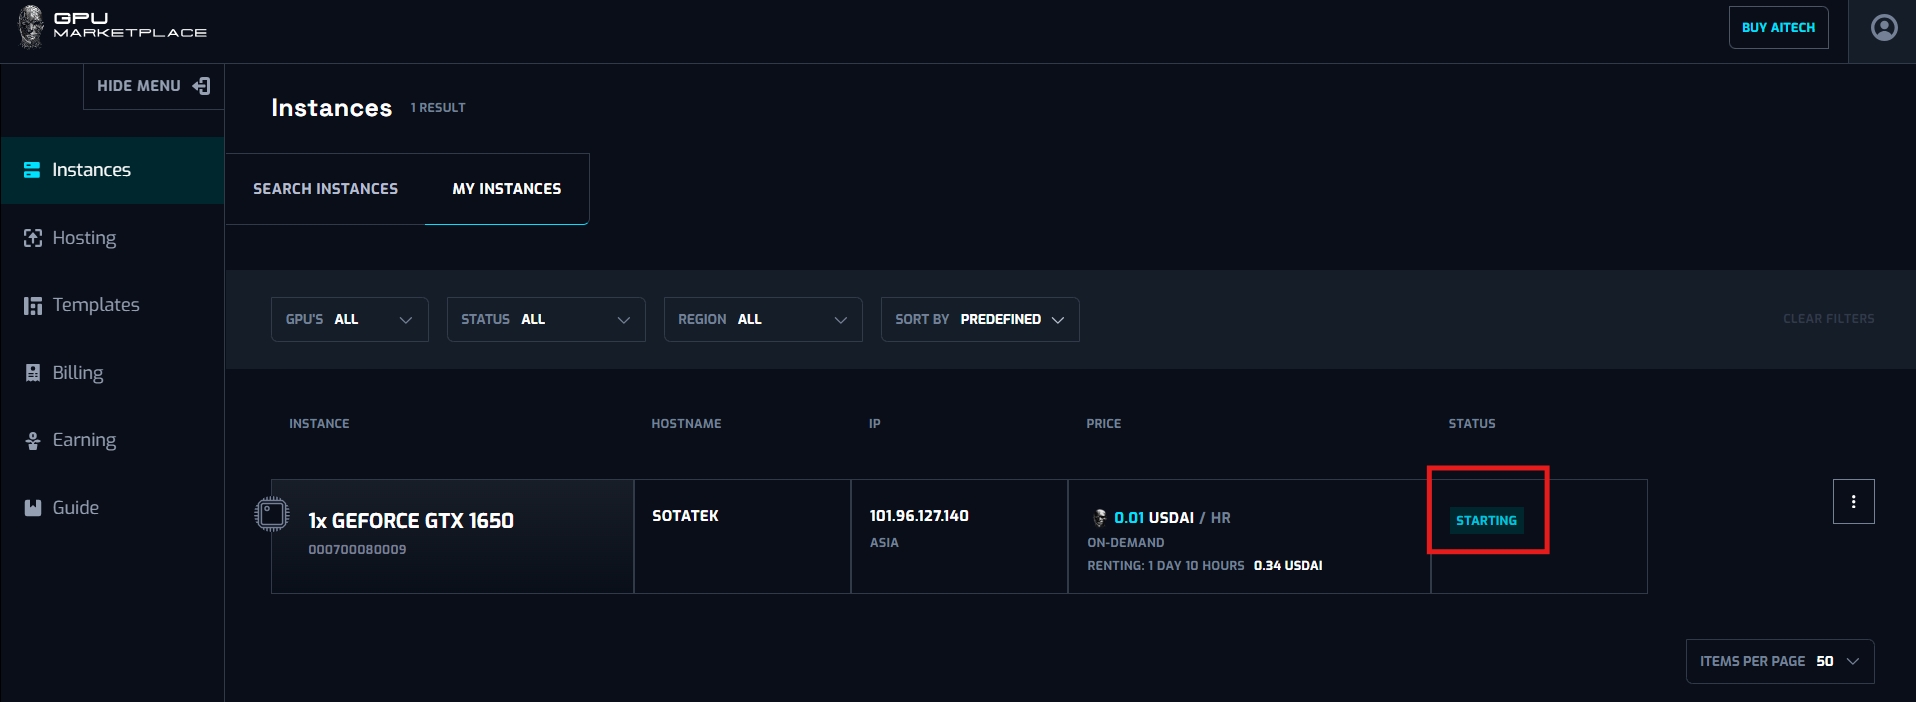
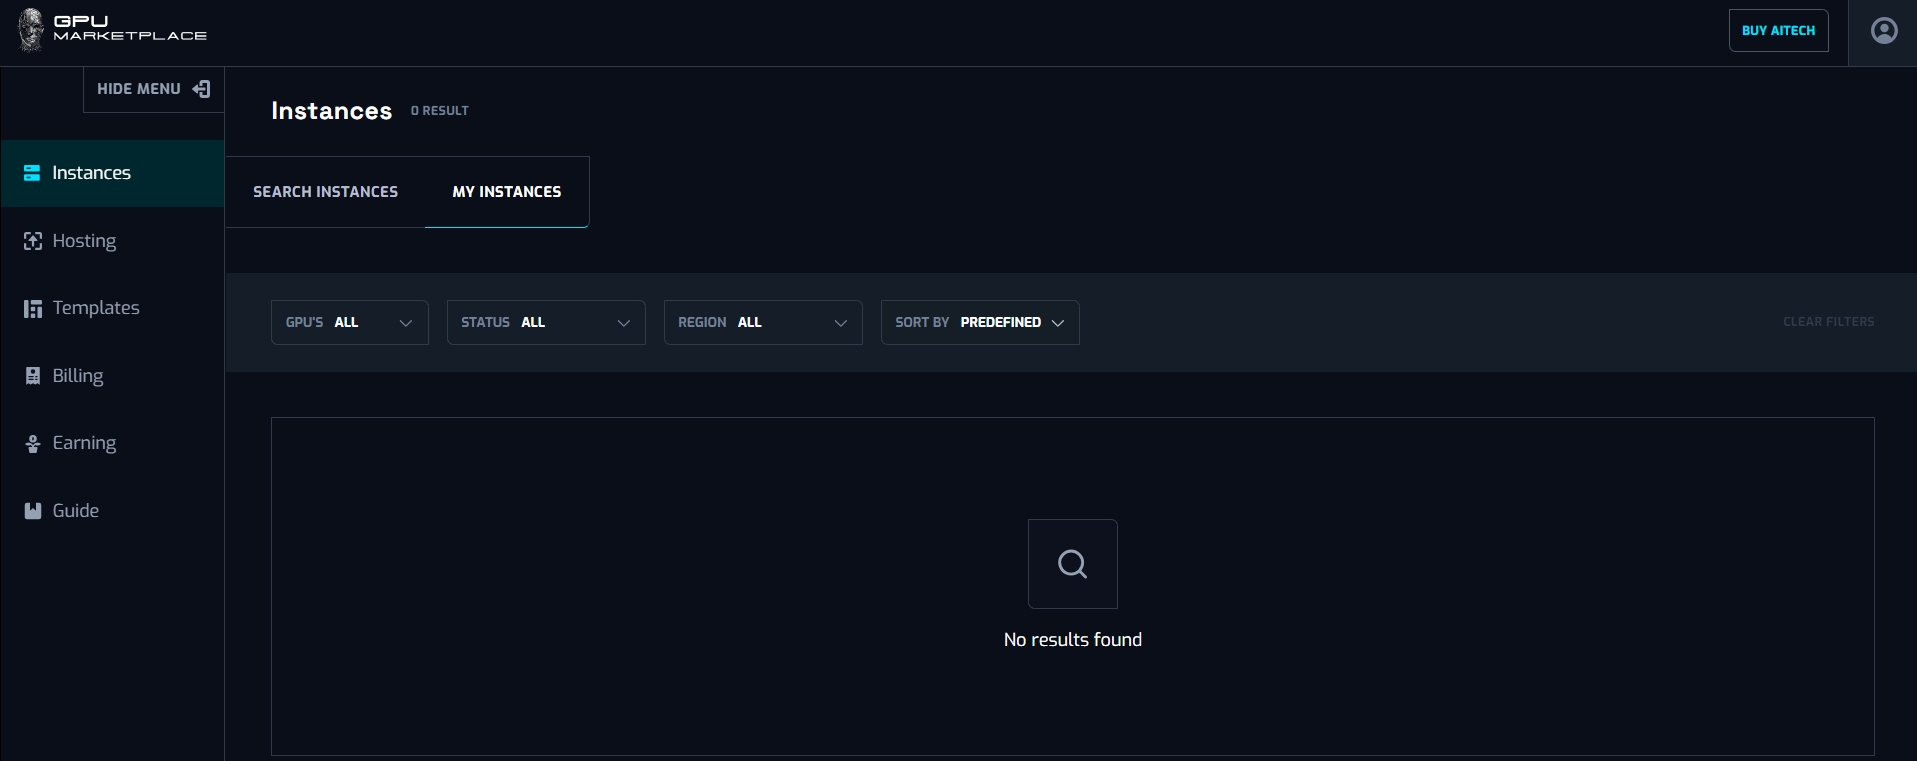
Step 8: User navigate to My instance screen (Instance -> My instance), and the instance will appear, with status “Starting”
Instance management
Overview: After Renter has rented successfully, renter will have to manage their instance, in order to connect and use the instance for their purposes. Instance will be controlled via different status, and according action to the status. This section will cover different cases for Instance management.
Status including:
- Starting: Status “Starting” represents the instance being created and turning on. This will be the first default status of any instances, after rented. Instance will stay at “Starting” From 3 - 30 minutes, depending on how many templates/extensions he/she added. The more extensions, the more download process happens, and the longer it will take to start the instance. User WILL NOT BE charged at this point
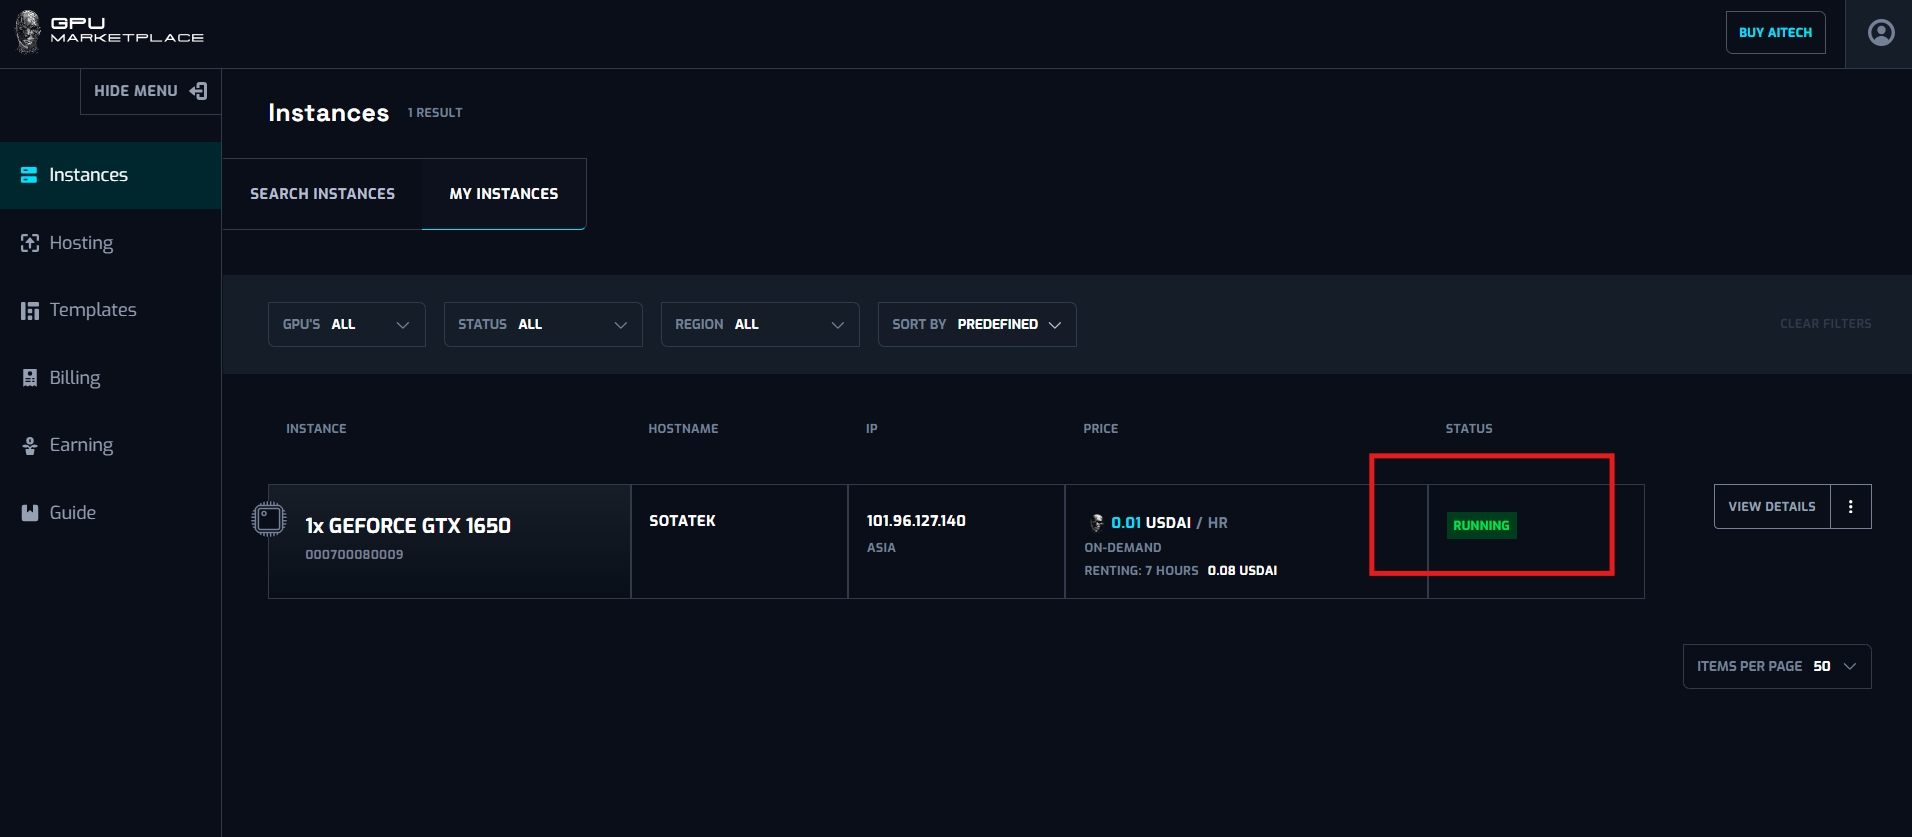
- Running: After instance starts successfully, status will change to “Running”. At this status, users can connect to the instance and start to use as their will. User WILL BE charged at this status
- Stopping: When User stops the instance, its status will be “Stopping”. When stopping successfully, status will change to “Stopped”. This process can last from 2 - 3 minutes.User WILL BE charged at this status
- Stopped: Stopped represents when Instance is still rented, however it is turned off. In order to turn on and keep on using the instance, User will have to reboot. User WILL BE charged at this status
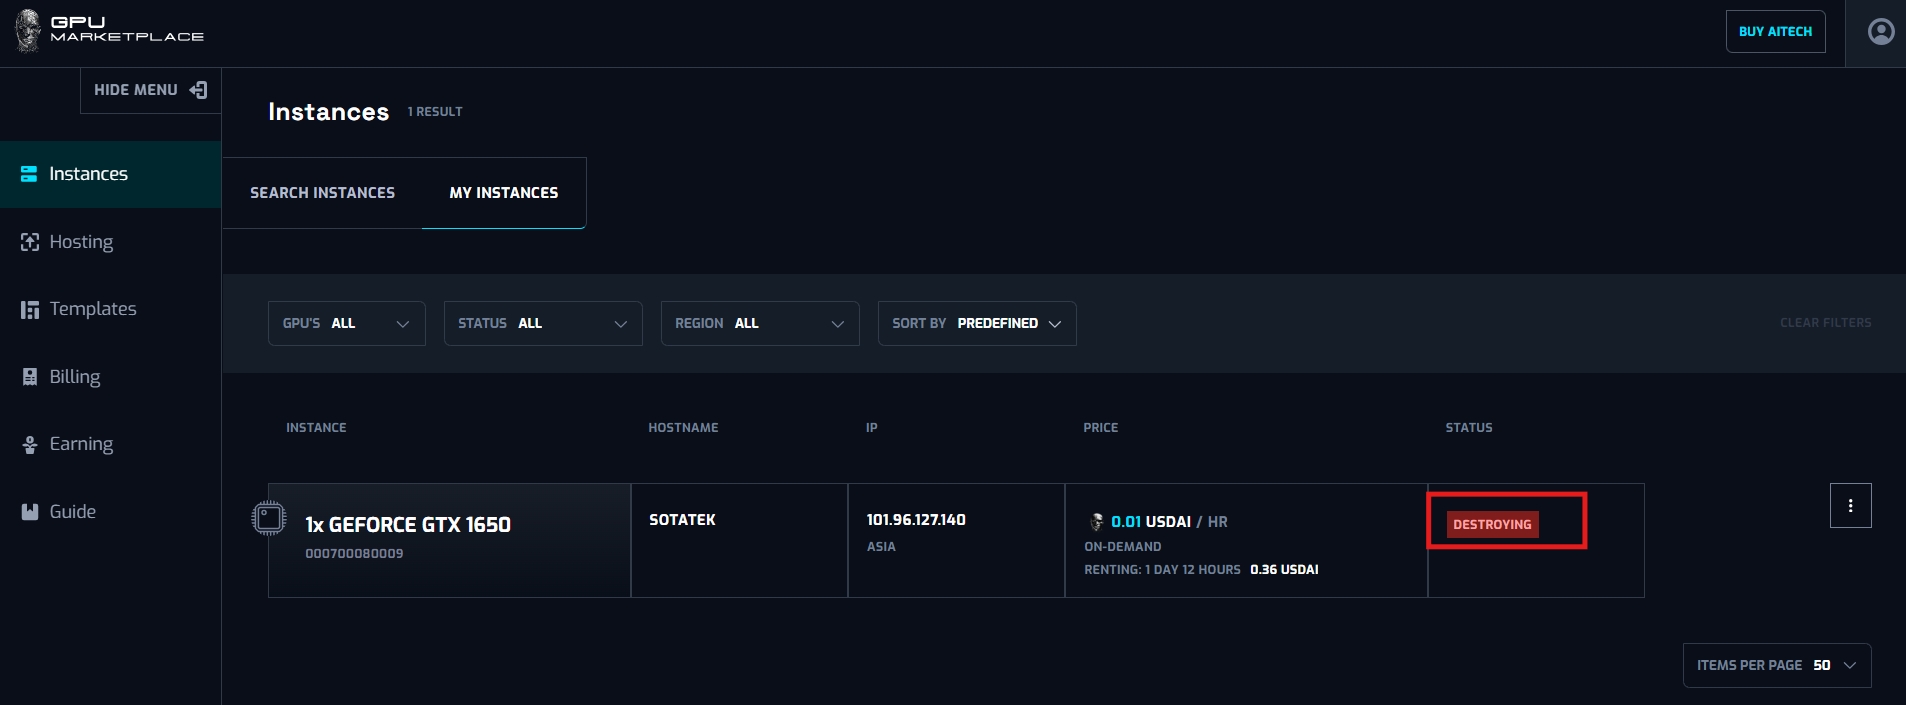
- Destroying: When a user destroys instances, status will change to “Destroying”. When destroyed successfully, status changes to “Destroyed”, and will not appear on the Renter screen anymore. This process can last from 2 - 3 minutes. User WILL NOT BE charged at this status
- Error: When the host machine is not connected, or a different error occurs, status will change to Error. Users can destroy instances of error, without being charged for money. Users can also rebook the instance. If the error is fixed, the instance will change status to “Starting”, else it will not be able to reboot. User WILL NOT BE charged at this status
Action/Method including:
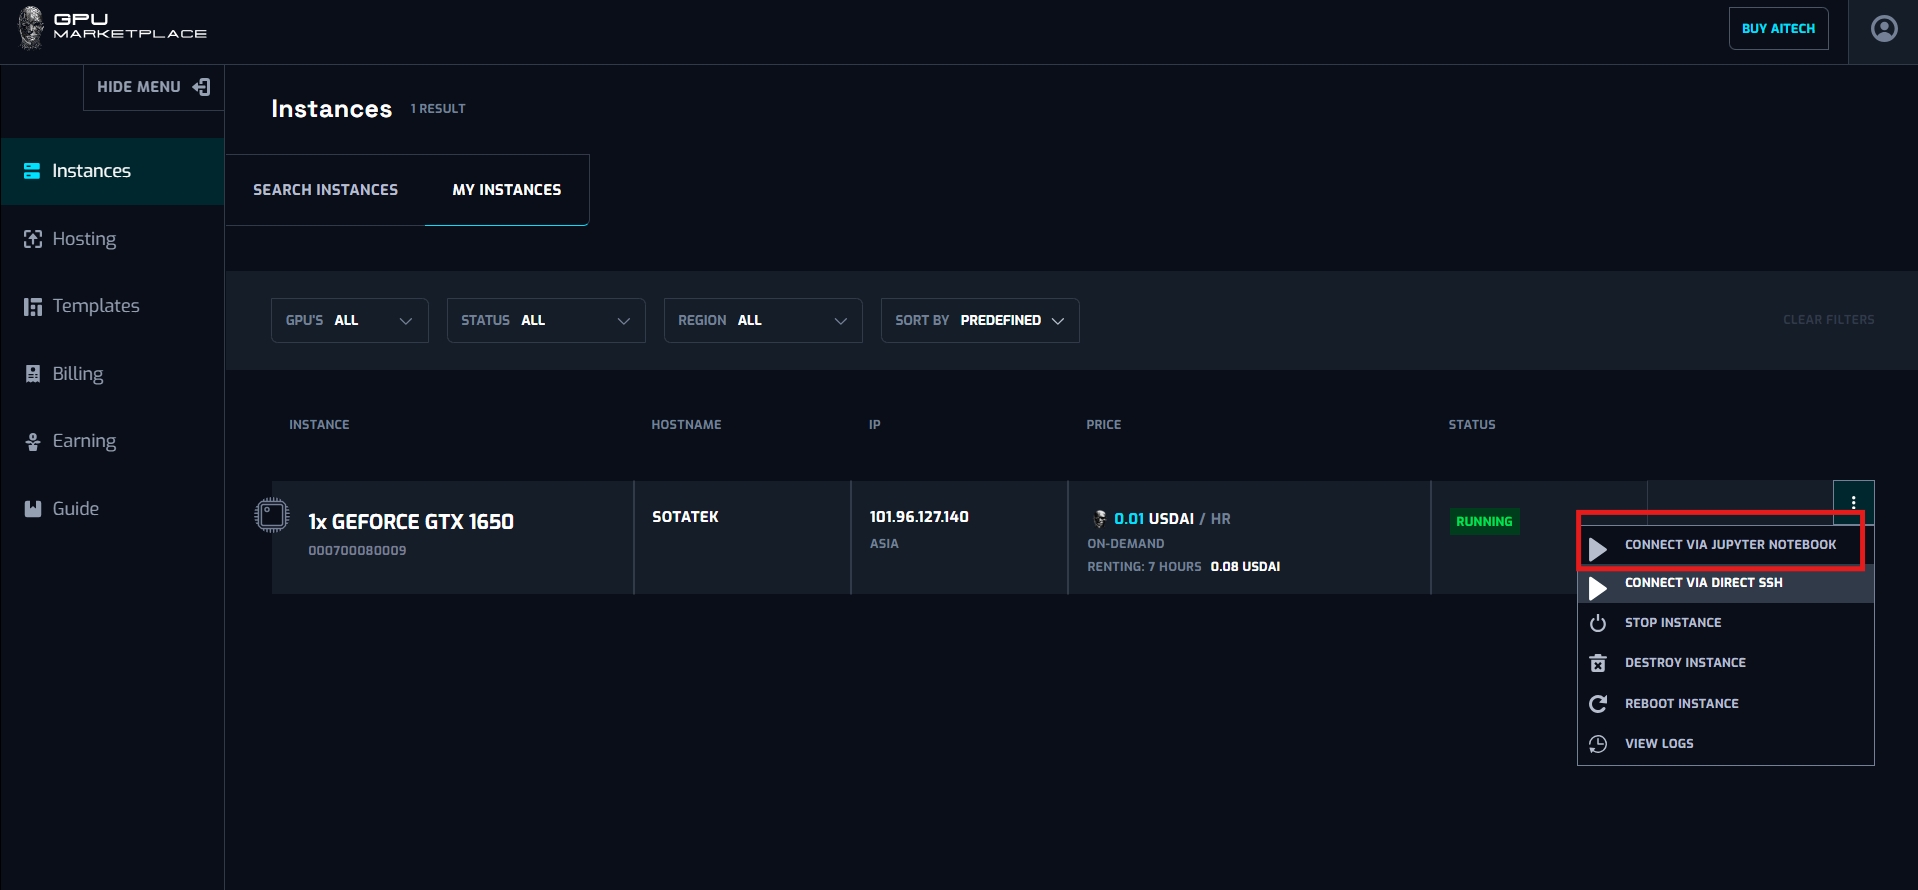
- Connect via Jupyter notebook: This button will be available when the user checks “Start jupyter notebook” on the deploying site. When clicked, the user will be navigated to a separate Jupyter Notebook page, and start using the instance from there.
- Connect via Direct SSH: This button will always be available. When clicked, user will be shown a SSH link, to run on their command shell to connect to the instance
- Stop instance: Stop instance equivalent to shutting down a computer. When clicked stop, instance changes status to “Stopping” -> “Stopped”
- Destroy instance: When a user does not want to use the instance anymore, and does not want to pay for it, the user can destroy the instance. Status will be change to “Destroying” -> “Destroyed”
- Reboot: Reboot instance is equivalent to restarting a computer. When clicked, change status to “Starting” -> “Running”
- View log: View log allows the user to see what is happening with the instance. Logs per instance will be removed everyday.
Case 1: User connect to instance via SSH
Step 1: (Continue from step 8 - Renting instance): Navigate to My instance screen
Step 2:Wait for the instance to change status to “Running”
Step 3: Select “Connect via direct SSH”
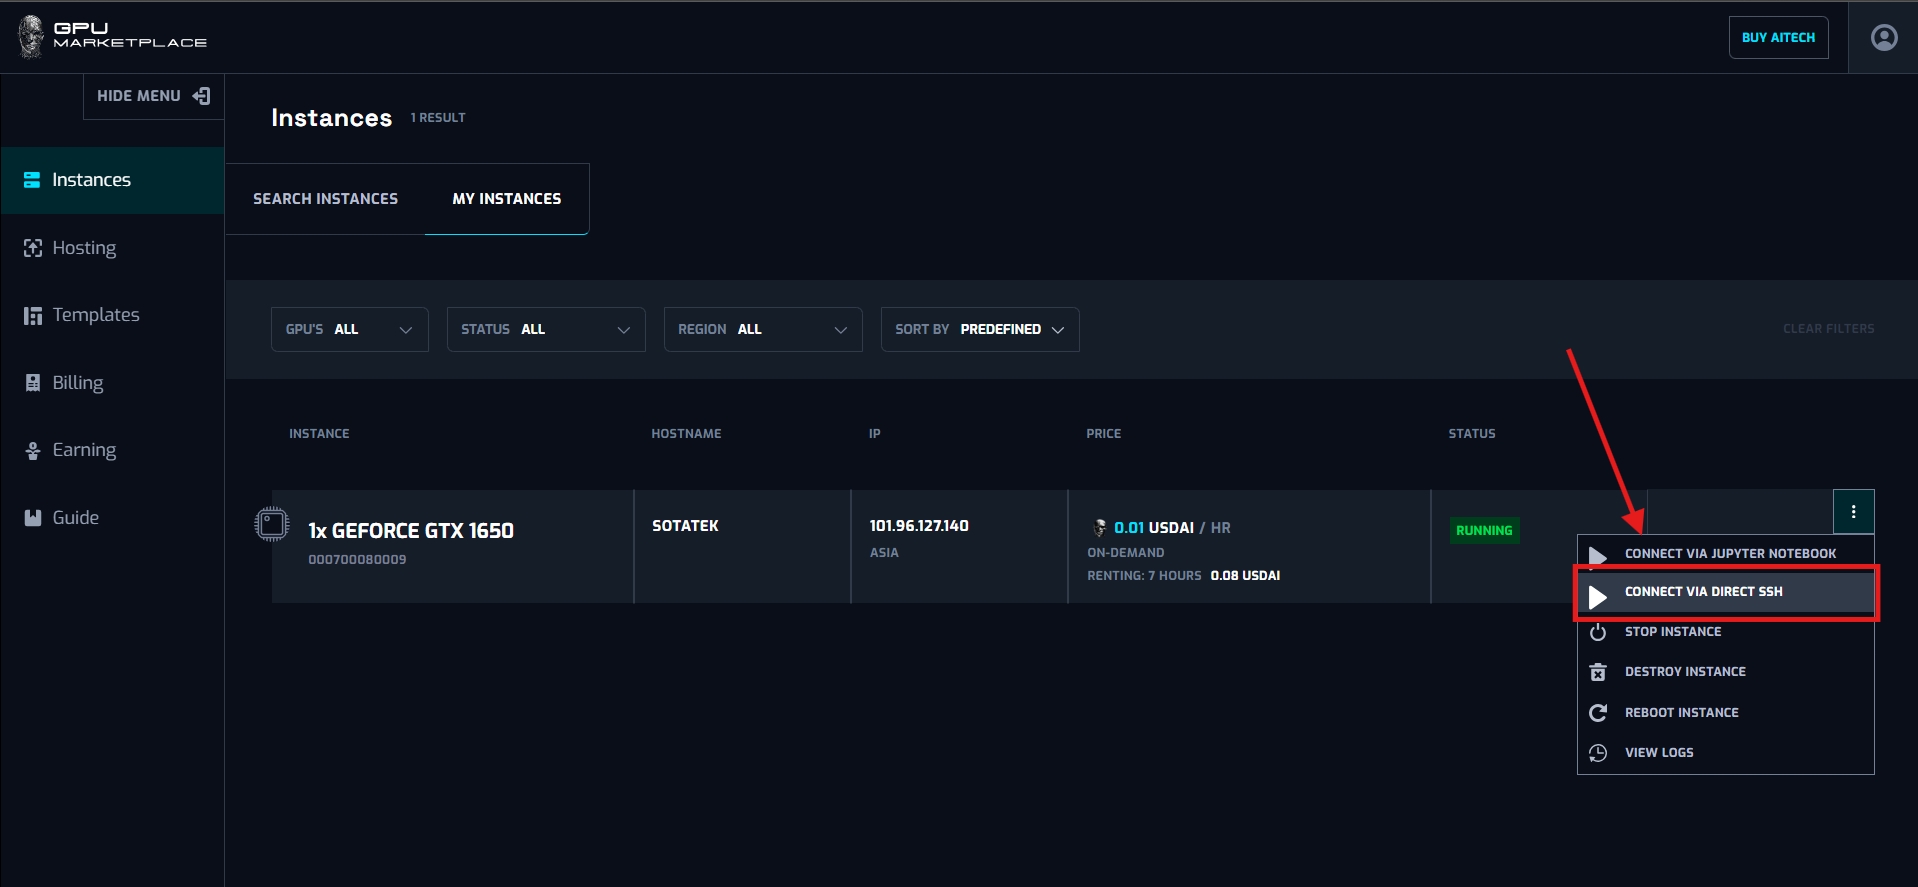
Step 4: After clicked, System will yield a message including the SSH connection. User can copy this code and run onto the cmd shell, and start connecting and using instance

Case 2: User connect to instance using Jupyter Notebook
Step 1: (Continue from step 8 - Renting instance): Navigate to My instance screen
Step 2:Wait for the instance to change status to “Running”
Step 3: Select “Connect via Jupyter Notebook”
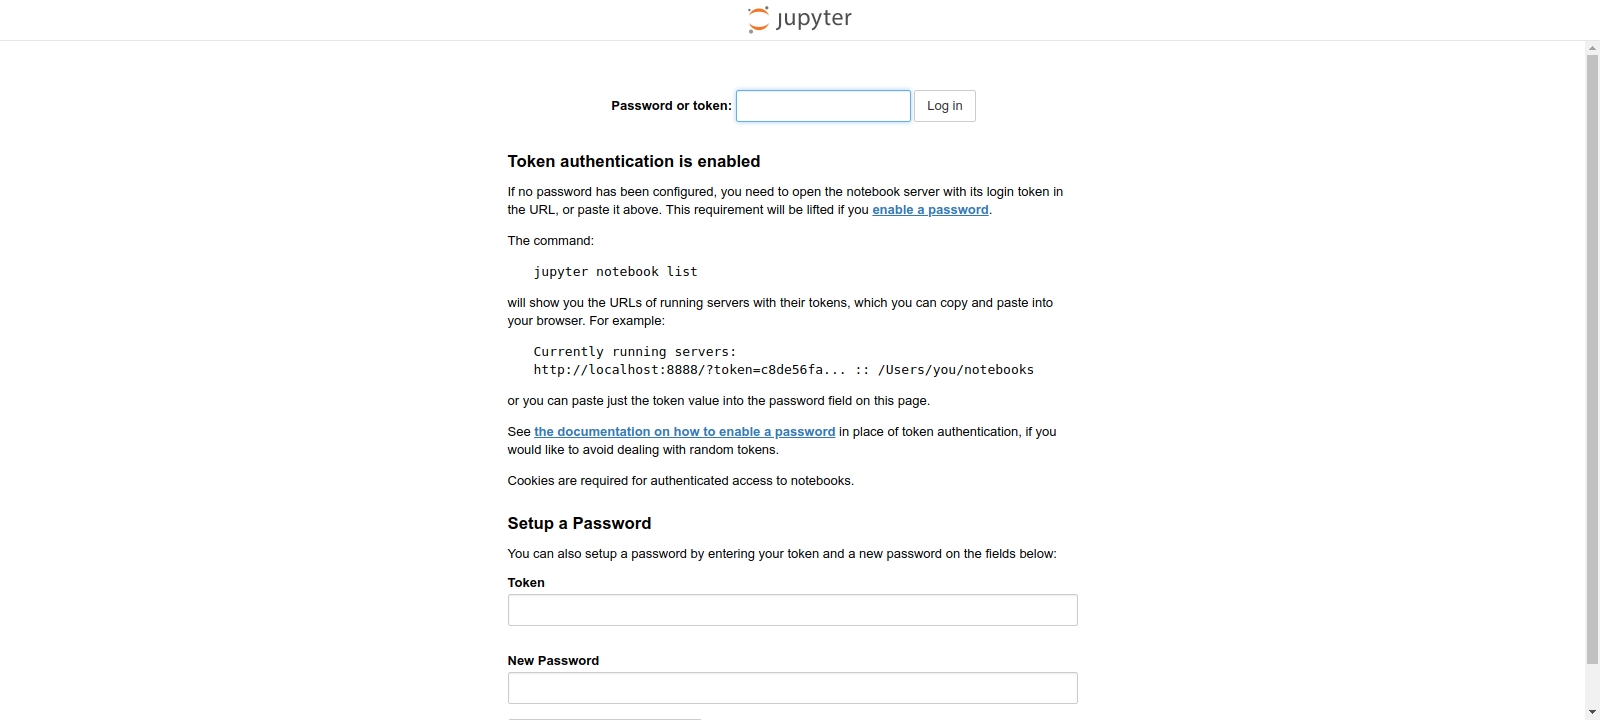
Step 4: Redirect to the Jupyter Notebook page. User select the token get from their machine, then connect to the instance
Case 3: User want to Stop the instance
Step 1: (Continue from step 8 - Renting instance): Navigate to My instance screen
Step 2: Wait for the instance to change status to “Running”
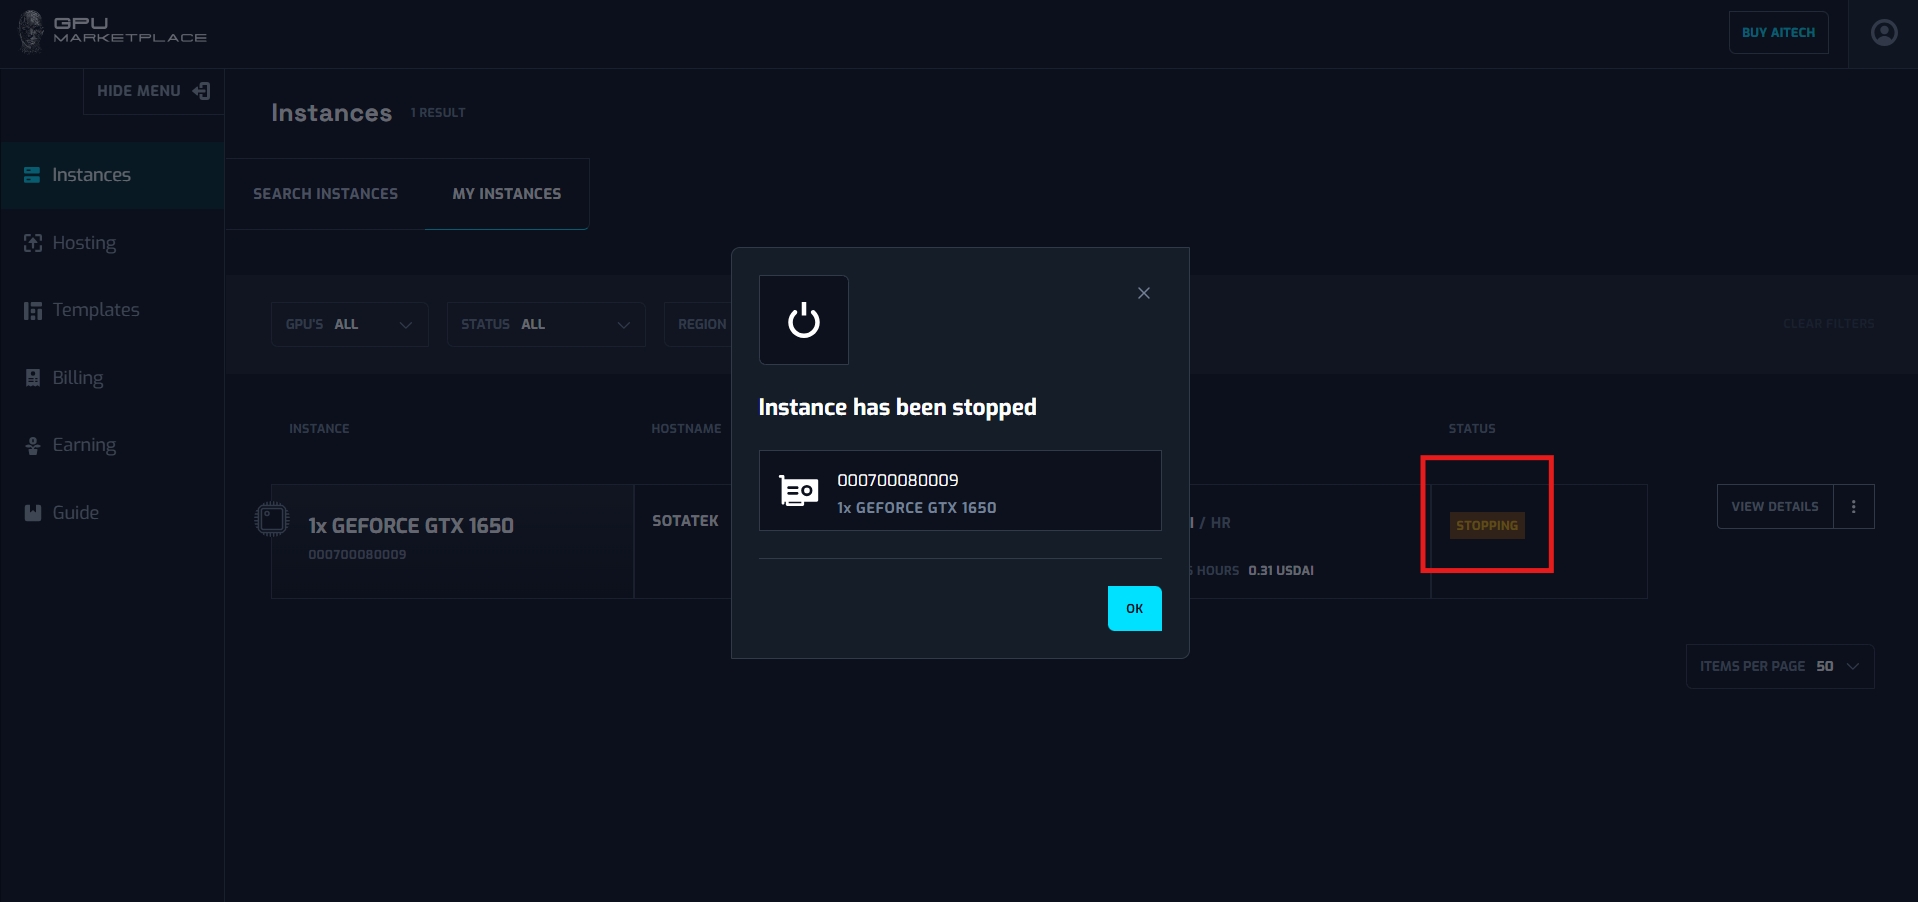
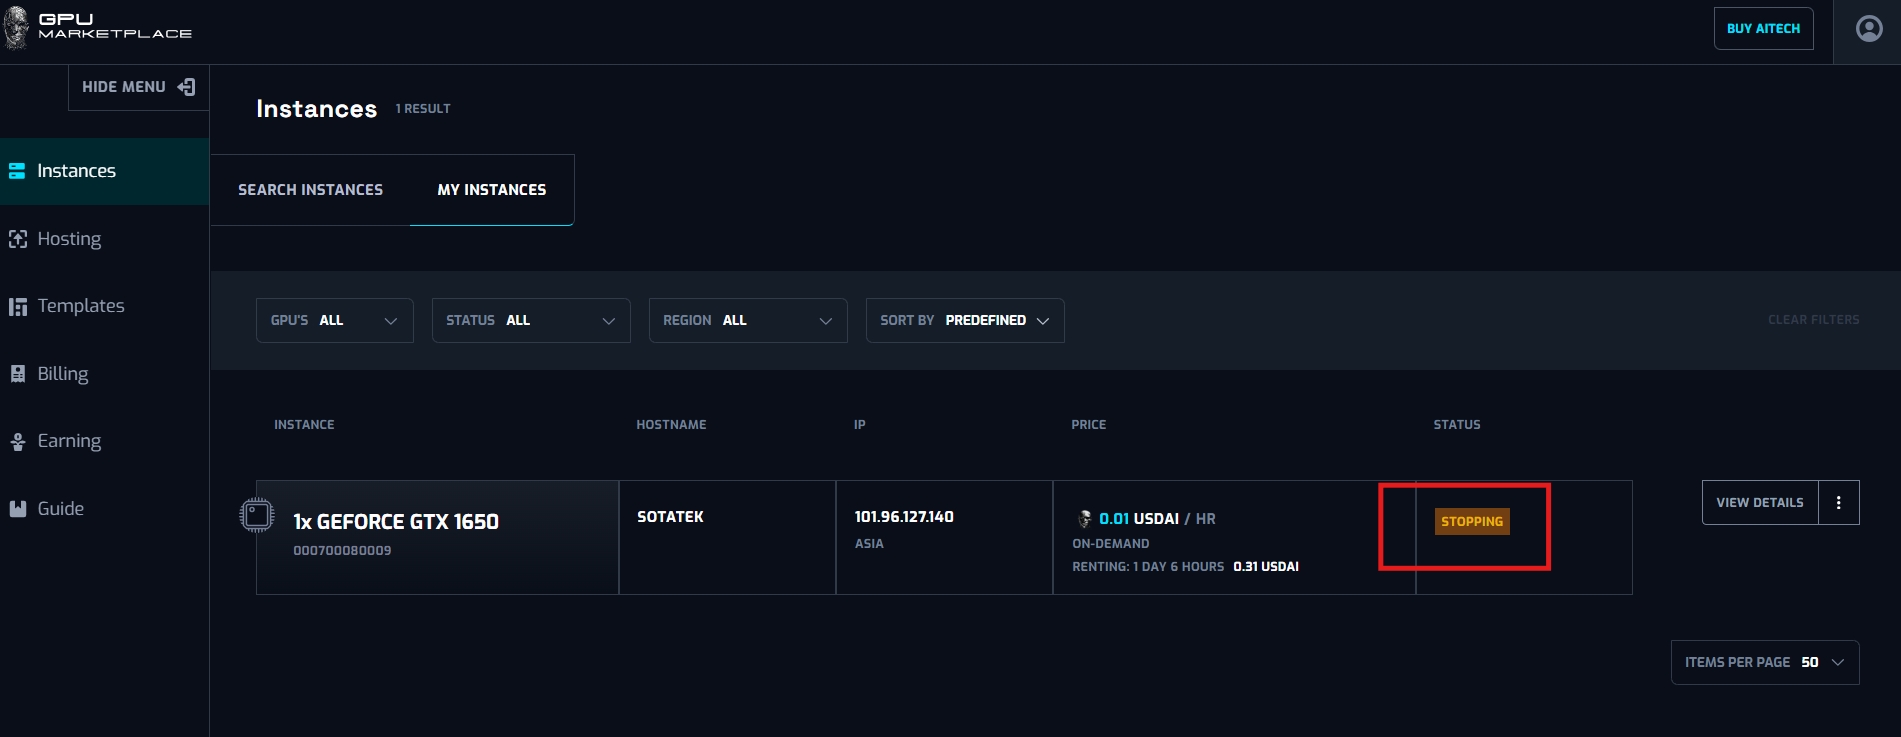
Step 3: Select “Stop instance”
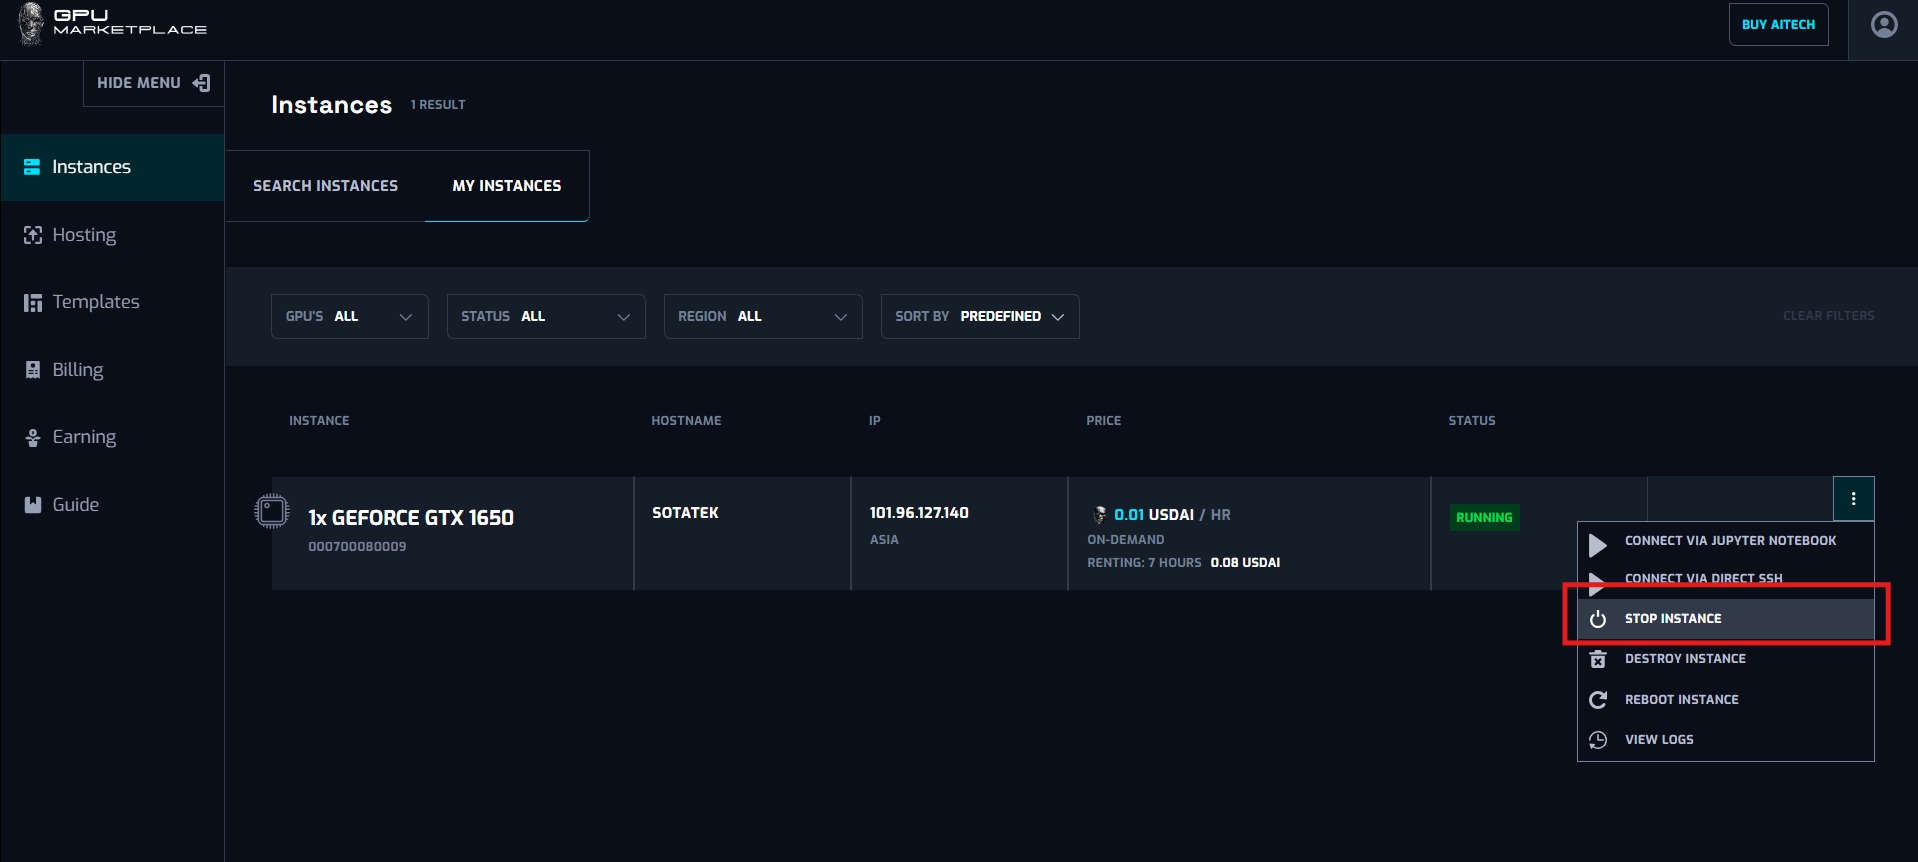
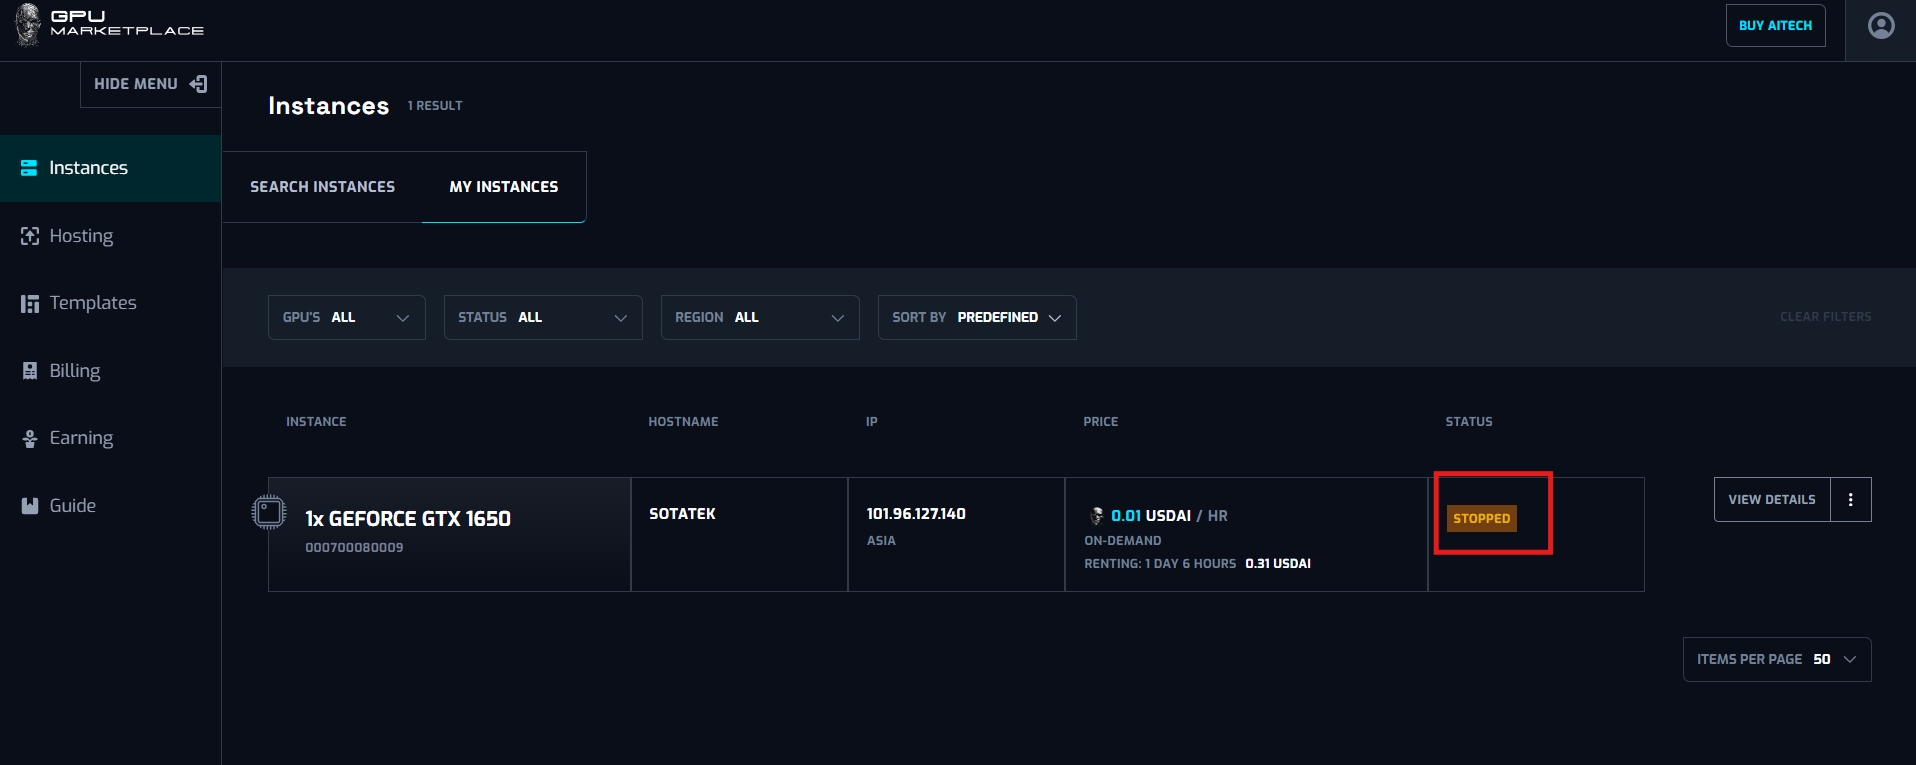
Step 4: Instance status will be changed to “Stopping” -> “Stopped”. Instance has been stopped.
Case 4: User want to reboot instances ( Reboot can happened at anytime, not necessarily at instance stopped)
Step 1: (Continue from step 8 - Renting instance): Navigate to My instance screen
Step 2: Wait for the instance to change status to “Running” or “Stopped”
Step 3: Clicks Reboot
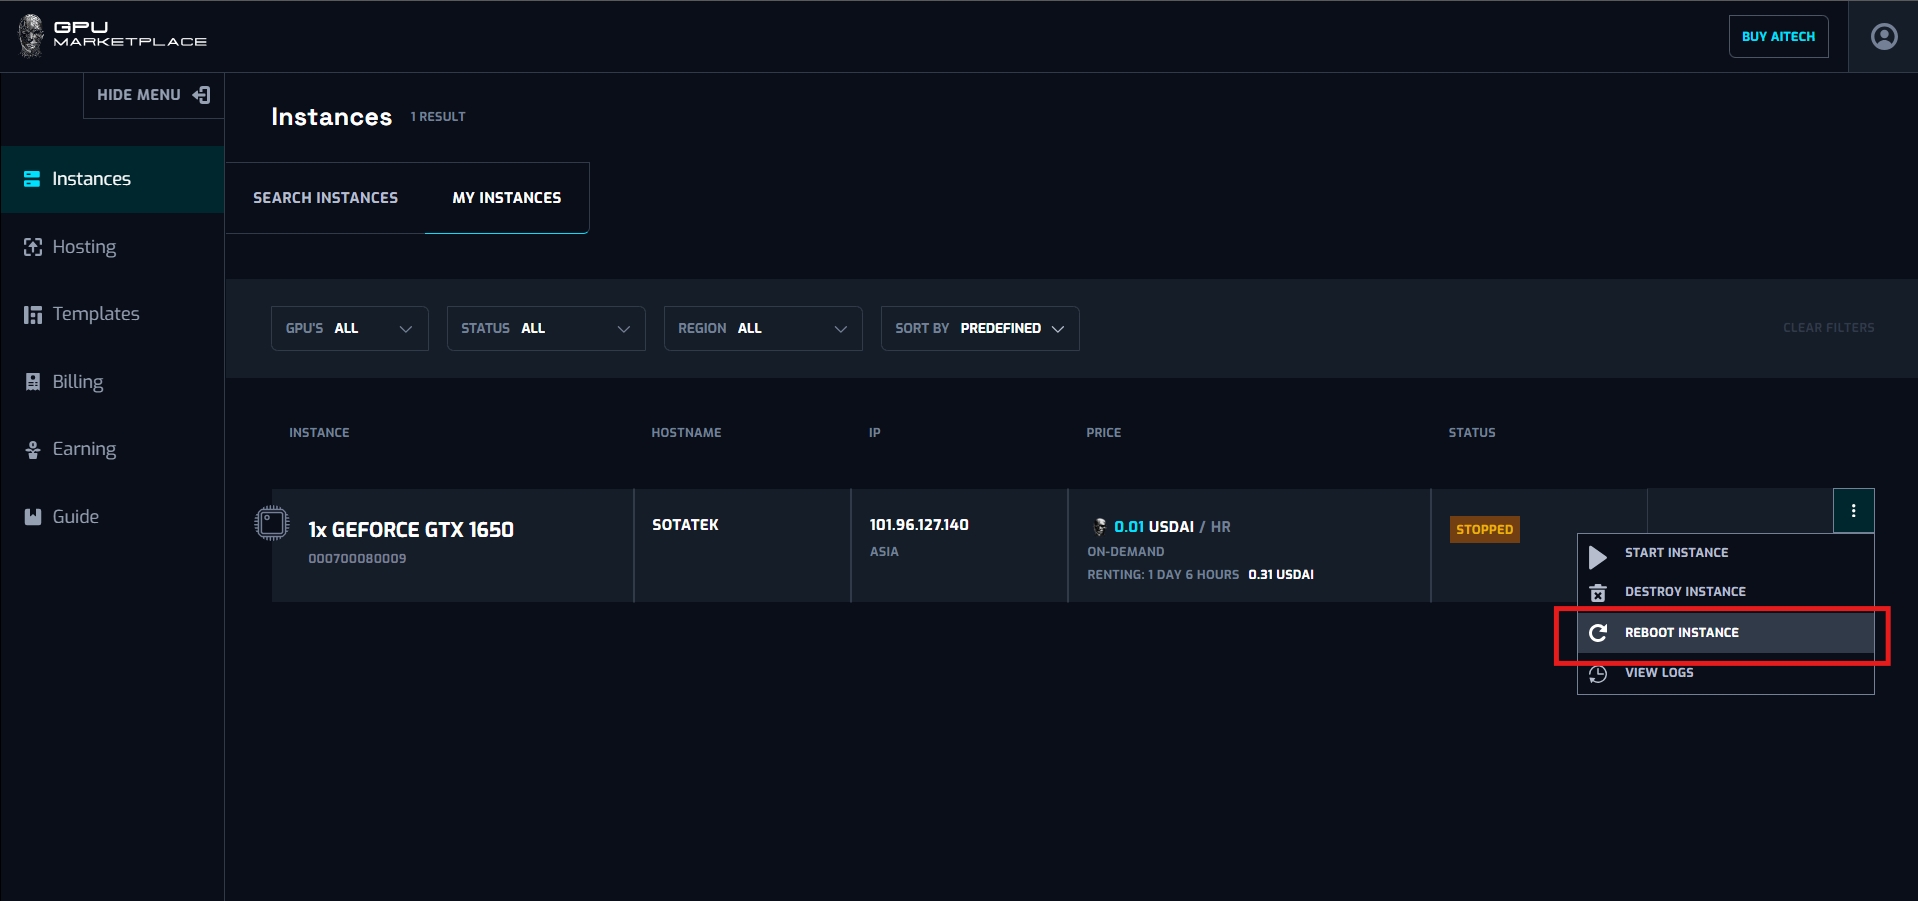
Step 4: Confirm to the confirmation pop up
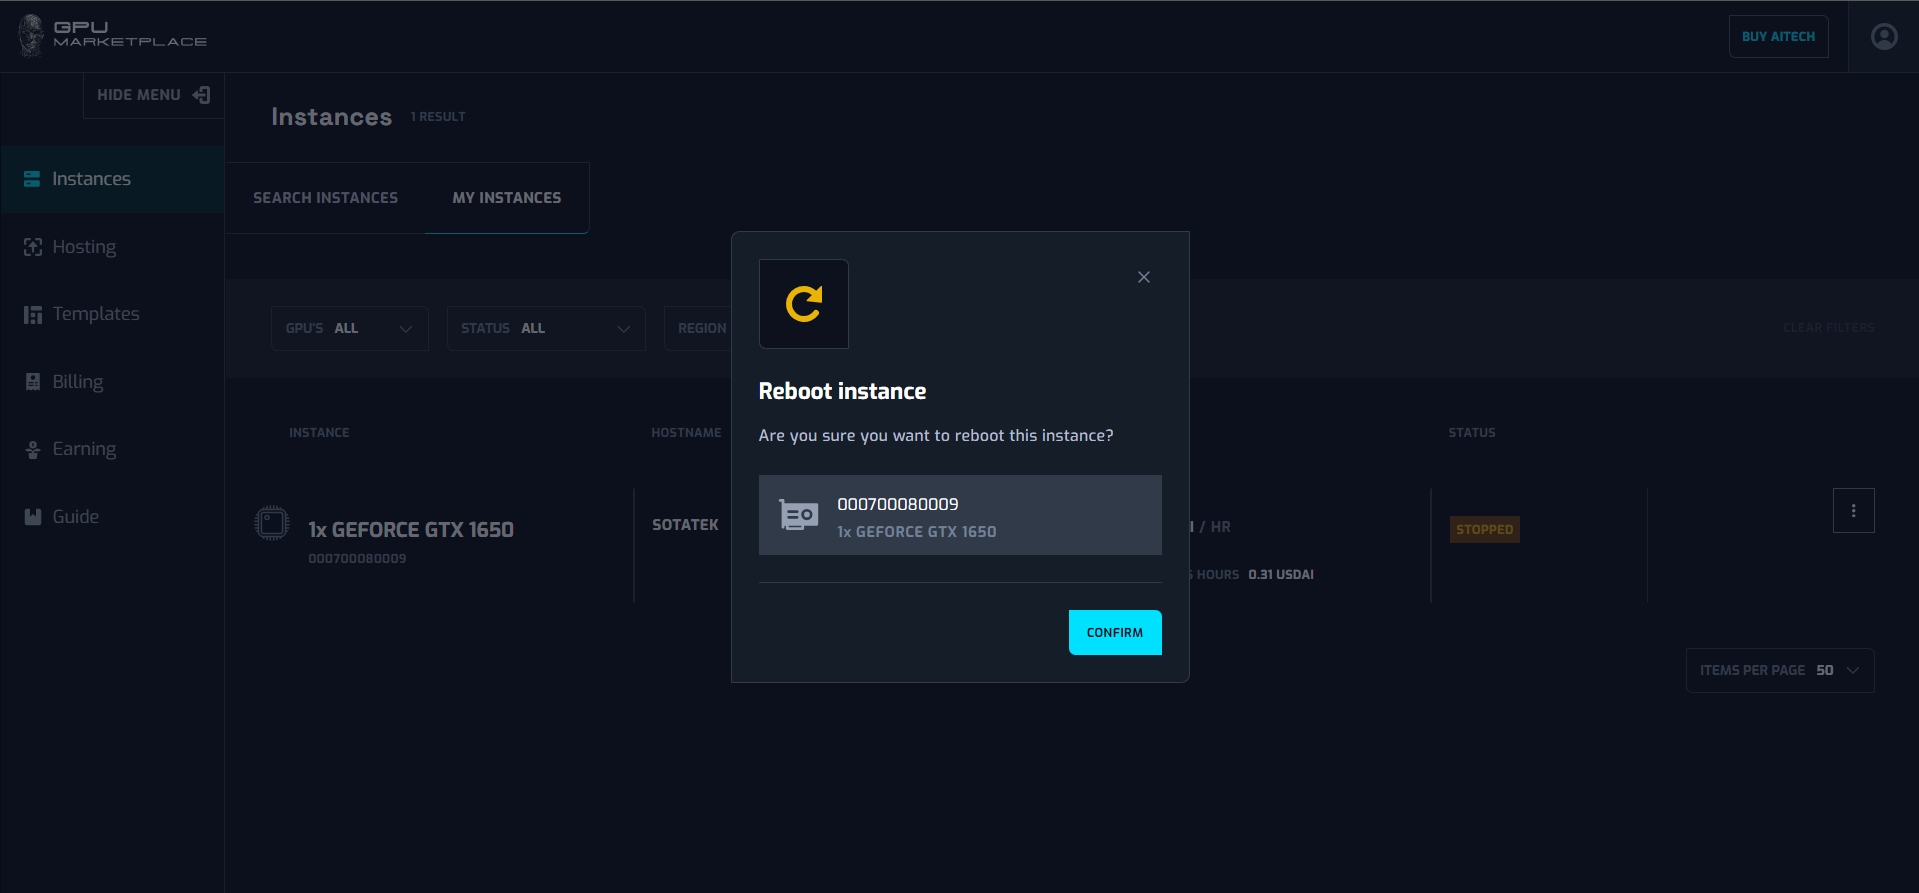
Step 5: After confirming, the instance will be rebooted. Instance status will be “Starting”. User wait until status change to “Running”, and start connecting again.
Case 5: User want to Destroy instance:
Step 1: (Continue from step 8 - Renting instance): Navigate to My instance screen
Step 2: Clicks “Destroy instance”
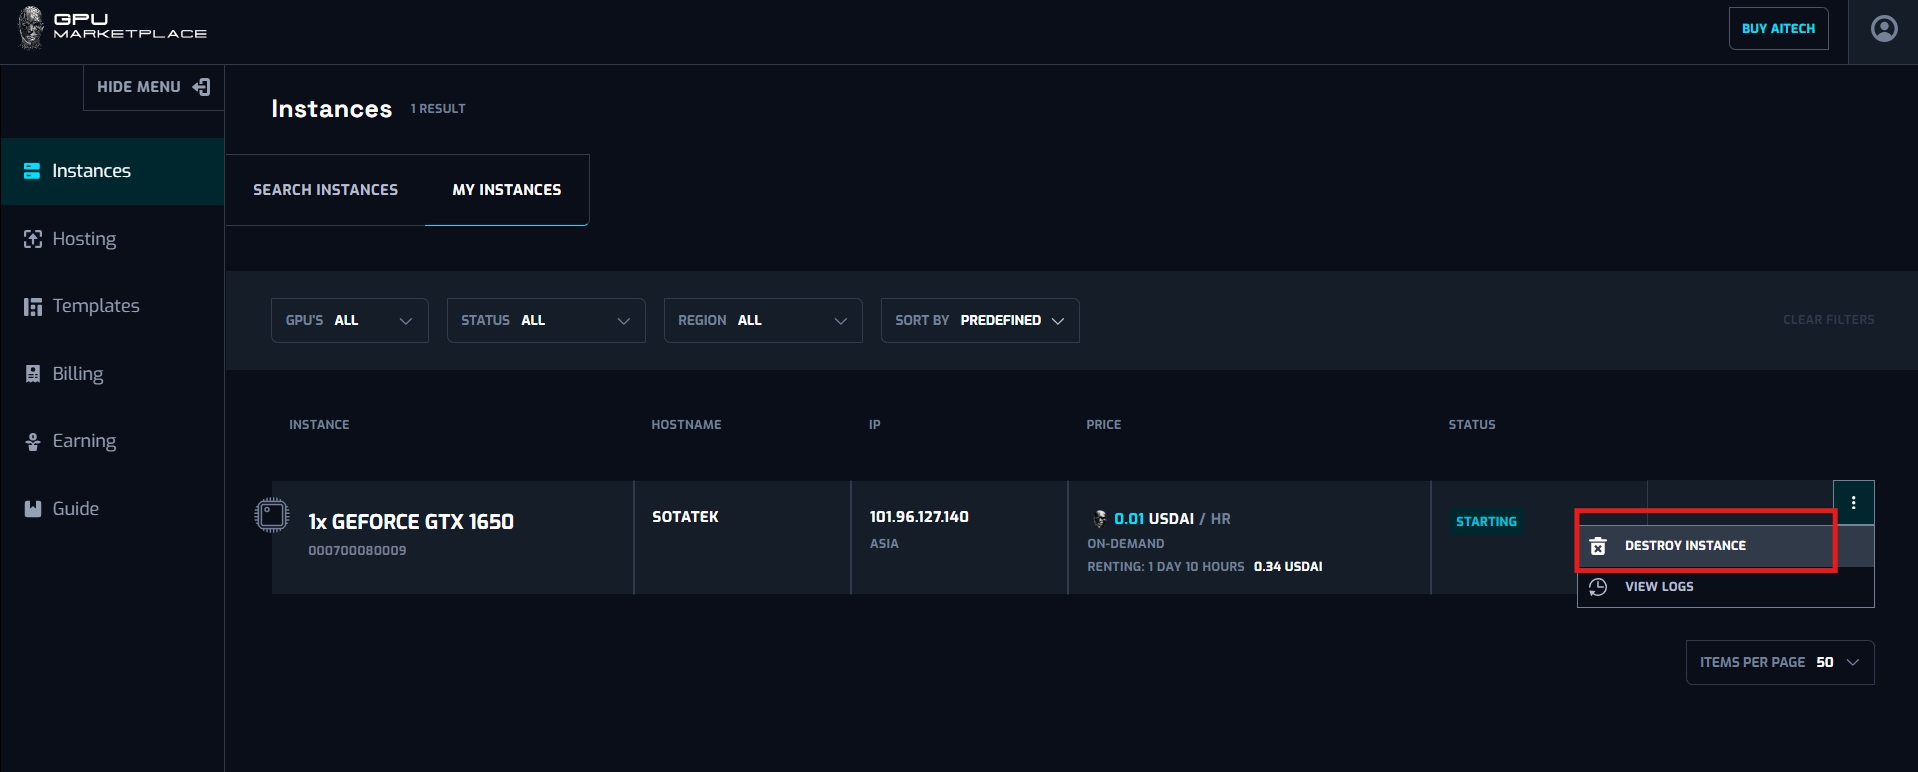
Step 3: Confirm the confirmation pop up. After that, instance status will change to “Destroying” -> “Destroyed”, and will no longer appear on the system.
Case 6: User want to view instance log:
Step 1: (Continue from step 8 - Renting instance): Navigate to My instance screen
Step 2: Clicks “View log”
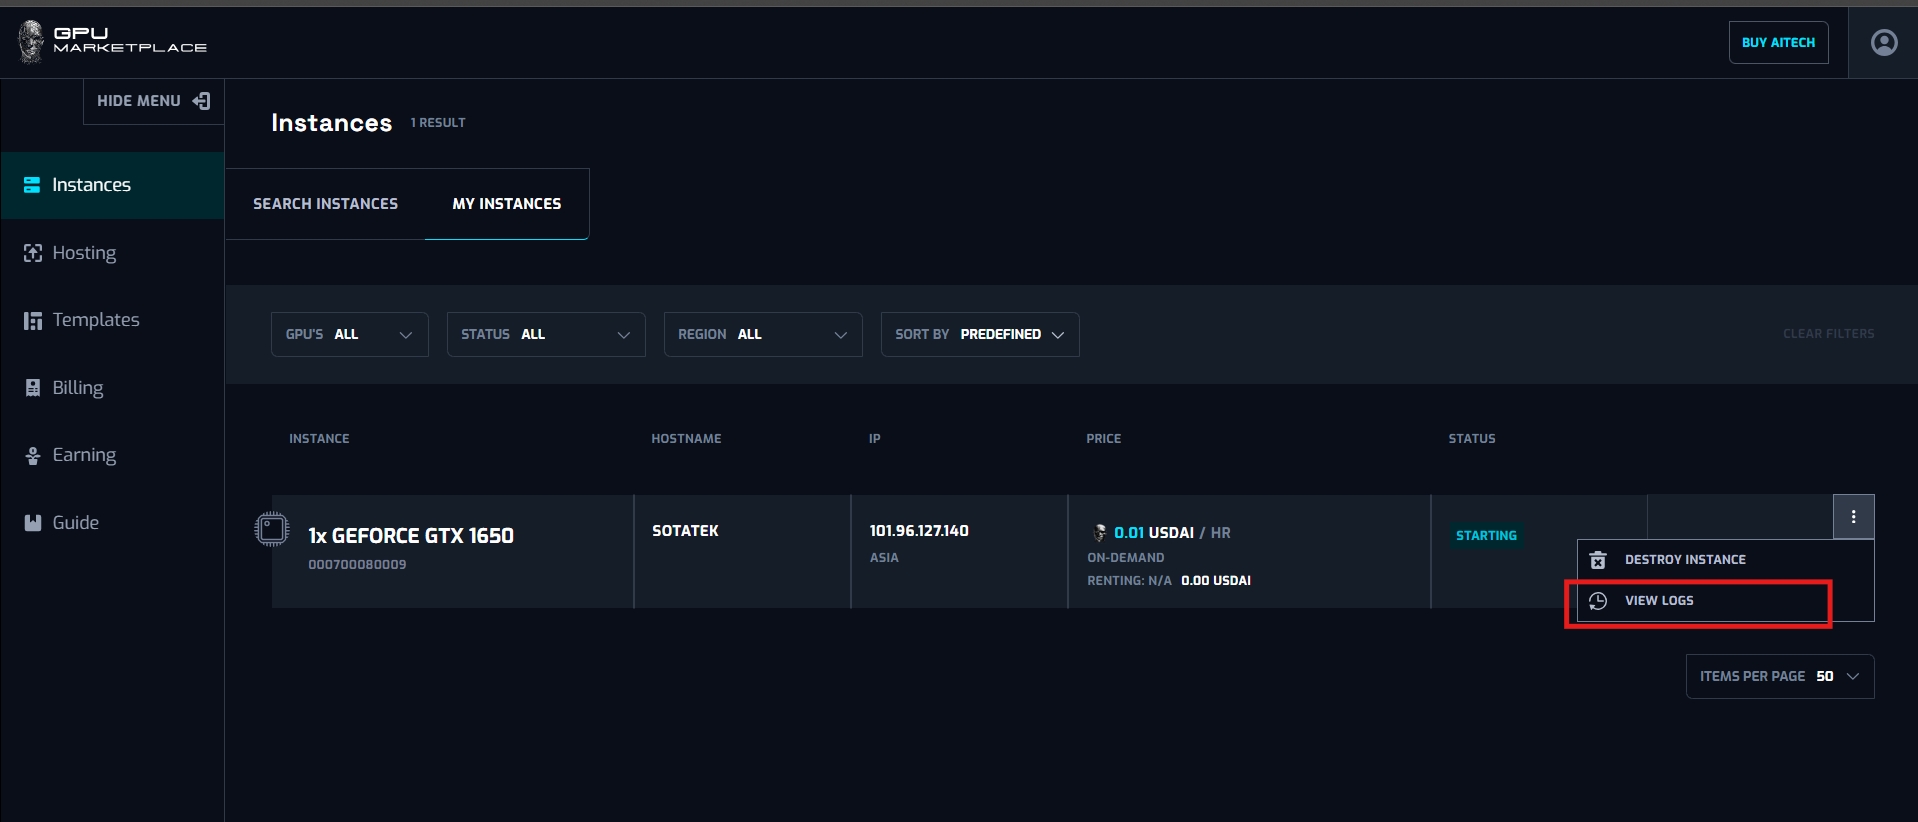
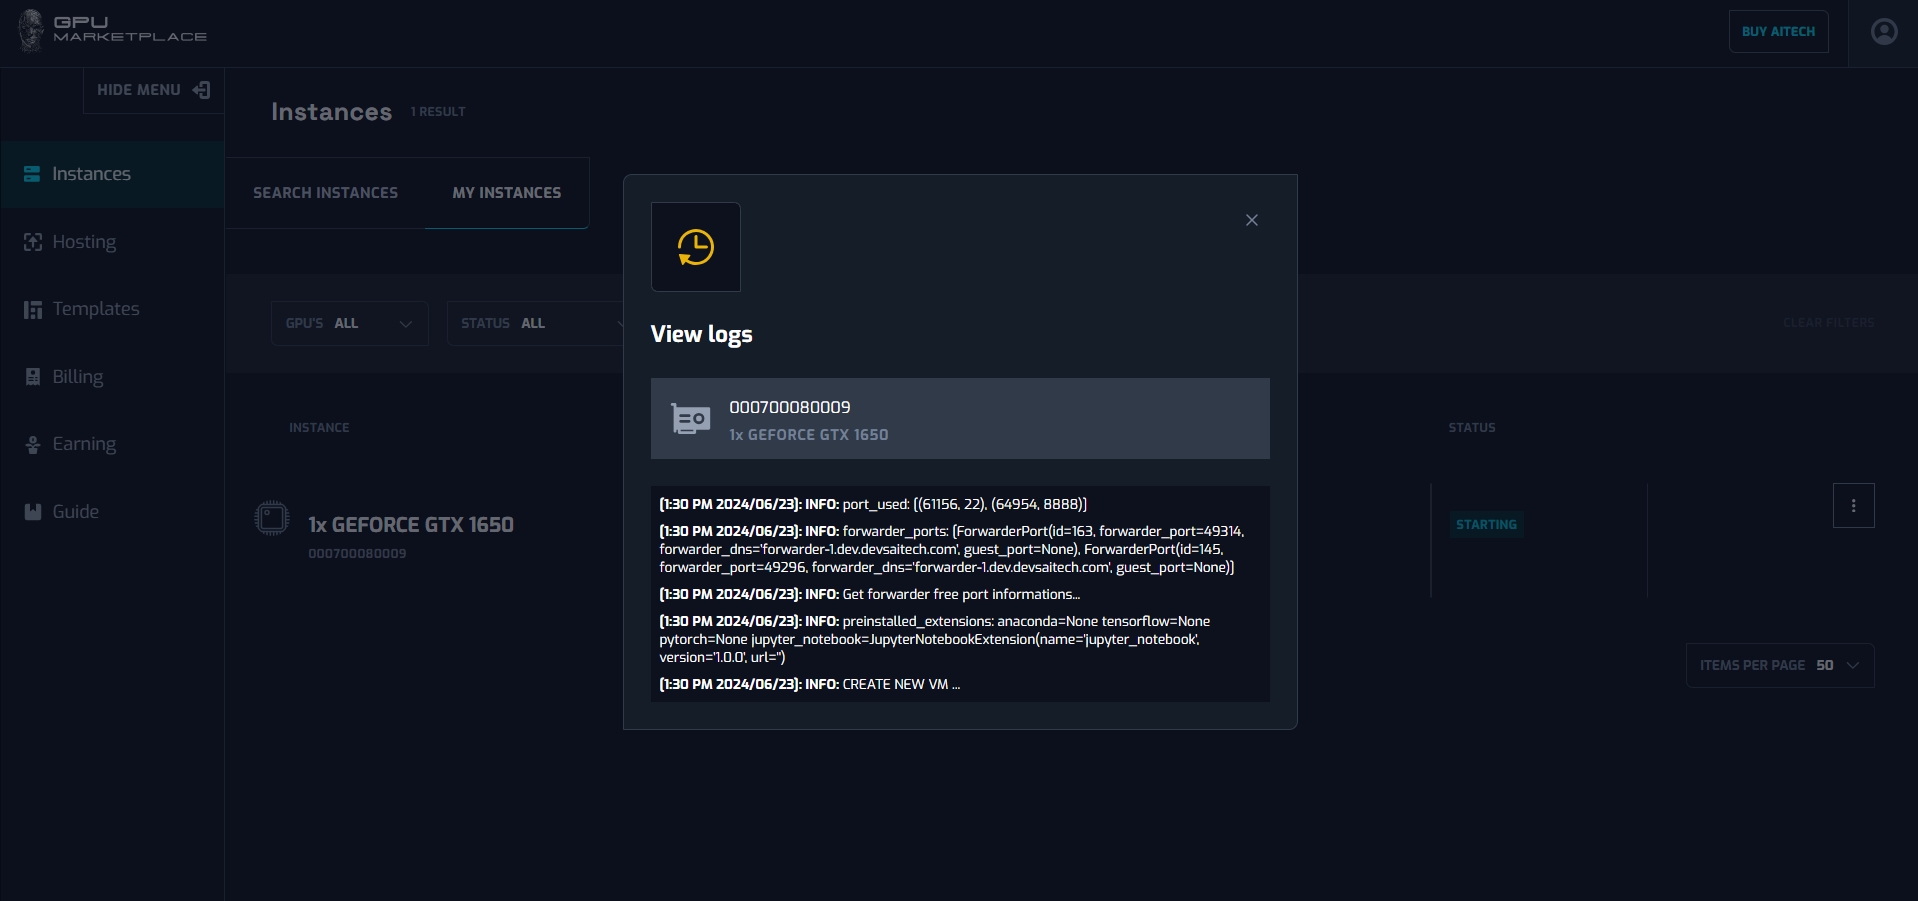
Step 3: A pop up will appear with the corresponding log inside it.
Case 7: User want to manage instance information:
Step 1: (Continue from step 8 - Renting instance): Navigate to My instance screen
| No | Component | Type | Description |
|---|---|---|---|
| 1 | GPU name | Constance value | Describe GPU Name with format [Number of GPU] x [GPU name] |
| 2 | Machine unique ID | Constant value | Describe Machine Unique ID (This ID is used throughout the system) |
| 3 | Host name | Constant value | Describe Name of the host machine |
| 4 | IP address | Constant value | Describe host machine IP address |
| 5 | Region | Constant value | Describe region of the IP address above |
| 6 | Price | Constant value | Describe the price currently the instance is being renter for |
| 7 | Renting type | Constant value | Describe the renting type of that instance |
| 8 | Renting duration | Constant value | Describe the renting duration of that machine, and the money spend for that instance |
| 9 | Status | Constant value | Describe the status of the instance (as mentioned above) |
Step 2: User clicks “View detail”
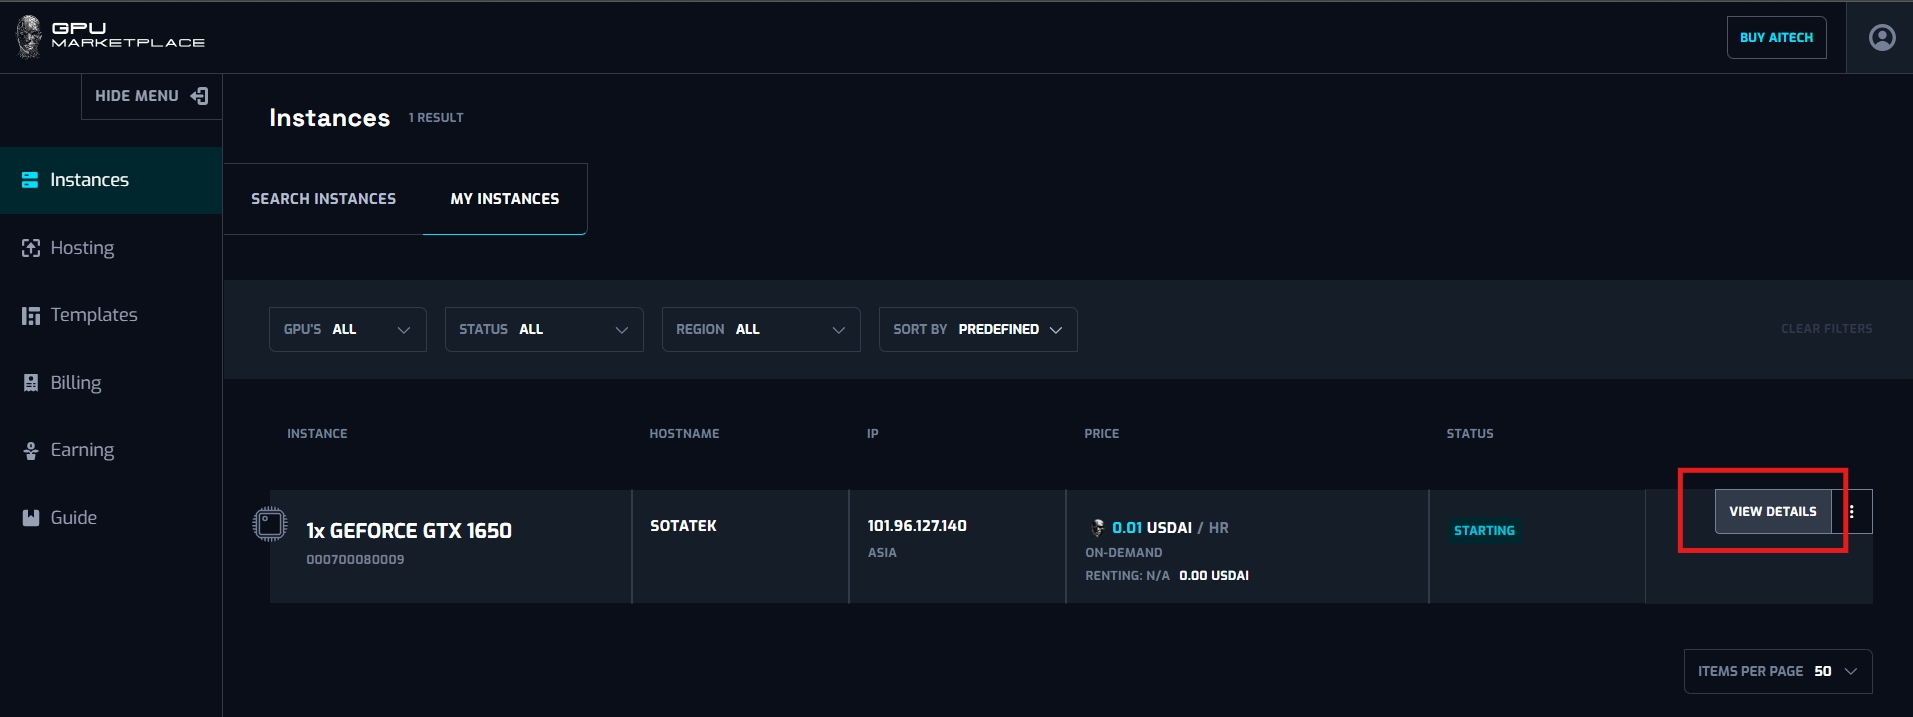
Step 3: User view detail information from the detail pop up

| No | Component | Type | Description |
|---|---|---|---|
| 1 | GPU name | Constant value | Describe GPU Name with format [Number of GPU] x [GPU name] |
| 2 | TFLOPs point | Constant value | Describe the TFLOPs value of the instance |
| 3 | Number of vCPU | Constant value | Describe Number of vCPU in the instance (each vCPU = 1 core of CPU) |
| 4 | CPU name | Constant value | Describe CPU name |
| 5 | RAM | Constant value | Describe RAM value of the machine (in GB) |
| 6 | IP/Region | Constant value | Refer to upper table |
| 7 | Download speed | Constant value | Describe the download speed of the host machine internet connection (in MB/s) |
| 8 | Upload speed | Constant value | Describe the upload speed of the host machine internet connection (in MB/s) |
| 9 | Latency | Constant value | Describe the latency/ping of the internet connection |
| 10 | Disk write speed | Constant value | Describe the disk write speed of the Internet connection |
| 11 | Disk read speed | Constant value | Describe the disk read speed of the Internet connection |
| 12 | Disk free space | Constant value | Describe the free disk space (in GB) |
| 13 | Info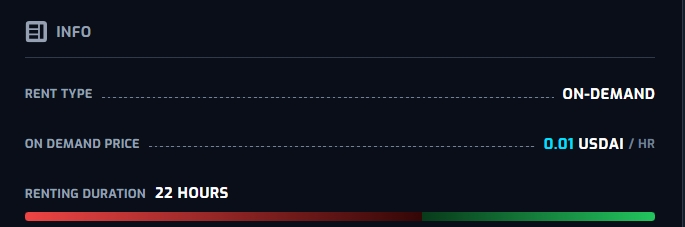 | Constant value | Refer to the upper table |
| 14 | Expiration date | Constant value | Describe the expiration date of the machine. Refer to the hosting section |